メインコンテンツにスキップ

HP Split x2 Battery Replacement

必要な工具と部品

  1. HP Split x2 Battery Replacement, Rear Cover: 手順 1、 1の画像 1
    • Opening the device voids the manufacturer warranty.

    • Power down the HP Split x2 before beginning the repair

    • Separate the tablet from the keyboard by pushing the slider to the left and lifting the tablet from the keyboard.

  2. HP Split x2 Battery Replacement: 手順 2、 3の画像 1 HP Split x2 Battery Replacement: 手順 2、 3の画像 2 HP Split x2 Battery Replacement: 手順 2、 3の画像 3
    • Remove the four white caps on the bottom edge of the tablet.

    • Use a tweezer to grasp white caps.

    • The white caps are easily lost. Store them in a secure place.

  3. HP Split x2 Battery Replacement: 手順 3、 1の画像 1
    • Use a Phillips #000 screwdriver to remove the four 3mm screws.

  4. HP Split x2 Battery Replacement: 手順 4、 2の画像 1 HP Split x2 Battery Replacement: 手順 4、 2の画像 2
    • Use a plastic opening tool to pry the tabs on the top, left and right sides of the tablet.

    • Only the top and sides have tabs. Remove all tabs before lifting screen.

  5. HP Split x2 Battery Replacement: 手順 5、 2の画像 1 HP Split x2 Battery Replacement: 手順 5、 2の画像 2
    • Separate the cover and the screen.

    • Gently lift the screen out of the cover.

  6. HP Split x2 Battery Replacement, Battery: 手順 6、 3の画像 1 HP Split x2 Battery Replacement, Battery: 手順 6、 3の画像 2 HP Split x2 Battery Replacement, Battery: 手順 6、 3の画像 3
    • Remove black stickers

  7. HP Split x2 Battery Replacement: 手順 7、 3の画像 1 HP Split x2 Battery Replacement: 手順 7、 3の画像 2 HP Split x2 Battery Replacement: 手順 7、 3の画像 3
    • Pull on the blue ribbon to disconnect the cable

    • Disconnect both ends of the cable

  8. HP Split x2 Battery Replacement: 手順 8、 3の画像 1 HP Split x2 Battery Replacement: 手順 8、 3の画像 2 HP Split x2 Battery Replacement: 手順 8、 3の画像 3
    • Flip up the retaining flap with either a spudger or your fingertips.

    • Disconnect the ribbon cable by gently pulling on it.

    • Disconnect the sliding connector with the pointed tip of the spudger and gently remove the cable.

  9. HP Split x2 Battery Replacement: 手順 9、 3の画像 1 HP Split x2 Battery Replacement: 手順 9、 3の画像 2 HP Split x2 Battery Replacement: 手順 9、 3の画像 3
    • Remove all eight 3mm Phillips screws using a J1 screw head.

  10. HP Split x2 Battery Replacement: 手順 10、 2の画像 1 HP Split x2 Battery Replacement: 手順 10、 2の画像 2
    • Gently lift up the battery as a whole

    • Make sure the battery is free to move on both ends.

    • Battery has two cells connected by a bridge making it a unit.

終わりに

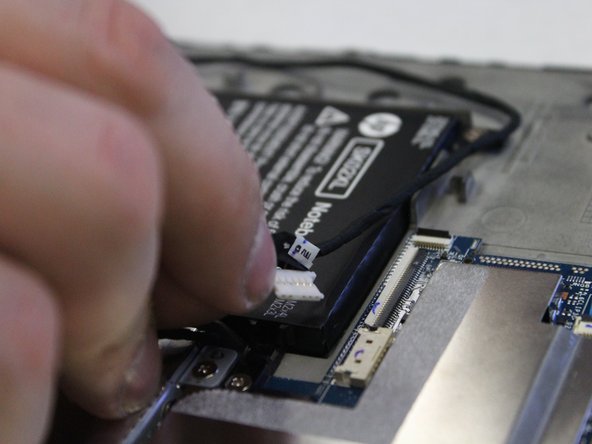
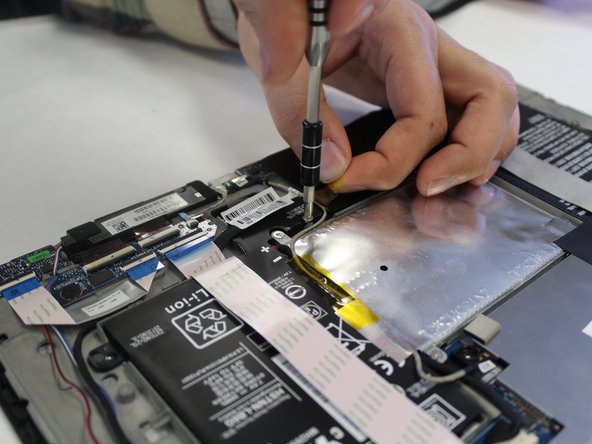
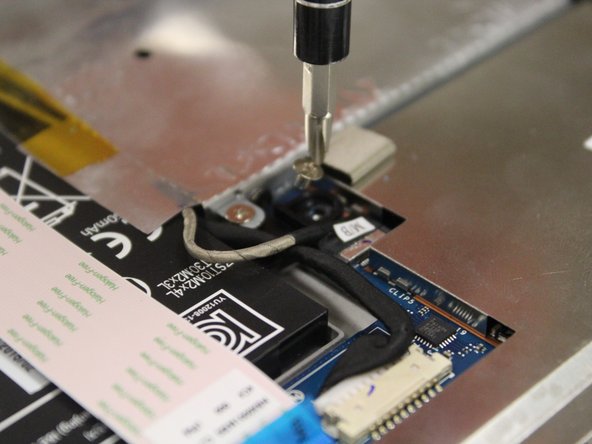
To reassemble your device, follow these instructions in reverse order.

4 の人々がこのガイドを完成させました。

作成者

2人の作成者と共同で作成されました。

Alvaro Esperanca

メンバー登録日: 03/04/17

239 ポイント

1ガイドが承認済み

チーム

IUPUI, Team S6-G6, Wilson Spring 2017 IUPUI, Team S6-G6, Wilson Spring 2017人のメンバー

IUPUI-WILSON-S17S6G6

4 メンバー

2のガイドは作成済み

5 件のコメント

Does the HP split have 2 batteries? One in screen part & 1 in keyboard part?

Genny Gallup - 返信

can you email the battery part number and where I can buy in the US ?

my email is leprince1@gmail.com

Imran Karram - 返信

I have a hp split just like this one i actually preessed down hard on the power bottom because it wouldnt turn on so the power bottom is pushed in so i really can’t power it up .. But before that my computer would not charge sometimes

can you please try an point me to the right direction on this issue

please email me at

galvanmichelle7@gmail.com

Michelle Marie - 返信

I own a split x2, but my screen is broken and my keyboard stopped working… is there a way this can be fixed??

Dosunmu Adelani - 返信

The screen is working, however the keyboard portion is not powering up . The light is not coming on when the power supply is placed in it and the bottom of the keyboard gets very hot once plugged in. Help needed.

LENNY - UNA PHILERT - 返信

コメントを追加

統計データ:

過去 24時間: 2

過去 7 日: 7

過去 30 日: 46

今までの合計 12,719