メインコンテンツにスキップ

HP Split 13-r010dx Screen Replacement

必要な工具と部品

  1. HP Split 13-r010dx Screen Replacement, Front and Back Panel: 手順 1、 2の画像 1 HP Split 13-r010dx Screen Replacement, Front and Back Panel: 手順 1、 2の画像 2
    • Locate the four screws at the bottom of the device. (Note that the keyboard attachment is missing from this device.)

    • Use a Philips head #0 screwdriver to remove each of the screws (Size: 4mm)

  2. HP Split 13-r010dx Screen Replacement: 手順 2、 2の画像 1 HP Split 13-r010dx Screen Replacement: 手順 2、 2の画像 2
    • Gently wedge the plastic opening tool in between where the display and back panel meet.

    • Slowly and gently apply force to the plastic opening tool in a downwards motion to loosen the front panel from the back panel.

    • Rotate the device so that the side is facing up and repeat the previous step for the sides.

    • Do NOT attempt to wedge the plastic opening tool on the bottom . Once the sides and top are loose you are ready to continue to the next step.

  3. HP Split 13-r010dx Screen Replacement: 手順 3、 1の画像 1
    • Gently and slowly pull the front and back panel away from each other (in opposite directions). ( Pulling them apart will not separate the two panels)

    • Only separate the panels by a few inches from each other so that there is room to separate the front and back panel in the next step. Proceed to the next step.

  4. HP Split 13-r010dx Screen Replacement: 手順 4、 1の画像 1
    • Hold the back panel firmly and pull the front panel upwards to completely separate the front panel from the back panel.

    • The device is now ready to be repaired or replacements installed.

  5. HP Split 13-r010dx Screen Replacement, Screen: 手順 5、 3の画像 1 HP Split 13-r010dx Screen Replacement, Screen: 手順 5、 3の画像 2 HP Split 13-r010dx Screen Replacement, Screen: 手順 5、 3の画像 3
    • Use the PH1 screwdriver to remove eleven 4mm Phillips screws.

  6. HP Split 13-r010dx Screen Replacement: 手順 6、 2の画像 1 HP Split 13-r010dx Screen Replacement: 手順 6、 2の画像 2
    • Unscrew the two 2mm zero insertion force connectors. Slide aside the white wires to properly unscrew.

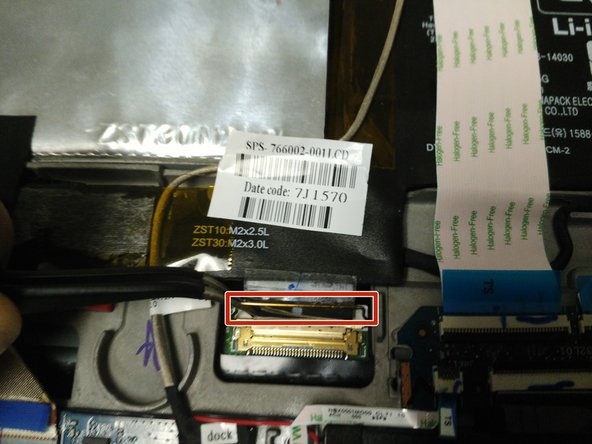
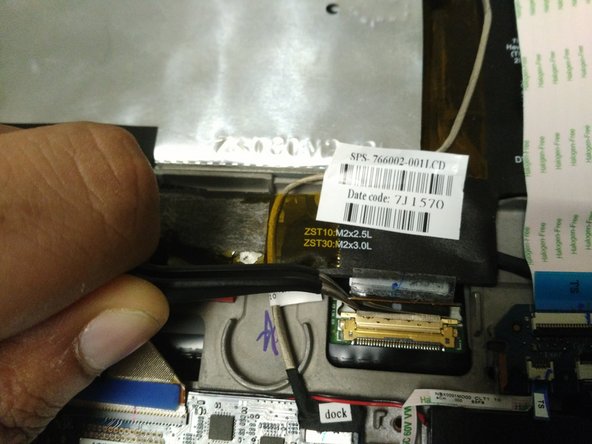
  7. HP Split 13-r010dx Screen Replacement: 手順 7、 3の画像 1 HP Split 13-r010dx Screen Replacement: 手順 7、 3の画像 2 HP Split 13-r010dx Screen Replacement: 手順 7、 3の画像 3
    • Use a pair of tweezers to pull up the yellow colored display cable connector.

    • Pull it to the direction of the cable.

  8. HP Split 13-r010dx Screen Replacement: 手順 8、 1の画像 1
    • Glue is attached at the edges. Apply force to the sides of the tablet. Separate the digitizer from the body of the tablet.

    • Replace the old screen with a new one.

    • If your screen is broken or damaged, use caution when pulling the screen from the tablet to avoid self harm.

終わりに

To reassemble your device, follow these instructions in reverse order.

ある他の人がこのガイドを完成しました。

作成者

3人の作成者と共同で作成されました。

bushraishaq

メンバー登録日: 09/25/17

327 ポイント

2のガイドは作成済み

チーム

University of North Texas, Team S2-G1, Thompson Fall 2017 University of North Texas, Team S2-G1, Thompson Fall 2017人のメンバー

UNT-THOMPSON-F17S2G1

4 メンバー

5のガイドは作成済み

コメント 1 件

Hello… How to know if it is the digitizer or the screen that is broken? .. thanks

Martin Sala - 返信

コメントを追加

統計データ:

過去 24時間: 0

過去 7 日: 0

過去 30 日: 1

今までの合計 583