メインコンテンツにスキップ

HP Photosmart Plus B210a Printhead Replacement

  1. HP Photosmart Plus B210a Printhead Replacement, Ink tank removal: 手順 1、 3の画像 1 HP Photosmart Plus B210a Printhead Replacement, Ink tank removal: 手順 1、 3の画像 2 HP Photosmart Plus B210a Printhead Replacement, Ink tank removal: 手順 1、 3の画像 3
    • Remove the ink cartridges from the printer. Install the shipping caps or put the ink cartridges in a plastic bag.

  2. HP Photosmart Plus B210a Printhead Replacement, Remove the printhead (See calibration warning): 手順 2、 3の画像 1 HP Photosmart Plus B210a Printhead Replacement, Remove the printhead (See calibration warning): 手順 2、 3の画像 2 HP Photosmart Plus B210a Printhead Replacement, Remove the printhead (See calibration warning): 手順 2、 3の画像 3
    • If the printhead is being removed for cleaning and is plugged in, the calibration data may be erased. Verify the printer is unplugged BEFORE REMOVING the printhead!

    • When the printer is unplugged, lift the lever up and remove the printhead.

    • Remove the printhead as shown. IMPORTANT: Leave the scanner lid open, or put a note near the printer.

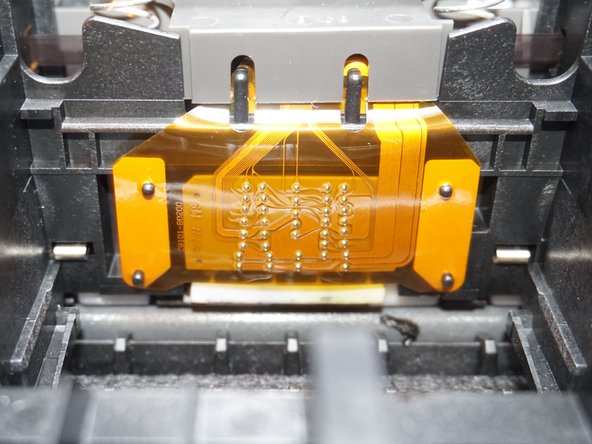
  3. HP Photosmart Plus B210a Printhead Replacement, Clean the printer contacts: 手順 3、 2の画像 1 HP Photosmart Plus B210a Printhead Replacement, Clean the printer contacts: 手順 3、 2の画像 2
    • Failure to clean this area may result in an Ink System Failure warning. If you are cleaning the printhead, this error will destroy your existing calibration!

    • Using an alcohol wipe, clean the printhead interface on the printer before installing the replacement part to avoid any errors like Ink System Failure.

終わりに

To reassemble your device, follow these instructions in reverse order.

Nick

メンバー登録日: 11/10/09

89,943 ポイント

52のガイドは作成済み

チーム

Master Techs Master Techs人のメンバー

Community

321 メンバー

1,525のガイドは作成済み

0 件のコメント

コメントを追加

統計データ:

過去 24時間: 0

過去 7 日: 0

過去 30 日: 4

今までの合計 17