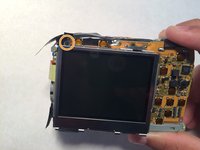
メインコンテンツにスキップ

HP Photosmart M547 Screen Replacement

必要な工具と部品

  1. HP Photosmart M547 Screen Replacement, Screen: 手順 1、 3の画像 1 HP Photosmart M547 Screen Replacement, Screen: 手順 1、 3の画像 2 HP Photosmart M547 Screen Replacement, Screen: 手順 1、 3の画像 3
    • Disconnect from all power sources. (Remove batteries, chargers, etc.)

  2. HP Photosmart M547 Screen Replacement: 手順 2、 2の画像 1 HP Photosmart M547 Screen Replacement: 手順 2、 2の画像 2
    • Remove the five 5mm screws from the bottom of the camera with a PH00 screwdriver.

  3. HP Photosmart M547 Screen Replacement: 手順 3、 1の画像 1
    • Pop the silver siding off of the camera. Proceed carefully as to not break the plastic.

  4. HP Photosmart M547 Screen Replacement: 手順 4、 2の画像 1 HP Photosmart M547 Screen Replacement: 手順 4、 2の画像 2
    • Make sure that the siding is fully removed and the battery dock is open. Carefully pry the top off of the camera.

  5. HP Photosmart M547 Screen Replacement: 手順 5、 1の画像 1
    • Approach from the front of the camera, make sure that the black/red wires as not covering the screw.

    • Carefully remove the black 5mm screw from the camera with a PH00 screwdriver.

  6. HP Photosmart M547 Screen Replacement: 手順 6、 1の画像 1
    • Flip the camera over and pop off the plastic siding.

  7. HP Photosmart M547 Screen Replacement: 手順 7、 2の画像 1 HP Photosmart M547 Screen Replacement: 手順 7、 2の画像 2
    • Look for the silver 5mm screw connecting the screen to the circuit board. Then carefully remove it using a PH00 screwdriver.

    • On the opposite corner of the screen there is a similar screw. Carefully remove that one as well.

    • You may need to peel back thin, black plastic to get to the screw. The plastic is purely there for dust protection.

  8. HP Photosmart M547 Screen Replacement: 手順 8、 1の画像 1
    • When you lift the screen off of the rest of the camera, you will see a small piece of ribbon wire connecting the screen and circuit board.

    • To remove this connection, you must lift the black bar at the base of the ribbon wire (on the circuit board), then slide the ribbon wire out.

  9. HP Photosmart M547 Screen Replacement: 手順 9、 1の画像 1
    • Congratulations! You have removed the screen, you can now replace it and reassemble your camera.

終わりに

To reassemble your device, follow these instructions in reverse order.

作成者

4人の作成者と共同で作成されました。

Jason Curran

メンバー登録日: 02/08/17

101 ポイント

1ガイドが承認済み

チーム

Central Coast New Tech High, Team 5-8, Rushing Spring 2017 Central Coast New Tech High, Team 5-8, Rushing Spring 2017人のメンバー

CCNTH-RUSHING-S17S5G8

2 メンバー

2のガイドは作成済み

0 件のコメント

コメントを追加

統計データ:

過去 24時間: 2

過去 7 日: 5

過去 30 日: 21

今までの合計 812