必要な工具と部品
-
-
First, begin by removing the printer's hood.
-
Open the printer's mouth by simply pulling down on it; there are 2 mouth pieces that need to be pulled down.
-
Adjust the flap covering the scanner upward, as shown.
-
-
-
-
To access and remove the fourth and final screw attaching the hood, the panel for the power button must be removed as follows:
-
Reach into the mouth of the printer and press on the small clip behind the power button. This allows the panel of the power button to be removed.
-
After pressing the clip, pull out the power button panel by pulling from right to left.
-
-
-
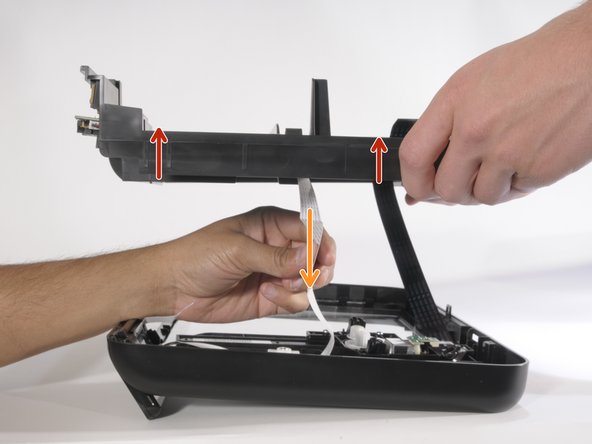
This step is easier with two people. Carefully have one person lift the hood of the printer 2-3 inches above where it was resting.
-
Remove the ribbon cables and wires attaching the motherboard (the only green PCB board) to the hood by gently pulling upward on them.
-
When all three cables are removed, lift the hood away from the printer and set it aside.
-
-
-
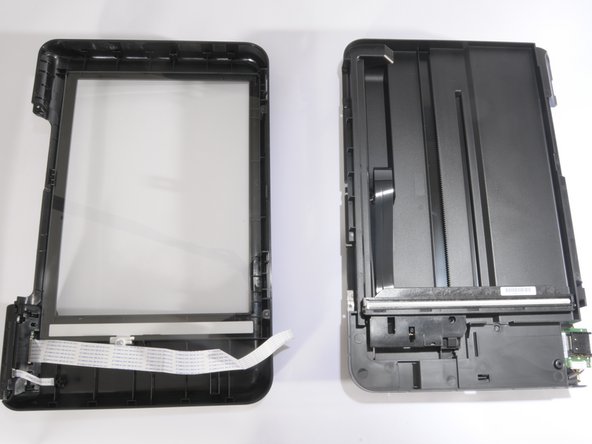
After being separated from the printer, the hood is ready to be disassembled.
-
Remove the only screw on the printer hood's underside, as shown. Use a T-9 screwdriver.
-


To reassemble your device, follow these instructions in reverse order.
To reassemble your device, follow these instructions in reverse order.
ある他の人がこのガイドを完成しました。
チーム

Cal Poly, Team 10-38, Forte Spring 2011 Cal Poly, Team 10-38, Forte Spring 2011人のメンバー
CPSU-FORTE-S11S10G38
5 メンバー
10のガイドは作成済み