メインコンテンツにスキップ

HP Pavilion x360 m3-u103dx Fan Replacement

必要な工具と部品

  1. HP Pavilion x360 m3-u103dx Fan Replacement, Fan: 手順 1、 1の画像 1
    • Power off device.

    • Flip laptop over.

  2. HP Pavilion x360 m3-u103dx Fan Replacement: 手順 2、 2の画像 1 HP Pavilion x360 m3-u103dx Fan Replacement: 手順 2、 2の画像 2
    • Remove the rubber foot with a Metal spudger

    • Remove 5 Phillip 2.4 x 5.7mm screws using a PH0 Phillips head screwdriver.

    • Remove 5 Phillips 2.8 x 5.0mm screws using a PH0 Phillips head screwdriver.

  3. HP Pavilion x360 m3-u103dx Fan Replacement: 手順 3、 3の画像 1 HP Pavilion x360 m3-u103dx Fan Replacement: 手順 3、 3の画像 2 HP Pavilion x360 m3-u103dx Fan Replacement: 手順 3、 3の画像 3
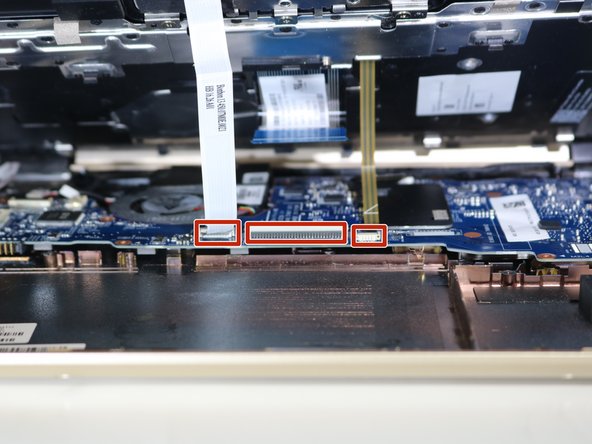
    • Open computer and pry open keyboard panel using the Metal Spudger. Apply little pressure then increase until keyboard pops away from motherboard.

    • Gently lift keyboard on the mouse pad side. Remove three connected ribbon wires connecting keyboard to frame by gently disconnecting them from the motherboard.

  4. HP Pavilion x360 m3-u103dx Fan Replacement: 手順 4、 1の画像 1
    • Remove eleven 2.0 x 4.6mm screws using the Phillips 00 Screwdriver

  5. HP Pavilion x360 m3-u103dx Fan Replacement: 手順 5、 3の画像 1 HP Pavilion x360 m3-u103dx Fan Replacement: 手順 5、 3の画像 2 HP Pavilion x360 m3-u103dx Fan Replacement: 手順 5、 3の画像 3
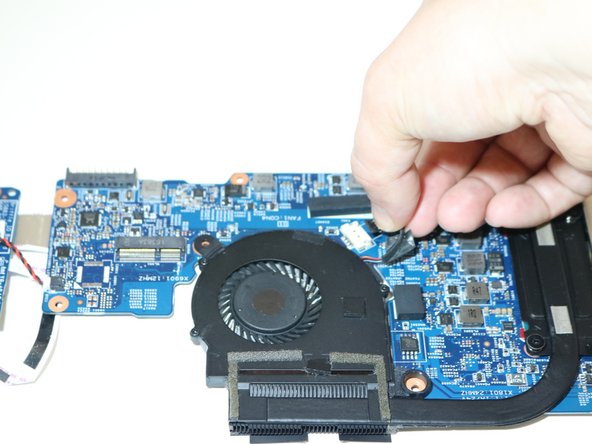
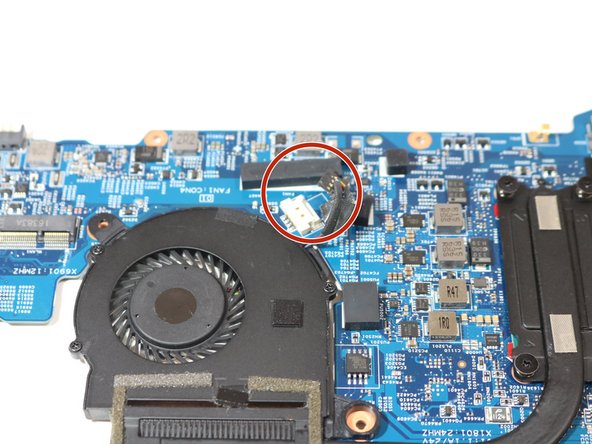
    • Remove the motherboard gently from the base of the laptop.

    • Disconnect the fastened cables from the motherboard by carefully pushing the cable's plastic edges using the metal Spudger.

  6. HP Pavilion x360 m3-u103dx Fan Replacement: 手順 6、 2の画像 1 HP Pavilion x360 m3-u103dx Fan Replacement: 手順 6、 2の画像 2
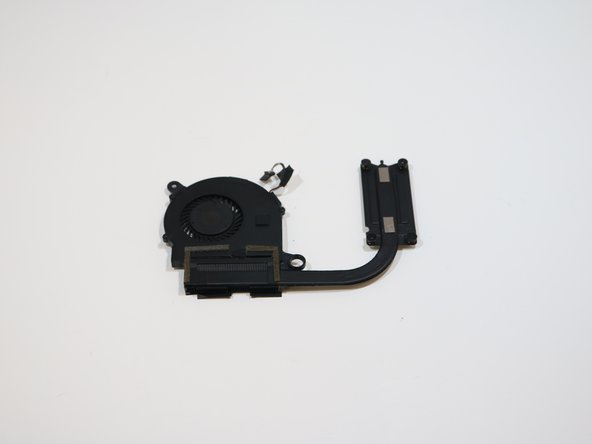
    • Using the Phillips 00 Screw Driver. remove 4 screws from the heat sink.

    • Remove any adhesive tape. Detach the fan/heat sink.

終わりに

To reassemble your device, follow these instructions in reverse order.

2 の人々がこのガイドを完成させました。

作成者

1人の作成者と共同作成されました。

Meaghan Hyatt

メンバー登録日: 01/17/19

355 ポイント

2のガイドは作成済み

チーム

0 件のコメント

コメントを追加

統計データ:

過去 24時間: 0

過去 7 日: 2

過去 30 日: 4

今までの合計 1,276