メインコンテンツにスキップ

HP Pavilion x360 m3-u001dx USB Port Shield Replacement

必要条件のみ
この修理ガイドは、他のガイドの前提条件として使用されます。それ自体は不完全で、単独で使用されることはありません。

必要な工具と部品

  1. HP Pavilion x360 m3-u001dx USB Port Shield  Replacement, Keyboard: 手順 1、 1の画像 1
    • Shut down the computer.

    • Disconnect the power and all external devices connected to the computer.

    • Working on your device while it is turned on may result in electric shock.

  2. HP Pavilion x360 m3-u001dx USB Port Shield  Replacement: 手順 2、 2の画像 1 HP Pavilion x360 m3-u001dx USB Port Shield  Replacement: 手順 2、 2の画像 2
    • Use a Metal Spudger and remove the rubber foot closet from the bottom of the laptop.

  3. HP Pavilion x360 m3-u001dx USB Port Shield  Replacement: 手順 3、 1の画像 1
    • Remove all of the screws located on the bottom of the laptop:

    • 5 Phillips 2.4 x 5.7 mm screws

    • 5 Phillips 2.0 x 5.0 mm screws

    • Make special note of each screw and screw lock size and location during removal and replacement.

    “5 Phillips 2.4 x 5.7 mm screws”

    “5 Phillips 2.0 x 5.0 mm screws”

    I think the color for the sizes are mixed up, because the one near the screen bending part are the bigger ones, yet it says they are the “2.0 x 5.0 mm” but they are the bigger ones.

    If I’m wrong, tell me because I’m not sure if thats the ways they’re named because I’m not an expert at screw sizes.

    SomeRandomChild - 返信

  4. HP Pavilion x360 m3-u001dx USB Port Shield  Replacement: 手順 4、 1の画像 1
    • Turn the computer over onto its base, with the computer open and the keyboard facing upward.

  5. HP Pavilion x360 m3-u001dx USB Port Shield  Replacement: 手順 5、 2の画像 1 HP Pavilion x360 m3-u001dx USB Port Shield  Replacement: 手順 5、 2の画像 2
    • The keyboard is attached internally by clips. Use a small amount of force when removing the keyboard.

    • Use the Plastic Opening Tool to separate the keyboard from the base of the laptop.

  6. HP Pavilion x360 m3-u001dx USB Port Shield  Replacement: 手順 6、 1の画像 1
    • Raise the keyboard slightly to access the touch pad and keyboard cables.

    • Raising the keyboard too far or with excessive force may cause damage to the keyboard, touch pad cables, or their connectors.

  7. HP Pavilion x360 m3-u001dx USB Port Shield  Replacement: 手順 7、 1の画像 1
    • Disconnect the ribbon cables attaching the touch pad and keyboard to the system board (motherboard).

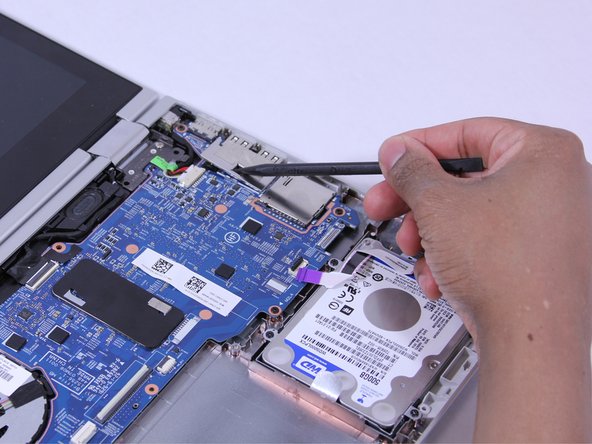
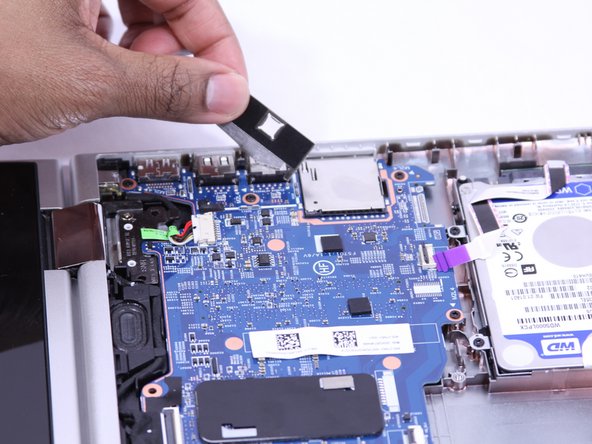
    • Using the Heavy-Duty Spudger lift up the plastic locks connecting the ribbon cable to the motherboard.

    • Use the blue plastic tab on the ribbon cable to pull it out from the lock on the motherboard.

  8. HP Pavilion x360 m3-u001dx USB Port Shield  Replacement: 手順 8、 1の画像 1
    • Lift the keyboard away from the base of the laptop.

  9. HP Pavilion x360 m3-u001dx USB Port Shield  Replacement, USB Port Shield: 手順 9、 3の画像 1 HP Pavilion x360 m3-u001dx USB Port Shield  Replacement, USB Port Shield: 手順 9、 3の画像 2 HP Pavilion x360 m3-u001dx USB Port Shield  Replacement, USB Port Shield: 手順 9、 3の画像 3
    • (You don't NEED to remove this shielding as you can remove the board with it still there.)

    • Remove the adhesive strip.

    • Lift the shield away from the base of the laptop.

    This step is not relevant or required...

    ETHREAL1 - 返信

終わりに

Follow these instructions in reverse order to reassemble your device.

作成者

4人の作成者と共同で作成されました。

Subhleen

メンバー登録日: 02/01/17

1,268 ポイント

5のガイドは作成済み

チーム

UW Tacoma, Team 1-6, Rose Winter 2017 UW Tacoma, Team 1-6, Rose Winter 2017人のメンバー

UWT-ROSE-W17S1G6

4 メンバー

8のガイドは作成済み

0 件のコメント

コメントを追加

統計データ:

過去 24時間: 0

過去 7 日: 0

過去 30 日: 0

今までの合計 62