メインコンテンツにスキップ

HP Pavilion p6 Wireless Card Replacement

必要な工具と部品

  1. HP Pavilion p6 Wireless Card Replacement, Side Panel Removal: 手順 1、 3の画像 1 HP Pavilion p6 Wireless Card Replacement, Side Panel Removal: 手順 1、 3の画像 2 HP Pavilion p6 Wireless Card Replacement, Side Panel Removal: 手順 1、 3の画像 3
    • Before you start make sure that all of the leads have been disconnected from the computer.

    • It is strongly recomended to wait at least 15 minutes after turning it off to allow the computer and internal components to cool down.

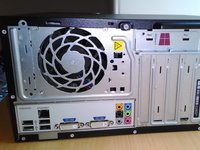
    • It is recomended to lay the computer down with the pull tab at the top to allow it to be easily opened.

    • It is also worth mentioning at this point that for complete safety when working inside the computer that wearing an anti-static band and touching a grounded metal object before starting is good practice.

  2. HP Pavilion p6 Wireless Card Replacement: 手順 2、 3の画像 1 HP Pavilion p6 Wireless Card Replacement: 手順 2、 3の画像 2 HP Pavilion p6 Wireless Card Replacement: 手順 2、 3の画像 3
    • In order to remove the side panel a single screw needs to first be removed.

    • The side panel can then be pulled towards the back of the computer using the pull tab provided.

    • The panel then needs to be rotated as showen in order to remove it from the computer.

  3. HP Pavilion p6 Wireless Card Replacement, Wireless Card: 手順 3、 3の画像 1 HP Pavilion p6 Wireless Card Replacement, Wireless Card: 手順 3、 3の画像 2 HP Pavilion p6 Wireless Card Replacement, Wireless Card: 手順 3、 3の画像 3
    • First locate the wireless card, it should look like this.

    • Next using a spudger or equivalent carefully pry the antenna cable off the wireless card, it should now look like the second picture.

    • A single screw then needs to be removed in order to free the card.

  4. HP Pavilion p6 Wireless Card Replacement: 手順 4、 2の画像 1 HP Pavilion p6 Wireless Card Replacement: 手順 4、 2の画像 2
    • The card can then just be easily removed by pulling it out and up.

    • The wireless card should then be kept in a safe place and care taken not to lose the small screw that goes with it.

終わりに

To reassemble your device, follow these instructions in reverse order.

7 の人々がこのガイドを完成させました。

作成者

4人の作成者と共同で作成されました。

Oli

メンバー登録日: 01/03/14

1,310 ポイント

4のガイドは作成済み

0 件のコメント

コメントを追加

統計データ:

過去 24時間: 0

過去 7 日: 8

過去 30 日: 33

今までの合計 2,617