メインコンテンツにスキップ

HP Pavilion g7-2023cl Hard Drive Mounting Bracket Replacement

必要な工具と部品

  1. HP Pavilion g7-2023cl Hard Drive Mounting Bracket Replacement, Battery: 手順 1、 1の画像 1
    • Shut off your device and disconnect the power cord. Disconnect any external devices connected to the device.

    • Place your finger on the battery lock slider, press toward the center of the laptop to unlock the battery.

    • The lock will make a click sound letting you know that the battery is unlocked.

  2. HP Pavilion g7-2023cl Hard Drive Mounting Bracket Replacement: 手順 2、 3の画像 1 HP Pavilion g7-2023cl Hard Drive Mounting Bracket Replacement: 手順 2、 3の画像 2 HP Pavilion g7-2023cl Hard Drive Mounting Bracket Replacement: 手順 2、 3の画像 3
    • Use your thumb to pry up the edge of the battery and lift it out of the device.

    • When replacing the battery, align the notch on the battery with the battery lock on the device. Gently press down on the battery until you hear the lock click, which signals that the battery is secure.

  3. HP Pavilion g7-2023cl Hard Drive Mounting Bracket Replacement, Service Door: 手順 3、 2の画像 1 HP Pavilion g7-2023cl Hard Drive Mounting Bracket Replacement, Service Door: 手順 3、 2の画像 2
    • Using a Phillips #0 screwdriver, loosen the service door screw.

    • This is a captive screw that will remain attached to the service door.

  4. HP Pavilion g7-2023cl Hard Drive Mounting Bracket Replacement: 手順 4、 2の画像 1 HP Pavilion g7-2023cl Hard Drive Mounting Bracket Replacement: 手順 4、 2の画像 2
    • Lift the service door up and away from the device.

  5. HP Pavilion g7-2023cl Hard Drive Mounting Bracket Replacement, Hard Drive: 手順 5、 3の画像 1 HP Pavilion g7-2023cl Hard Drive Mounting Bracket Replacement, Hard Drive: 手順 5、 3の画像 2 HP Pavilion g7-2023cl Hard Drive Mounting Bracket Replacement, Hard Drive: 手順 5、 3の画像 3
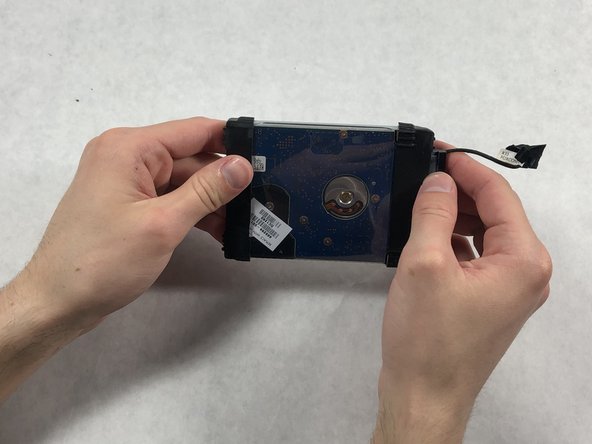
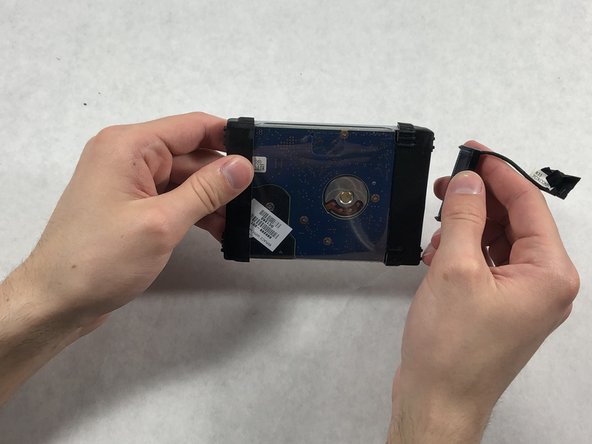
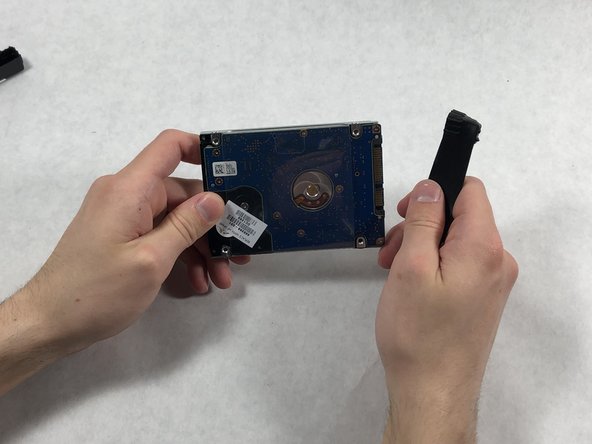
    • Locate the hard drive cable connector pull tab.

    • Pinch the pull tab pulling upwards from the motherboard to disconnect the hard drive cable.

    • To reconnect the cable, align it so that the cable from the connector is facing the battery and the cable lays in the groove of the base enclosure.

  6. HP Pavilion g7-2023cl Hard Drive Mounting Bracket Replacement: 手順 6、 1の画像 1
    • Use a spudger or other ESD-safe prying tool to lift one side of the hard drive up and out of the base enclosure.

    • You may be able to lift up the hard drive with just your fingers.

  7. HP Pavilion g7-2023cl Hard Drive Mounting Bracket Replacement: 手順 7、 2の画像 1 HP Pavilion g7-2023cl Hard Drive Mounting Bracket Replacement: 手順 7、 2の画像 2
    • Grab the end of the hard drive.

    • Pull the hard drive out of the base enclosure at an angle.

    • To replace the hard drive, insert it at the same angle you removed it from and slide it back into the base enclosure until it lays flat.

  8. HP Pavilion g7-2023cl Hard Drive Mounting Bracket Replacement, Hard Drive Mounting Bracket: 手順 8、 3の画像 1 HP Pavilion g7-2023cl Hard Drive Mounting Bracket Replacement, Hard Drive Mounting Bracket: 手順 8、 3の画像 2 HP Pavilion g7-2023cl Hard Drive Mounting Bracket Replacement, Hard Drive Mounting Bracket: 手順 8、 3の画像 3
    • Locate the hard drive cable.

    • Disconnect the hard drive cable.

  9. HP Pavilion g7-2023cl Hard Drive Mounting Bracket Replacement: 手順 9、 3の画像 1 HP Pavilion g7-2023cl Hard Drive Mounting Bracket Replacement: 手順 9、 3の画像 2 HP Pavilion g7-2023cl Hard Drive Mounting Bracket Replacement: 手順 9、 3の画像 3
    • Remove the bumper by simply pulling it off with your fingers.

  10. HP Pavilion g7-2023cl Hard Drive Mounting Bracket Replacement: 手順 10、 2の画像 1 HP Pavilion g7-2023cl Hard Drive Mounting Bracket Replacement: 手順 10、 2の画像 2
    • Remove the other bumper the same way as the last one.

  11. HP Pavilion g7-2023cl Hard Drive Mounting Bracket Replacement: 手順 11、 1の画像 1
    • Using a Phillips #0 screwdriver, remove the four Phillips M3.0×3.5 screws (two on either side of the hard drive).

  12. HP Pavilion g7-2023cl Hard Drive Mounting Bracket Replacement: 手順 12、 2の画像 1 HP Pavilion g7-2023cl Hard Drive Mounting Bracket Replacement: 手順 12、 2の画像 2
    • Remove the mounting bracket.

終わりに

To reassemble your device, follow these instructions in reverse order.

作成者

1人の作成者と共同作成されました。

Thomas Maloney

メンバー登録日: 03/21/19

1,060 ポイント

9のガイドは作成済み

チーム

UMass Dartmouth, Team S8-G4, Bailey Spring 2019 UMass Dartmouth, Team S8-G4, Bailey Spring 2019人のメンバー

UMASSD-BAILEY-S19S8G4

3 メンバー

9のガイドは作成済み

0 件のコメント

コメントを追加

統計データ:

過去 24時間: 0

過去 7 日: 0

過去 30 日: 10

今までの合計 154