メインコンテンツにスキップ

HP Pavilion g7-1365dx RAM Replacement

必要な工具と部品

  1. HP Pavilion g7-1365dx RAM Replacement, Battery: 手順 1、 1の画像 1
    • To prevent injury, make sure the laptop is powered off before removing the battery.

    • Flip the laptop so that it is upside down and opens away from you. This exposes the battery, it will be centered at the bottom of the laptop .

    • Push the switch above the battery towards the center of the laptop .

  2. HP Pavilion g7-1365dx RAM Replacement: 手順 2、 1の画像 1
    • While pushing the switch, lift the battery by the side closest to the switch up and away from the laptop.

  3. HP Pavilion g7-1365dx RAM Replacement, Service Door: 手順 3、 2の画像 1 HP Pavilion g7-1365dx RAM Replacement, Service Door: 手順 3、 2の画像 2
    • Using a Phillips size 0 screwdriver, unscrew the 2 Phillips screws.

    • Use the opening tool around the edges of the service door to loosen it and remove it.

  4. HP Pavilion g7-1365dx RAM Replacement, RAM: 手順 4、 2の画像 1 HP Pavilion g7-1365dx RAM Replacement, RAM: 手順 4、 2の画像 2
    • Use your fingers to simultaneously pull apart both tabs holding the module.

    • The memory module will pop up once the tabs are pulled so that it can be removed.

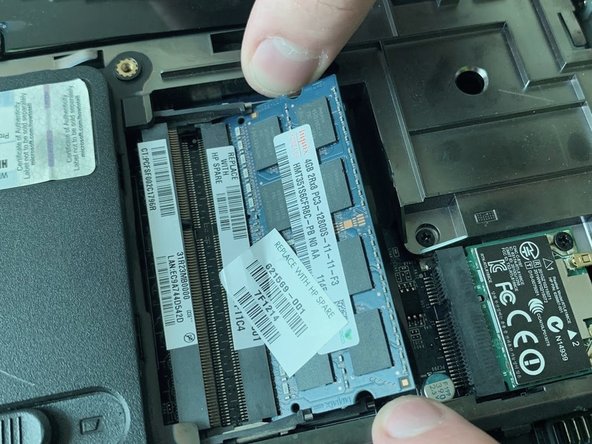
  5. HP Pavilion g7-1365dx RAM Replacement: 手順 5、 1の画像 1
    • Directly pull out the memory module as shown.

終わりに

To reassemble your device, follow these instructions in reverse order.

作成者

2人の作成者と共同で作成されました。

Rafal Szmyd

メンバー登録日: 03/22/19

181 ポイント

2のガイドは作成済み

チーム

UMass Dartmouth, Team S1-G1, Simcock Spring 2019 UMass Dartmouth, Team S1-G1, Simcock Spring 2019人のメンバー

UMASSD-SIMCOCK-S19S1G1

4 メンバー

8のガイドは作成済み

0 件のコメント

コメントを追加

統計データ:

過去 24時間: 1

過去 7 日: 3

過去 30 日: 12

今までの合計 298