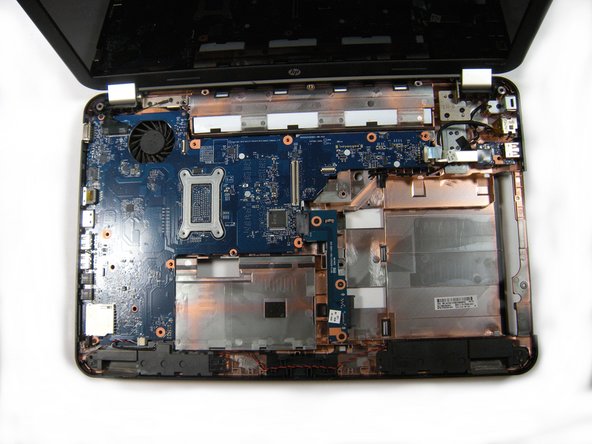
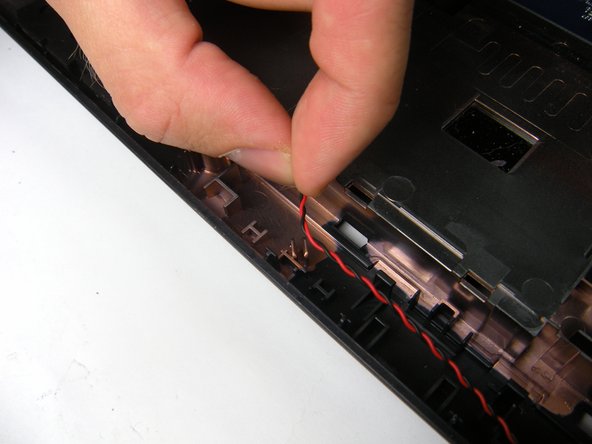
メインコンテンツにスキップ

HP Pavilion g6-1b79dx Speaker Replacement

必要な工具と部品

  1. HP Pavilion g6-1b79dx Speaker Replacement, Battery: 手順 1、 1の画像 1
    • Flip the computer so the bottom is facing up with the battery away from you.

    • Turn off the computer and disconnect the charger.

  2. HP Pavilion g6-1b79dx Speaker Replacement: 手順 2、 2の画像 1 HP Pavilion g6-1b79dx Speaker Replacement: 手順 2、 2の画像 2
    • Slide the battery switch to the left until the battery unlatches from the base of the laptop.

  3. HP Pavilion g6-1b79dx Speaker Replacement: 手順 3、 2の画像 1 HP Pavilion g6-1b79dx Speaker Replacement: 手順 3、 2の画像 2
    • Lift the battery from its compartment away from the laptop.

  4. HP Pavilion g6-1b79dx Speaker Replacement, Bottom Panel: 手順 4、 1の画像 1
    • Loosen the two 5.7 mm screws on the bottom panel using a PH00 screwdriver.

    • The screws do not come out of the panel due to small washers. Do not try to remove the screws completely.

  5. HP Pavilion g6-1b79dx Speaker Replacement: 手順 5、 1の画像 1
    • Use the metal spudger all around the panel to pop it up from the base.

    • When working with electronics, it's important to choose a tool that's ESD-safe to avoid accidental damage to the device. The regular black nylon spudger or a plastic opening tool should be used whenever possible.

    • Using your finger is acceptable but not entirely recommended. Be gentle if you choose to use your hands.

  6. HP Pavilion g6-1b79dx Speaker Replacement: 手順 6、 3の画像 1 HP Pavilion g6-1b79dx Speaker Replacement: 手順 6、 3の画像 2 HP Pavilion g6-1b79dx Speaker Replacement: 手順 6、 3の画像 3
    • With your hands, lift the panel completely off the base of the laptop.

  7. HP Pavilion g6-1b79dx Speaker Replacement, RAM: 手順 7、 3の画像 1 HP Pavilion g6-1b79dx Speaker Replacement, RAM: 手順 7、 3の画像 2 HP Pavilion g6-1b79dx Speaker Replacement, RAM: 手順 7、 3の画像 3
    • Slide the two latches away from the RAM to unhook it.

  8. HP Pavilion g6-1b79dx Speaker Replacement: 手順 8、 3の画像 1 HP Pavilion g6-1b79dx Speaker Replacement: 手順 8、 3の画像 2 HP Pavilion g6-1b79dx Speaker Replacement: 手順 8、 3の画像 3
    • Gently slide the RAM out from the laptop.

  9. HP Pavilion g6-1b79dx Speaker Replacement, Hard Drive: 手順 9、 2の画像 1 HP Pavilion g6-1b79dx Speaker Replacement, Hard Drive: 手順 9、 2の画像 2
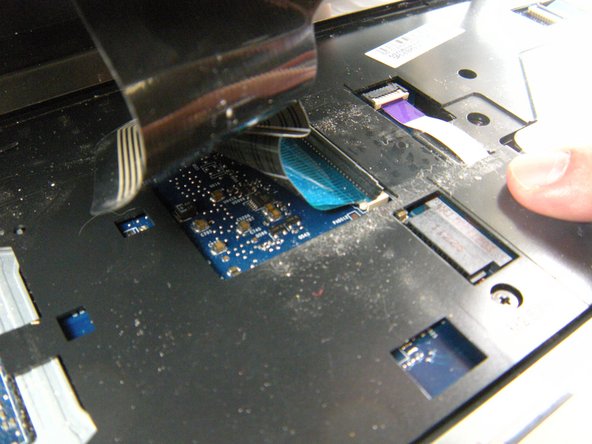
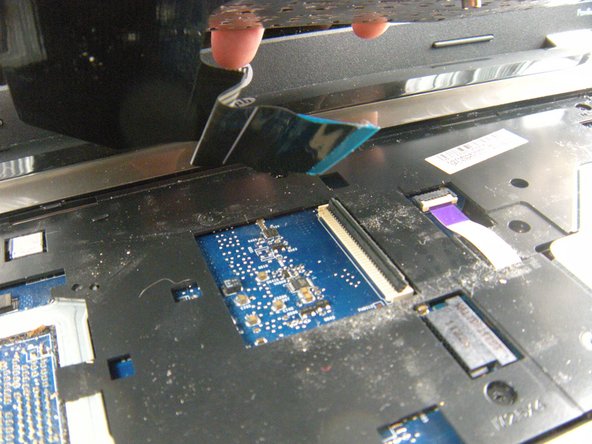
    • Use the PH 00 screwdriver to unscrew the 2.5 mm screw to the right of the hard drive.

  10. HP Pavilion g6-1b79dx Speaker Replacement: 手順 10、 3の画像 1 HP Pavilion g6-1b79dx Speaker Replacement: 手順 10、 3の画像 2 HP Pavilion g6-1b79dx Speaker Replacement: 手順 10、 3の画像 3
    • Pull the triangular blue tab to diconnect and remove the hard drive. You can see the word 'Pull' on the cover.

  11. HP Pavilion g6-1b79dx Speaker Replacement, Wireless Card: 手順 11、 3の画像 1 HP Pavilion g6-1b79dx Speaker Replacement, Wireless Card: 手順 11、 3の画像 2 HP Pavilion g6-1b79dx Speaker Replacement, Wireless Card: 手順 11、 3の画像 3
    • Unlatch the two antenna cable connectors from the wireless card.

  12. HP Pavilion g6-1b79dx Speaker Replacement: 手順 12、 1の画像 1
    • Remove the two 2.5 mm screws in the wireless card with a PH00 screwdriver.

    • You may have to gently bend the cables away from the wireless card to remove the screws

  13. HP Pavilion g6-1b79dx Speaker Replacement: 手順 13、 3の画像 1 HP Pavilion g6-1b79dx Speaker Replacement: 手順 13、 3の画像 2 HP Pavilion g6-1b79dx Speaker Replacement: 手順 13、 3の画像 3
    • Gently disconnect the wireless card from the laptop.

  14. HP Pavilion g6-1b79dx Speaker Replacement, CD Drive: 手順 14、 2の画像 1 HP Pavilion g6-1b79dx Speaker Replacement, CD Drive: 手順 14、 2の画像 2
    • Using the PH 00 screwdriver, remove the screw left of the CD drive.

  15. HP Pavilion g6-1b79dx Speaker Replacement: 手順 15、 3の画像 1 HP Pavilion g6-1b79dx Speaker Replacement: 手順 15、 3の画像 2 HP Pavilion g6-1b79dx Speaker Replacement: 手順 15、 3の画像 3
    • Slide the CD drive out from the exterior of the laptop.

  16. HP Pavilion g6-1b79dx Speaker Replacement, Keyboard: 手順 16、 1の画像 1
    • Using a PH 00 screwdriver, remove the screw located next to the wireless card.

    • You can remove the wireless card for this process but it is not necessary.

    • This screw has a small keyboard icon next to it.

  17. HP Pavilion g6-1b79dx Speaker Replacement: 手順 17、 1の画像 1
    • Flip the laptop over and open it.

    • The components beneath your computer may be loose and fall out when you flip the laptop. Be careful when turning it over.

  18. HP Pavilion g6-1b79dx Speaker Replacement: 手順 18、 3の画像 1 HP Pavilion g6-1b79dx Speaker Replacement: 手順 18、 3の画像 2 HP Pavilion g6-1b79dx Speaker Replacement: 手順 18、 3の画像 3
    • Insert a plastic spudger or similar pry tool, beneath the keyboard, near the "insert" key, and pop the keyboard up from the laptop.

    • When working with electronics, it's important to choose a tool that's ESD-safe to avoid accidental damage to the device. The regular black nylon spudger or a plastic opening tool should be used whenever possible.

    • Starting at the opening you just created, run your fingers around the outside of the keyboard separating it from the rest of the computer.

    • Only lift the keyboard up a few inches because it is attached to the laptop by a ribbon cable.

  19. HP Pavilion g6-1b79dx Speaker Replacement: 手順 19、 3の画像 1 HP Pavilion g6-1b79dx Speaker Replacement: 手順 19、 3の画像 2 HP Pavilion g6-1b79dx Speaker Replacement: 手順 19、 3の画像 3
    • Slightly angle the keyboard back so the ribbon connector underneath it is visible.

    • Remove the ribbon cable by using your fingers to pull up and away from the connector.

  20. HP Pavilion g6-1b79dx Speaker Replacement: 手順 20、 1の画像 1
    • With the ribbon cable detached, you can now completely remove the keyboard.

  21. HP Pavilion g6-1b79dx Speaker Replacement, Speaker: 手順 21、 3の画像 1 HP Pavilion g6-1b79dx Speaker Replacement, Speaker: 手順 21、 3の画像 2 HP Pavilion g6-1b79dx Speaker Replacement, Speaker: 手順 21、 3の画像 3
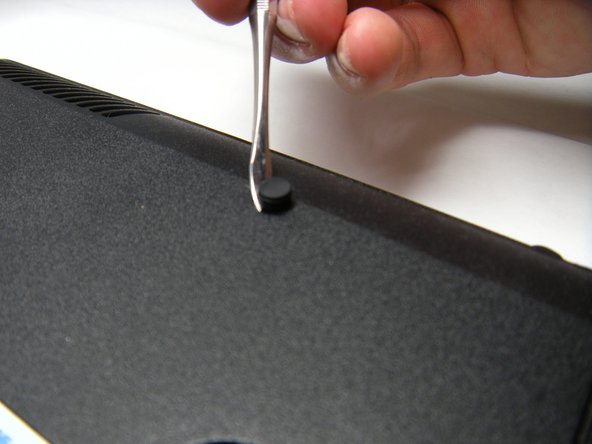
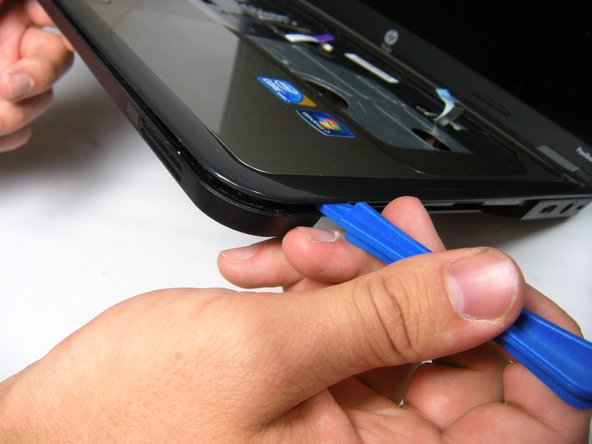
    • With the laptop bottom facing up, locate the rubber plug on the right side of the computer.

    • Use a metal splunger to remove the plug.

  22. HP Pavilion g6-1b79dx Speaker Replacement: 手順 22、 1の画像 1
    • Remove the ten 6.7 mm screws using a PH00 screwdriver.

    • Remove the five 3.4 mm screws using a PH00 screwdriver.

  23. HP Pavilion g6-1b79dx Speaker Replacement: 手順 23、 1の画像 1
    • Flip the computer over and open it.

    • Detach the two purple ribbons from the ribbon connectors.

    • Unscrew the six 4.6 mm screws using the PH00 screwdriver.

  24. HP Pavilion g6-1b79dx Speaker Replacement: 手順 24、 3の画像 1 HP Pavilion g6-1b79dx Speaker Replacement: 手順 24、 3の画像 2 HP Pavilion g6-1b79dx Speaker Replacement: 手順 24、 3の画像 3
    • Use the plastic opening tool to pry out the front panel around the entire computer.

  25. HP Pavilion g6-1b79dx Speaker Replacement: 手順 25、 3の画像 1 HP Pavilion g6-1b79dx Speaker Replacement: 手順 25、 3の画像 2 HP Pavilion g6-1b79dx Speaker Replacement: 手順 25、 3の画像 3
    • Gently lift the front panel away from the computer.

  26. HP Pavilion g6-1b79dx Speaker Replacement: 手順 26、 3の画像 1 HP Pavilion g6-1b79dx Speaker Replacement: 手順 26、 3の画像 2 HP Pavilion g6-1b79dx Speaker Replacement: 手順 26、 3の画像 3
    • Locate the red and black speaker cables connecting the speakers and detach them from the two holders.

  27. HP Pavilion g6-1b79dx Speaker Replacement: 手順 27、 3の画像 1 HP Pavilion g6-1b79dx Speaker Replacement: 手順 27、 3の画像 2 HP Pavilion g6-1b79dx Speaker Replacement: 手順 27、 3の画像 3
    • Pull the speaker cables out of their connectors.

  28. HP Pavilion g6-1b79dx Speaker Replacement: 手順 28、 2の画像 1 HP Pavilion g6-1b79dx Speaker Replacement: 手順 28、 2の画像 2
    • Slide the left speaker out from under the blue motherboard.

  29. HP Pavilion g6-1b79dx Speaker Replacement: 手順 29、 3の画像 1 HP Pavilion g6-1b79dx Speaker Replacement: 手順 29、 3の画像 2 HP Pavilion g6-1b79dx Speaker Replacement: 手順 29、 3の画像 3
    • Lift the right speaker directly up and remove it from the computer.

終わりに

To reassemble your device, follow these instructions in reverse order.

10 の人々がこのガイドを完成させました。

作成者

3人の作成者と共同で作成されました。

Rachel Gallegos

メンバー登録日: 09/22/15

873 ポイント

5のガイドは作成済み

チーム

Baylor, Team 10-12, Williams Fall 2015 Baylor, Team 10-12, Williams Fall 2015人のメンバー

BU-WILLIAMS-F15S10G12

3 メンバー

8のガイドは作成済み

2 件のコメント

I Love the practical very much

Mamadoumolo Jalloh - 返信

HP Pavilion g6 price

YASIR KHAN OFFICIAL - 返信

コメントを追加

統計データ:

過去 24時間: 0

過去 7 日: 7

過去 30 日: 19

今までの合計 6,616