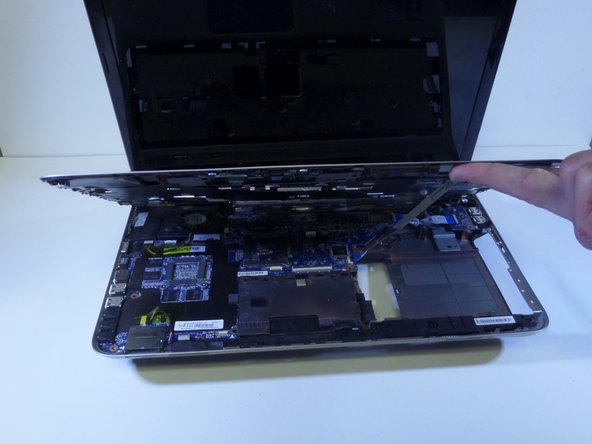
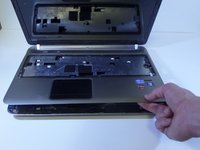
メインコンテンツにスキップ

HP Pavilion dv6-6180us Screen Replacement

必要な工具と部品

  1. HP Pavilion dv6-6180us Screen Replacement, Hard Drive: 手順 1、 1の画像 1
    • Turn off and unplug the device before starting.

    • Flip your device over so the bottom panel is facing up.

  2. HP Pavilion dv6-6180us Screen Replacement: 手順 2、 1の画像 1
    • Slide the lock switch to the right.

    • The panel will pop open at the top corner.

  3. HP Pavilion dv6-6180us Screen Replacement: 手順 3、 1の画像 1
    • Use the plastic opening tool to remove the back panel.

    • Some force may be required to remove the panel from the case. Use caution when prying to avoid breaking the panel or the plastic tabs securing it in place.

  4. HP Pavilion dv6-6180us Screen Replacement: 手順 4、 1の画像 1
    • Use the PH 1 screwdriver to remove the four 3.5 mm screws securing the hard drive.

  5. HP Pavilion dv6-6180us Screen Replacement: 手順 5、 1の画像 1
    • Lift the corner bracket to remove the hard drive.

  6. HP Pavilion dv6-6180us Screen Replacement: 手順 6、 1の画像 1
    • Unplug the hard drive wire to detach the hard drive.

  7. HP Pavilion dv6-6180us Screen Replacement, Screen: 手順 7、 1の画像 1
    この手順で使用する道具:
    Tweezers
    $4.99
    購入する
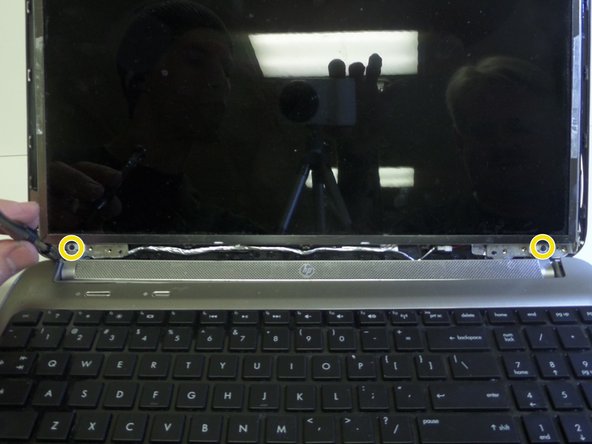
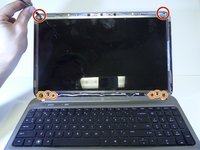
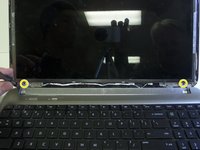
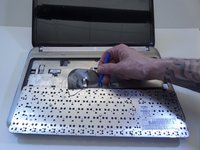
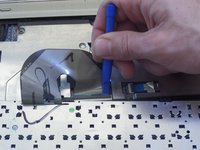
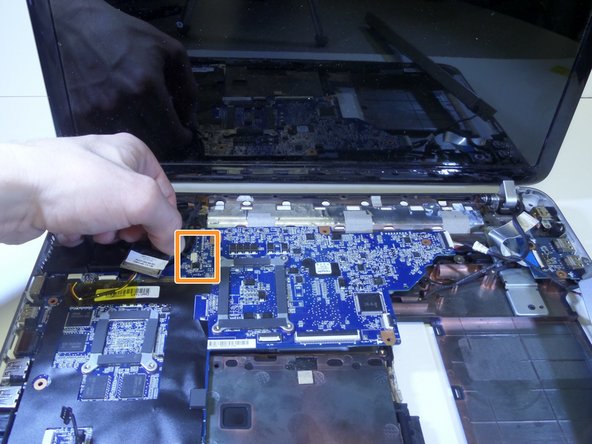
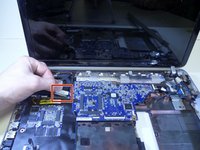
    • Using tweezers, grab the top and bottom while rocking back and forth to pull rubber plug out.

    • Cover is glued into place so gently pick at the edge before removing.

  8. HP Pavilion dv6-6180us Screen Replacement: 手順 8、 1の画像 1
    • Unscrew two 6mm screws using PH1 screwdriver.

  9. HP Pavilion dv6-6180us Screen Replacement: 手順 9、 1の画像 1
    • Pry the left lower corner with fingers.

  10. HP Pavilion dv6-6180us Screen Replacement: 手順 10、 1の画像 1
    • Remove screen frame.

  11. HP Pavilion dv6-6180us Screen Replacement: 手順 11、 2の画像 1 HP Pavilion dv6-6180us Screen Replacement: 手順 11、 2の画像 2
    • Unscrew two 3mm screws using PH 1 screwdriver

    • Eight 6mm screws using PH 1 screwdriver.

    • Use PH 000 screwdriver to remove two 4mm screws.

  12. HP Pavilion dv6-6180us Screen Replacement: 手順 12、 1の画像 1
    • Pry open the keyboard using plastic opening tool starting from the top.

    • Lift up keyboard gently because a silver ribbon is still attaching it to the laptop.

  13. HP Pavilion dv6-6180us Screen Replacement: 手順 13、 3の画像 1 HP Pavilion dv6-6180us Screen Replacement: 手順 13、 3の画像 2 HP Pavilion dv6-6180us Screen Replacement: 手順 13、 3の画像 3
    • Place keyboard upside down.

    • Lift up plastic cover over keyboard connector cable.

    • Pull ribbon cable up away from keyboard to completely remove.

  14. HP Pavilion dv6-6180us Screen Replacement: 手順 14、 1の画像 1
    • Remove seven 4mm pannel screws with PH 1 screwdriver.

  15. HP Pavilion dv6-6180us Screen Replacement: 手順 15、 1の画像 1
    • Place the computer on its side.

    • Separate top panel from bottom frame.

  16. HP Pavilion dv6-6180us Screen Replacement: 手順 16、 2の画像 1 HP Pavilion dv6-6180us Screen Replacement: 手順 16、 2の画像 2
    • Pop open rest palm assembly.

  17. HP Pavilion dv6-6180us Screen Replacement: 手順 17、 1の画像 1
    • Pull ribbon to detach from bottom panel.

  18. HP Pavilion dv6-6180us Screen Replacement: 手順 18、 1の画像 1
    • Remove two 5mm screws securing fan, using HP 1 screwdriver.

  19. HP Pavilion dv6-6180us Screen Replacement: 手順 19、 1の画像 1
    • Flip laptop over.

    • Remove two 4mm screws securing antenna using PH 1 screwdriver.

    • Pull antenna to the right to remove.

  20. HP Pavilion dv6-6180us Screen Replacement: 手順 20、 1の画像 1
    • Flip laptop side up.

    • Pull off yellow insulating tape.

  21. HP Pavilion dv6-6180us Screen Replacement: 手順 21、 2の画像 1 HP Pavilion dv6-6180us Screen Replacement: 手順 21、 2の画像 2
    • Grab tab on left top corner and remove black wire.

    • Remove white input attachment.

  22. HP Pavilion dv6-6180us Screen Replacement: 手順 22、 1の画像 1
    • Lift up speaker.

  23. HP Pavilion dv6-6180us Screen Replacement: 手順 23、 1の画像 1
    • Hold the motherboard and pull to the right.

    • The plugs on the left may be difficult to snap out.

  24. HP Pavilion dv6-6180us Screen Replacement: 手順 24、 1の画像 1
    • Remove a 4mm screw securing wire attachment using PH 1 screwdriver.

  25. HP Pavilion dv6-6180us Screen Replacement: 手順 25、 1の画像 1
    • Remove two hinge covers.

  26. HP Pavilion dv6-6180us Screen Replacement: 手順 26、 1の画像 1
    • Unhook the antenna wire from behind hinge.

  27. HP Pavilion dv6-6180us Screen Replacement: 手順 27、 1の画像 1
    • Lay screen face down.

    • Detach silver wire from screen

終わりに

To reassemble your device, follow these instructions in reverse order.

ある他の人がこのガイドを完成しました。

作成者

5人の作成者と共同で作成されました。

michelle pulido

メンバー登録日: 09/15/16

839 ポイント

4のガイドは作成済み

チーム

CSU Fullerton, Team 1-2, Bruce Fall 2016 CSU Fullerton, Team 1-2, Bruce Fall 2016人のメンバー

CSUF-BRUCE-F16S1G2

4 メンバー

4のガイドは作成済み

0 件のコメント

コメントを追加

統計データ:

過去 24時間: 2

過去 7 日: 9

過去 30 日: 23

今までの合計 1,537