この修理ガイドは変更されています。最新の未承認バージョンに切り替えます。
必要な工具と部品
-
-
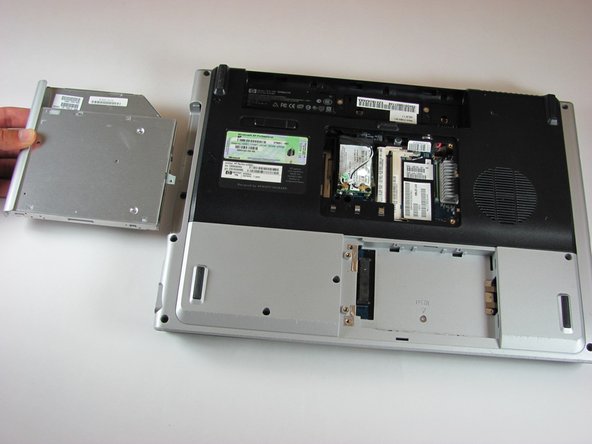
Lay the computer face-down on a flat surface. Orient the computer to match the image.
-
Locate the battery release switch, as indicated in the image by the red rectangle. Slide the switch from right to left, and remove the battery.
-
-
-
Remove the two 5mm Phillips screws on the right side of the RAM cover.
-
Lift the right side of the RAM cover, and remove it.
-
-
-
Locate the hard drive cover. Note that in this image, the RAM cover is still in place.
-
-
-
-
Remove the two 11.0mm screws at the corners on either side of the battery compartment.
-
Remove the three 6.0mm screws.
-
Remove the two 5.0mm screws.
-
Remove the 6.0mm screw in the middle of the battery compartment.
-
-
-
Remove the two 3.0mm screws on the side of the laptop shown.
-
Remove the one 5.0mm screw in the hard drive compartment.
-


To reassemble your device, follow these instructions in reverse order.
To reassemble your device, follow these instructions in reverse order.
ある他の人がこのガイドを完成しました。
チーム

UMass Dartmouth, Team 4-5, Calaway Spring 2014 UMass Dartmouth, Team 4-5, Calaway Spring 2014人のメンバー
UMASSD-CALAWAY-S14S4G5
4 メンバー
3のガイドは作成済み