メインコンテンツにスキップ

HP Pavilion TPN-C125 RAM Replacement

必要な工具と部品

  1. HP Pavilion TPN-C125 RAM Replacement, RAM: 手順 1、 2の画像 1 HP Pavilion TPN-C125 RAM Replacement, RAM: 手順 1、 2の画像 2
    • Flip the laptop over so the bottom is facing up and the external battery is at the top.

  2. HP Pavilion TPN-C125 RAM Replacement: 手順 2、 2の画像 1 HP Pavilion TPN-C125 RAM Replacement: 手順 2、 2の画像 2
    • Use your thumbs to slide the battery locks towards the center and pop the battery out.

  3. HP Pavilion TPN-C125 RAM Replacement: 手順 3、 2の画像 1 HP Pavilion TPN-C125 RAM Replacement: 手順 3、 2の画像 2
    • Slowly peel off the two rubber stoppers found at the top corners of the laptop.

    • This will expose two Philips #00 10 mm screws required to remove the back plate.

    • Be careful not to peel off the rubber stoppers too quickly as it could cause the adhesive on the rubber stopper to strip off.

  4. HP Pavilion TPN-C125 RAM Replacement: 手順 4、 2の画像 1 HP Pavilion TPN-C125 RAM Replacement: 手順 4、 2の画像 2
    • Use a Phillips #00 screwdriver to remove the twelve 10 mm screws (from the twelve holes shown) that secure the bottom case.

    • Use an opening tool to carefully separate the back case from the chassis, working around all four sides.

    • You will hear a "click" as you release the clips and remove it.

  5. HP Pavilion TPN-C125 RAM Replacement: 手順 5、 3の画像 1 HP Pavilion TPN-C125 RAM Replacement: 手順 5、 3の画像 2 HP Pavilion TPN-C125 RAM Replacement: 手順 5、 3の画像 3
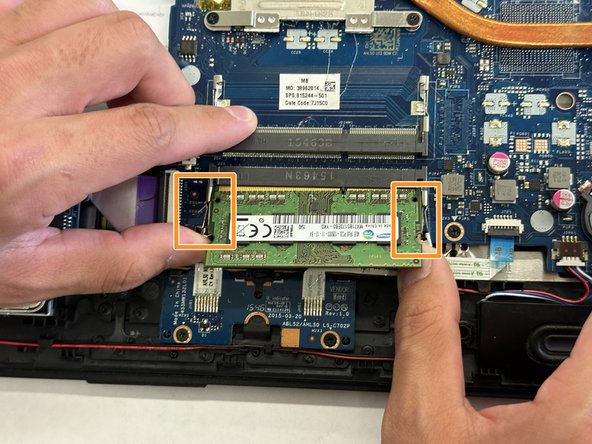
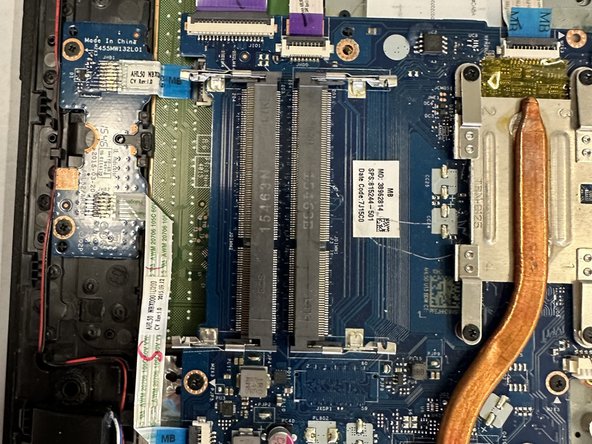
    • The RAM sticks can be found in the bottom right section of the laptop.

    • Push both side arms holding the RAM stick in place outwards.

    • The RAM sticks will "pop" up at a 45-degree angle when released from the arms.

    • Slide the RAM sticks out of the socket gently.

  6. HP Pavilion TPN-C125 RAM Replacement: 手順 6、 3の画像 1 HP Pavilion TPN-C125 RAM Replacement: 手順 6、 3の画像 2 HP Pavilion TPN-C125 RAM Replacement: 手順 6、 3の画像 3
    • Carefully slide the new replacement RAM sticks into their slots.

    • Make sure to align edge of the RAM sticks with the slots to avoid damaging both.

    • Gently push the RAM sticks downward until the latches click into place to secure them.

終わりに

To reassemble your device, follow these instructions in reverse order.

作成者

2人の作成者と共同で作成されました。

Cesar Gomez

メンバー登録日: 03/05/24

183 ポイント

1ガイドが承認済み

チーム

CSU Los Angeles, Team 7-10, Grodsky Spring 2024 CSU Los Angeles, Team 7-10, Grodsky Spring 2024人のメンバー

CSULA-GRODSKY-S24S7G10

2 メンバー

1のガイドは作成済み

0 件のコメント

コメントを追加

統計データ:

過去 24時間: 3

過去 7 日: 17

過去 30 日: 52

今までの合計 127