メインコンテンツにスキップ

HP Pavilion 15-p214dx Headphone Jack Replacement

必要な工具と部品

  1. HP Pavilion 15-p214dx Headphone Jack Replacement, Disk Drive: 手順 1、 3の画像 1 HP Pavilion 15-p214dx Headphone Jack Replacement, Disk Drive: 手順 1、 3の画像 2 HP Pavilion 15-p214dx Headphone Jack Replacement, Disk Drive: 手順 1、 3の画像 3
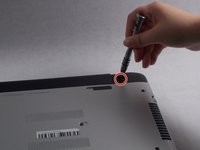
    • Place your laptop on a flat surface with the bottom facing upwards. The HP logo should be facing downwards.

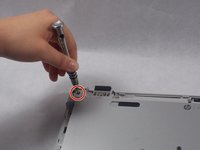
    • Locate the disk drive screw. It is a 7mm screw that can be found to the upper left on label on the bottom of the computer and is marked with a disk drive symbol.

    • Remove this screw using a Philips #0 screwdriver.

  2. HP Pavilion 15-p214dx Headphone Jack Replacement: 手順 2、 2の画像 1 HP Pavilion 15-p214dx Headphone Jack Replacement: 手順 2、 2の画像 2
    • Place your thumbnail between the disk drive exterior and your laptop's bottom cover.

    • If your nail is not long enough to do this, you can use a prying tool instead.

    • Pull outwards to slide the disk drive out of its slot.

    • Due to how the disk drive's slot is constructed, the drive must be properly aligned to fit back in. It may take a couple attempts to properly align it.

  3. HP Pavilion 15-p214dx Headphone Jack Replacement, Top Cover: 手順 3、 1の画像 1
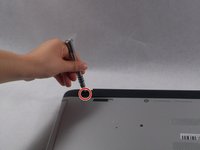
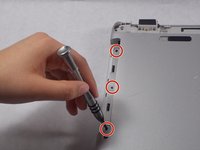
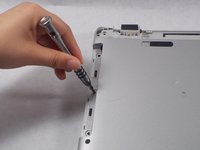
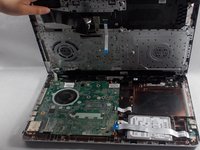
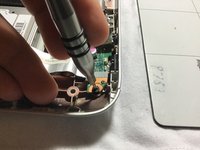
    • Using a magnetic screwdriver with a Philips #0 head, remove all of the visible screws on your laptop's bottom face. These screws are all about 7.5mm long.

  4. HP Pavilion 15-p214dx Headphone Jack Replacement: 手順 4、 2の画像 1 HP Pavilion 15-p214dx Headphone Jack Replacement: 手順 4、 2の画像 2
    • Remove the 5.5mm screws holding the computer's end caps in place. The end caps are located to the left and right of the battery.

    • These screws are normally hidden underneath the end caps' rubber feet, which are not shown in the pictures. To remove these, gently pry them out of their slots with a plastic opening tool or a flathead screwdriver.

  5. HP Pavilion 15-p214dx Headphone Jack Replacement: 手順 5、 3の画像 1 HP Pavilion 15-p214dx Headphone Jack Replacement: 手順 5、 3の画像 2 HP Pavilion 15-p214dx Headphone Jack Replacement: 手順 5、 3の画像 3
    • Lift both end caps from their respective corners.

    • Use a Philips #0 screwdriver to remove the 4.3mm screw that is underneath both end caps.

  6. HP Pavilion 15-p214dx Headphone Jack Replacement: 手順 6、 3の画像 1 HP Pavilion 15-p214dx Headphone Jack Replacement: 手順 6、 3の画像 2 HP Pavilion 15-p214dx Headphone Jack Replacement: 手順 6、 3の画像 3
    • Use a Philips #0 screwdriver to remove the three 5.5mm screws in on the edge of the disk drive slot.

    • These three screws are missing from the pictures.

  7. HP Pavilion 15-p214dx Headphone Jack Replacement: 手順 7、 1の画像 1
    • Flip your computer so that the bottom is now on the surface. Open the laptop like you normally would if you were about to use it.

    • Use a plastic opening tool to separate the top cover from the bottom cover.

    • Be careful when prying the cover off since it is susceptible to bending and cracking.

    • There are several cables connecting the top cover to the computer's motherboard that need to be disconnected before the cover can be completely removed.

  8. HP Pavilion 15-p214dx Headphone Jack Replacement: 手順 8、 2の画像 1 HP Pavilion 15-p214dx Headphone Jack Replacement: 手順 8、 2の画像 2
    • While lifting the top cover, undo the clip holding the keyboard cable in place.

    • Slide the cable out of its port.

  9. HP Pavilion 15-p214dx Headphone Jack Replacement: 手順 9、 1の画像 1
    • Undo the clip holding the touchpad cable in place.

    • Remove the touchpad cable from its port.

  10. HP Pavilion 15-p214dx Headphone Jack Replacement: 手順 10、 2の画像 1 HP Pavilion 15-p214dx Headphone Jack Replacement: 手順 10、 2の画像 2
    • Undo the clip holding the power button cable in place.

    • Disconnect the power button cable from its port.

    • Gently lift the top cover to remove it from the computer.

  11. HP Pavilion 15-p214dx Headphone Jack Replacement, Headphone Jack / USB Port: 手順 11、 3の画像 1 HP Pavilion 15-p214dx Headphone Jack Replacement, Headphone Jack / USB Port: 手順 11、 3の画像 2 HP Pavilion 15-p214dx Headphone Jack Replacement, Headphone Jack / USB Port: 手順 11、 3の画像 3
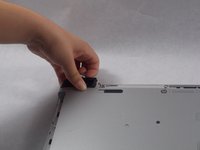
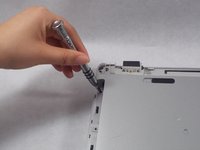
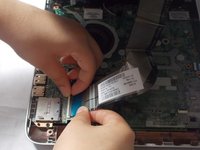
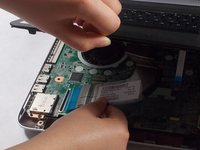
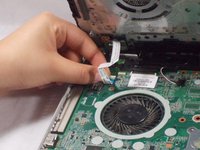
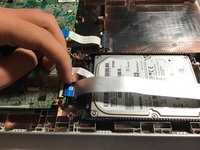
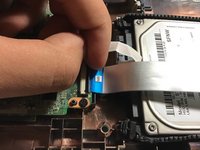
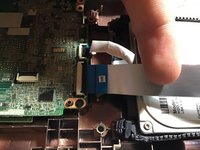
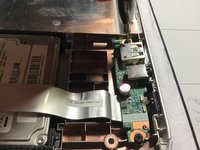
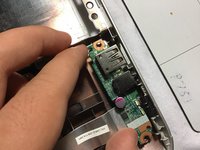
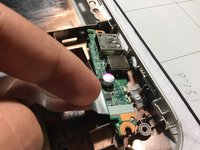
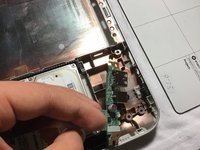
    • Undo the clip holding the small circuit cable.

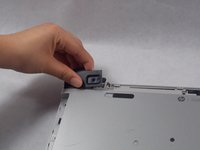
    • Gently pull the cable out from the clip.

  12. HP Pavilion 15-p214dx Headphone Jack Replacement: 手順 12、 3の画像 1 HP Pavilion 15-p214dx Headphone Jack Replacement: 手順 12、 3の画像 2 HP Pavilion 15-p214dx Headphone Jack Replacement: 手順 12、 3の画像 3
    • Using a magnetic screwdriver with a Philips #0 head, remove both screws that are holding down the circuit These screws are all about 5.5mm long.

  13. HP Pavilion 15-p214dx Headphone Jack Replacement: 手順 13、 3の画像 1 HP Pavilion 15-p214dx Headphone Jack Replacement: 手順 13、 3の画像 2 HP Pavilion 15-p214dx Headphone Jack Replacement: 手順 13、 3の画像 3
    • Once the circuit is unmounted gently remove the circuit board to be replaced.

終わりに

To reassemble your device, follow these instructions in reverse order.

ある他の人がこのガイドを完成しました。

作成者

3人の作成者と共同で作成されました。

Patrick Seaver

メンバー登録日: 03/25/19

1,001 ポイント

8のガイドは作成済み

チーム

UMass Dartmouth, Team S2-G1, Simcock Spring 2019 UMass Dartmouth, Team S2-G1, Simcock Spring 2019人のメンバー

UMASSD-SIMCOCK-S19S2G1

4 メンバー

8のガイドは作成済み

0 件のコメント

コメントを追加

統計データ:

過去 24時間: 0

過去 7 日: 3

過去 30 日: 16

今までの合計 386