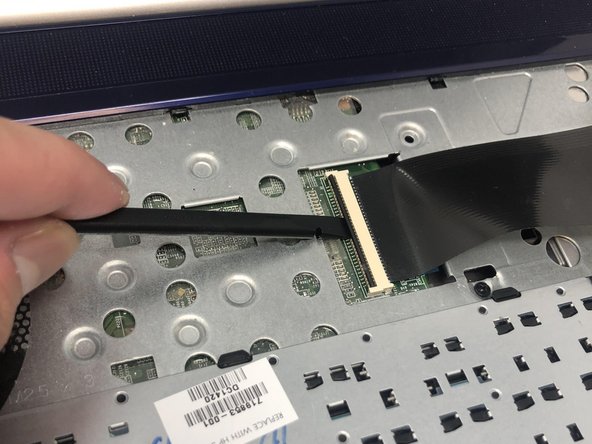
メインコンテンツにスキップ

HP Pavilion 15-n232nr Keyboard Replacement

必要な工具と部品

  1. HP Pavilion 15-n232nr Keyboard Replacement, Keyboard: 手順 1、 2の画像 1 HP Pavilion 15-n232nr Keyboard Replacement, Keyboard: 手順 1、 2の画像 2
    • Unscrew the 6 mm Phillips #1 screw securing the keyboard.

  2. HP Pavilion 15-n232nr Keyboard Replacement: 手順 2、 2の画像 1 HP Pavilion 15-n232nr Keyboard Replacement: 手順 2、 2の画像 2
    • Flip the laptop to the front side and open it up.

  3. HP Pavilion 15-n232nr Keyboard Replacement: 手順 3、 2の画像 1 HP Pavilion 15-n232nr Keyboard Replacement: 手順 3、 2の画像 2
    • Use the metal spudger to release the keyboard from the front panel.

  4. HP Pavilion 15-n232nr Keyboard Replacement: 手順 4、 3の画像 1 HP Pavilion 15-n232nr Keyboard Replacement: 手順 4、 3の画像 2 HP Pavilion 15-n232nr Keyboard Replacement: 手順 4、 3の画像 3
    • Flip the keyboard out and locate the connector.

    • Use the spudger to unhinge the the fastener and remove the connector.

    • Keyboard should be completely detached after this step.

終わりに

To reassemble your device, follow these instructions in reverse order.

2 の人々がこのガイドを完成させました。

作成者

3人の作成者と共同で作成されました。

[deleted]

メンバー登録日: 03/18/19

262 ポイント

2のガイドは作成済み

0 件のコメント

コメントを追加

統計データ:

過去 24時間: 0

過去 7 日: 1

過去 30 日: 6

今までの合計 369