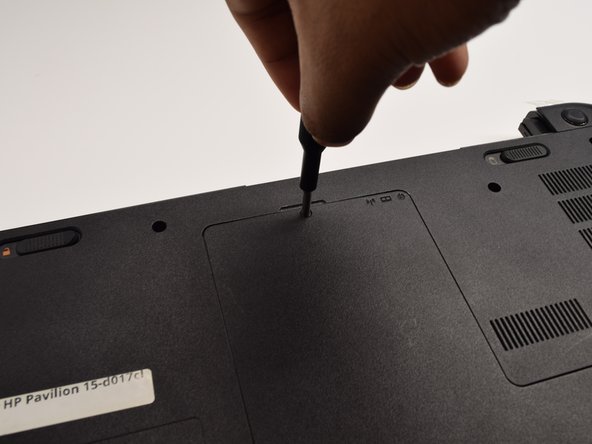
メインコンテンツにスキップ

HP Pavilion 15-d017cl RAM Replacement

必要な工具と部品

  1. HP Pavilion 15-d017cl RAM Replacement, Battery: 手順 1、 3の画像 1 HP Pavilion 15-d017cl RAM Replacement, Battery: 手順 1、 3の画像 2 HP Pavilion 15-d017cl RAM Replacement, Battery: 手順 1、 3の画像 3
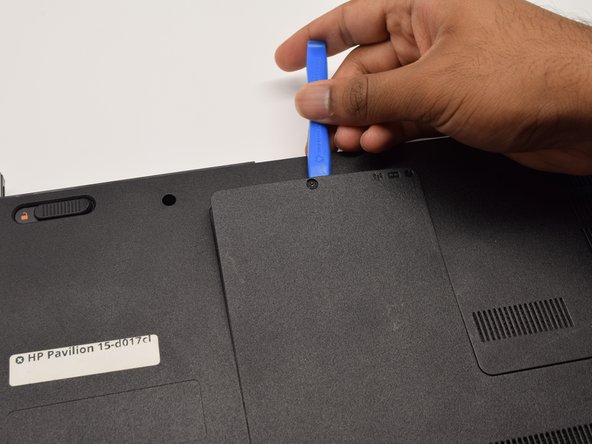
    • To unlock the top left latch, place your finger on the black latch and slide toward the center of the computer.

    • You do not need to hold this latch when removing the battery.

  2. HP Pavilion 15-d017cl RAM Replacement: 手順 2、 1の画像 1
    • To unlock the top right latch, slide the black latch towards the center of the computer.

  3. HP Pavilion 15-d017cl RAM Replacement: 手順 3、 1の画像 1
    • The right latch is spring loaded, hold the latch towards the center of the computer.

    • To remove the battery, pull the battery bar away from the computer.

  4. HP Pavilion 15-d017cl RAM Replacement, RAM: 手順 4、 2の画像 1 HP Pavilion 15-d017cl RAM Replacement, RAM: 手順 4、 2の画像 2
    • Flip the laptop onto its back in order to have access to the back panel.

    • Using a Phillips #1 Screwdriver, unscrew the 5mm screw until the L-shaped panel feels like it can be removed.

  5. HP Pavilion 15-d017cl RAM Replacement: 手順 5、 2の画像 1 HP Pavilion 15-d017cl RAM Replacement: 手順 5、 2の画像 2
    • To remove the L-shaped panel, use the plastic opening tool to pry the panel from the back of the laptop. Make sure to move the tool the entire way around the panel.

    • This may require a good amount of strength to loosen the panel. As the opening tool is moving around the panel, clicking noises will be heard.

  6. HP Pavilion 15-d017cl RAM Replacement: 手順 6、 3の画像 1 HP Pavilion 15-d017cl RAM Replacement: 手順 6、 3の画像 2 HP Pavilion 15-d017cl RAM Replacement: 手順 6、 3の画像 3
    • Using a spudger, press down on the silver latches that are holding the RAM in place. The RAM looks like a blue rectangle and has a size of about 1 x 2 inches. A slight click will be heard, and the RAM should pop out. You can then pull it away from the laptop.

    • Now that the old RAM has been removed, the new RAM can be inserted back into the laptop by pressing it gently into the place where the old RAM was.

終わりに

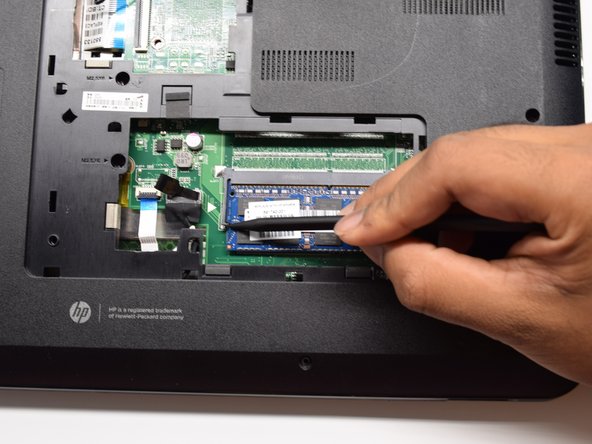
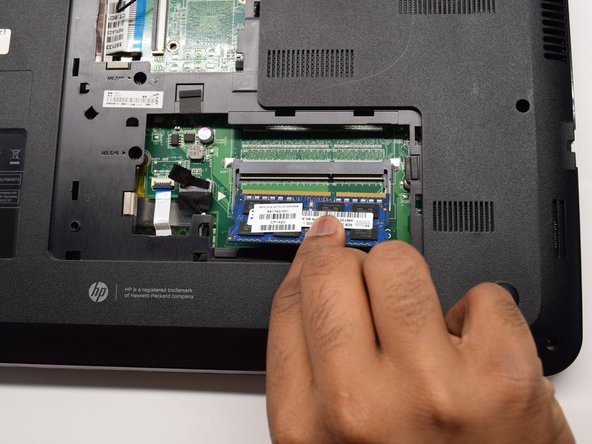
To reassemble your device, follow these instructions in reverse order.

4 の人々がこのガイドを完成させました。

作成者

2人の作成者と共同で作成されました。

Alana Dawson

メンバー登録日: 09/24/19

265 ポイント

2のガイドは作成済み

チーム

0 件のコメント

コメントを追加

統計データ:

過去 24時間: 0

過去 7 日: 1

過去 30 日: 5

今までの合計 371