メインコンテンツにスキップ

HP Pavilion 15-ca2073cl Cooling Fan Replacement

必要な工具と部品

  1. HP Pavilion 15-ca2073cl Cooling Fan Replacement, Back Cover: 手順 1、 1の画像 1
    • Before beginning, make sure the laptop is completely turned off by pressing the off button and waiting for the screen to turn black.

    • Flip the laptop over.

    • Remove all the 6.5mm screws (black) and the 4.8mm long screws (silver) using the Phillips #00 screwdriver.

  2. HP Pavilion 15-ca2073cl Cooling Fan Replacement: 手順 2、 2の画像 1 HP Pavilion 15-ca2073cl Cooling Fan Replacement: 手順 2、 2の画像 2
    • Use an iFixit opening tool to wedge in between the case and the body of the laptop.

    • Start from the front and work down both sides, disconnecting clips.

    • Remove the bottom case from the body.

  3. HP Pavilion 15-ca2073cl Cooling Fan Replacement, Battery: 手順 3、 2の画像 1 HP Pavilion 15-ca2073cl Cooling Fan Replacement, Battery: 手順 3、 2の画像 2
    • Remove six 4.8mm screws (silver) using the Phillips #00 screwdriver.

  4. HP Pavilion 15-ca2073cl Cooling Fan Replacement, Cooling Fan: 手順 4、 2の画像 1 HP Pavilion 15-ca2073cl Cooling Fan Replacement, Cooling Fan: 手順 4、 2の画像 2
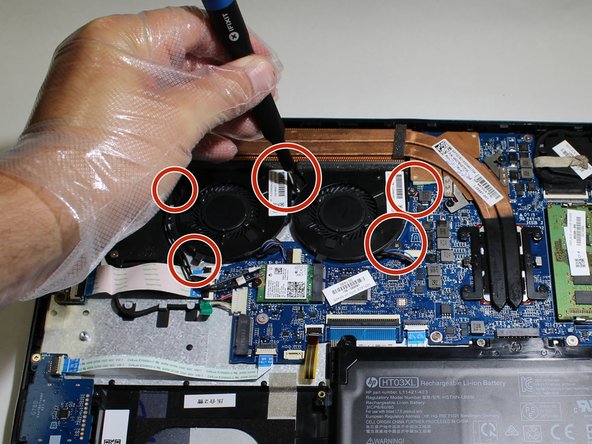
    • Remove the five silver 4.3 mm screws securing the fans using a Phillips #0 screwdriver.

  5. HP Pavilion 15-ca2073cl Cooling Fan Replacement: 手順 5、 2の画像 1 HP Pavilion 15-ca2073cl Cooling Fan Replacement: 手順 5、 2の画像 2
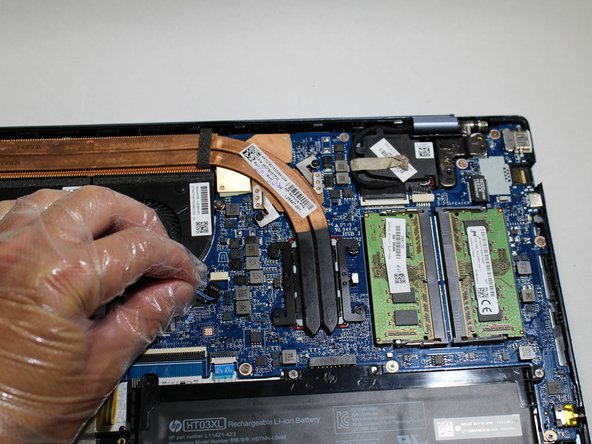
    • Remove the two cables from their connectors on the motherboard.

  6. HP Pavilion 15-ca2073cl Cooling Fan Replacement: 手順 6、 3の画像 1 HP Pavilion 15-ca2073cl Cooling Fan Replacement: 手順 6、 3の画像 2 HP Pavilion 15-ca2073cl Cooling Fan Replacement: 手順 6、 3の画像 3
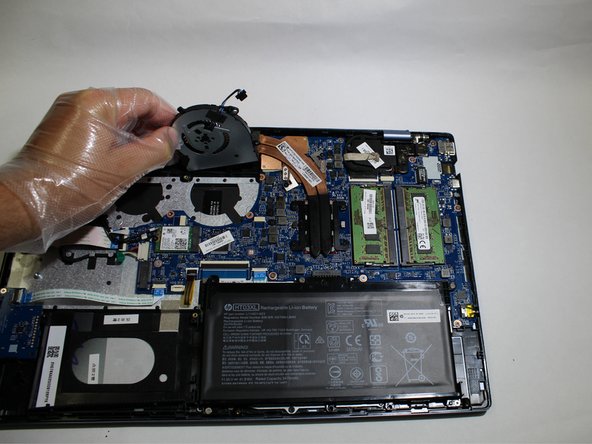
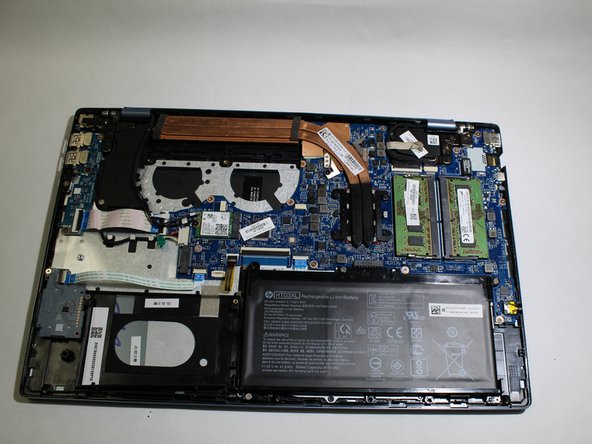
    • Lift and remove one cooling fan at a time from the laptop.

終わりに

To reassemble your device, follow these instructions in reverse order.

作成者

3人の作成者と共同で作成されました。

Cameron Walter Graham

メンバー登録日: 09/24/21

97 ポイント

1ガイドが承認済み

コメント 1 件

Thank you for making this post.

Adam Mallicoat - 返信

コメントを追加

統計データ:

過去 24時間: 1

過去 7 日: 4

過去 30 日: 12

今までの合計 501