はじめに
The LCD screen on laptops is one of the most important components as that is how the user can see and interact with the machine.
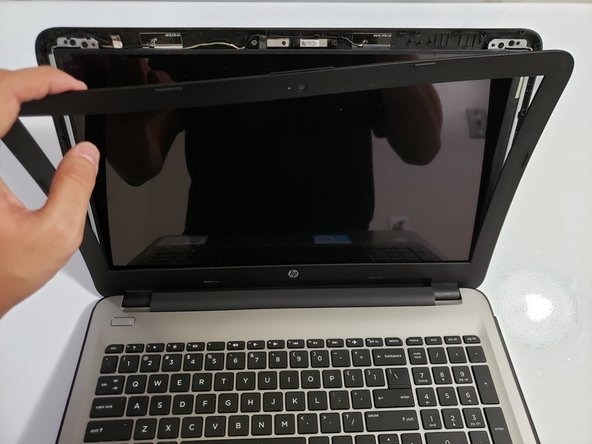
The screen might need to be replaced if it no longer produces a clear picture. If your laptop screen is cracked, dim, or producing vertical or horizontal lines, then your laptop might need a new LCD screen.
This 10-step guide will show you how to and replace the LCD screen in your HP Pavilion laptop with a Phillips #00 screwdriver.
Make sure the laptop is powered down before beginning this guide.
必要な工具と部品


To reassemble your device, follow these instructions in reverse order.
To reassemble your device, follow these instructions in reverse order.
2 の人々がこのガイドを完成させました。
チーム

York University, Team S1-G2, Woodhouse Winter 2020 York University, Team S1-G2, Woodhouse Winter 2020人のメンバー
YORK-WOODHOUSE-W20S1G2
3 メンバー
4のガイドは作成済み
コメント 1 件
Hi. This is my first time trying to fix a computer by myself, but I'm desperate -old lady, low fixed income & this is my only computer. Please, please help! Trying to replace LCD cable, not the screen itself from HP15-ay041wm. [Screen fading from various shades of color to white & cursor freezes. Have to keep moving/tilting screen till find the “sweet spot". Then have to keep holding onto screen w/one hand while trying to type w/other. That lasts a few moments, but it eventually starts going goofy again & I have to find its new sweet spot. Hear this seems to be pretty common w/this model.] Followed your terrific directions & removed screen & disco’d the cable from screen, but now I'm stuck & panicking. How do I get the old cable past the hinge setup, get bad cable out of the main guts of the comp & get the new cable in? I've got this thing taken apart, scared to death I'm gonna ruin the whole computer and I can't afford a new one. So grateful for your help. Thx, God bless, be safe & well!
Bernadette - 返信