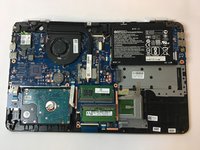
メインコンテンツにスキップ

HP Pavilion 15-au123cl Motherboard Replacement

必要な工具と部品

  1. HP Pavilion 15-au123cl Motherboard Replacement, Battery: 手順 1、 1の画像 1
    • Make sure the laptop is off and unplugged before starting.

    • Using the plastic opening tool, remove the top rubber feet on the back panel as it hides one of the screws we will be removing.

  2. HP Pavilion 15-au123cl Motherboard Replacement: 手順 2、 2の画像 1 HP Pavilion 15-au123cl Motherboard Replacement: 手順 2、 2の画像 2
    • Using a PH0 screwdriver, unscrew the ten 4.4mm Phillips head screws located on the back panel.

  3. HP Pavilion 15-au123cl Motherboard Replacement: 手順 3、 2の画像 1 HP Pavilion 15-au123cl Motherboard Replacement: 手順 3、 2の画像 2
    • Using the plastic opening tool, remove the back cover of the laptop.

    • It is recommended that you start with a corner and run the tool throughout the edges of the cover.

    • Be sure not to bend the cover by applying too much force.

  4. HP Pavilion 15-au123cl Motherboard Replacement: 手順 4、 2の画像 1 HP Pavilion 15-au123cl Motherboard Replacement: 手順 4、 2の画像 2
    • Using a PH0 screwdriver, unscrew the two 3.8mm PH0 Phillips head screws that hold the battery in place.

  5. HP Pavilion 15-au123cl Motherboard Replacement: 手順 5、 3の画像 1 HP Pavilion 15-au123cl Motherboard Replacement: 手順 5、 3の画像 2 HP Pavilion 15-au123cl Motherboard Replacement: 手順 5、 3の画像 3
    • Carefully disconnect the cable connecting the top of the battery and remove the battery.

  6. HP Pavilion 15-au123cl Motherboard Replacement, Network Card: 手順 6、 3の画像 1 HP Pavilion 15-au123cl Motherboard Replacement, Network Card: 手順 6、 3の画像 2 HP Pavilion 15-au123cl Motherboard Replacement, Network Card: 手順 6、 3の画像 3
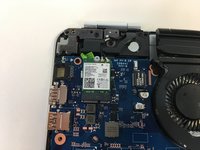
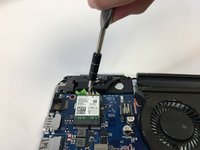
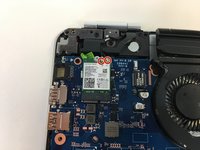
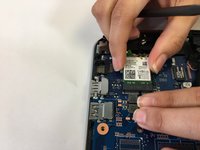
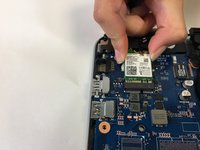
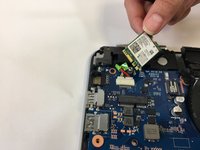
    • The network card is located at the top left corner of the motherboard.

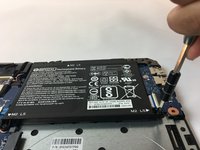
    • Unscrew the 4.4mm PH0 Phillips screw at the top of the network card.

  7. HP Pavilion 15-au123cl Motherboard Replacement: 手順 7、 3の画像 1 HP Pavilion 15-au123cl Motherboard Replacement: 手順 7、 3の画像 2 HP Pavilion 15-au123cl Motherboard Replacement: 手順 7、 3の画像 3
    • Using the spudger, remove the two gold pins at the top of the network card.

    • It is recommended to gently apply a vertical force upward with the spudger.

  8. HP Pavilion 15-au123cl Motherboard Replacement: 手順 8、 3の画像 1 HP Pavilion 15-au123cl Motherboard Replacement: 手順 8、 3の画像 2 HP Pavilion 15-au123cl Motherboard Replacement: 手順 8、 3の画像 3
    • Lift up the network card and remove it from the motherboard connector.

  9. HP Pavilion 15-au123cl Motherboard Replacement, Motherboard: 手順 9、 1の画像 1
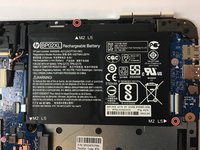
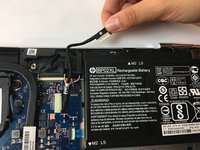
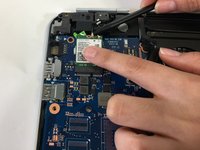
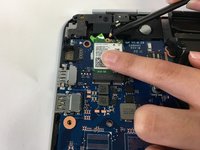
    • Firmly disconnect the fan from the motherboard.

    • Remove the three screws from the fan using a Philips #0 Screwdriver.

  10. HP Pavilion 15-au123cl Motherboard Replacement: 手順 10、 1の画像 1
    • Remove the six screws from the motherboard using a Philips #0 Screwdriver.

  11. HP Pavilion 15-au123cl Motherboard Replacement: 手順 11、 1の画像 1
    • Disconnect the ribbon cables from the motherboard.

    • Remove the motherboard.

終わりに

To reassemble your device, follow these instructions in reverse order.

3 の人々がこのガイドを完成させました。

作成者

1人の作成者と共同作成されました。

Joseph Nicholson

メンバー登録日: 10/02/19

178 ポイント

1ガイドが承認済み

コメント 1 件

buenas tardes : Nesecito saber donde puedo conseguir el Motherboard para una HP Pavilion Y1N95UA 15-AU123CL descrito en este posteo ..

Saludos Gabriel Angel..!!!

Gabriel Antonielli - 返信

コメントを追加

統計データ:

過去 24時間: 0

過去 7 日: 4

過去 30 日: 17

今までの合計 1,761