メインコンテンツにスキップ

HP Pavilion 15-ab243cl Hard Drive Replacement

必要な工具と部品

  1. HP Pavilion 15-ab243cl Hard Drive Replacement, Battery: 手順 1、 2の画像 1 HP Pavilion 15-ab243cl Hard Drive Replacement, Battery: 手順 1、 2の画像 2
    • Slide the battery lock tab toward the center of the battery to the unlock position.

  2. HP Pavilion 15-ab243cl Hard Drive Replacement: 手順 2、 3の画像 1 HP Pavilion 15-ab243cl Hard Drive Replacement: 手順 2、 3の画像 2 HP Pavilion 15-ab243cl Hard Drive Replacement: 手順 2、 3の画像 3
    • Slide the battery release switch to the right until the battery pops out.

  3. HP Pavilion 15-ab243cl Hard Drive Replacement: 手順 3、 2の画像 1 HP Pavilion 15-ab243cl Hard Drive Replacement: 手順 3、 2の画像 2
    • Grabbing the top edge of the battery, rotate it toward you and then lift upward to relieve the battery from its slot.

  4. HP Pavilion 15-ab243cl Hard Drive Replacement, Laptop Case: 手順 4、 3の画像 1 HP Pavilion 15-ab243cl Hard Drive Replacement, Laptop Case: 手順 4、 3の画像 2 HP Pavilion 15-ab243cl Hard Drive Replacement, Laptop Case: 手順 4、 3の画像 3
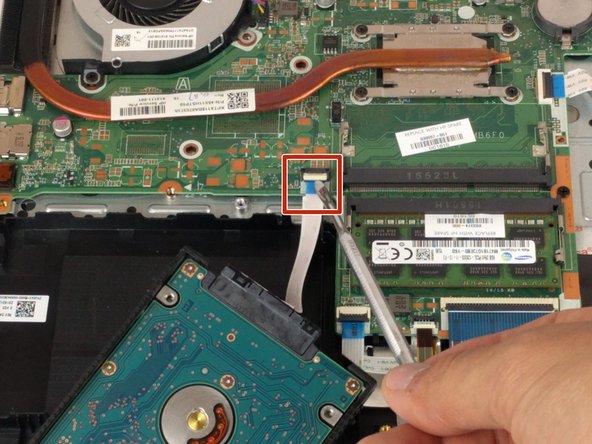
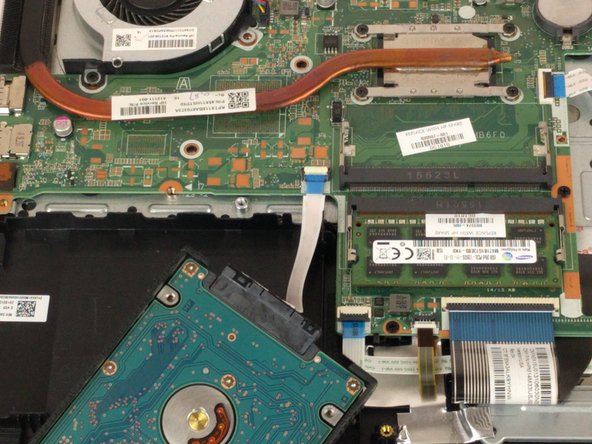
    • With the battery removed, remove both black plastic covers with a plastic opening tool. Unscrew both 7.5 mm screws from the tabs, using a PH1 screw driver. Using a plastic opening tool, pry off both covers.

  5. HP Pavilion 15-ab243cl Hard Drive Replacement: 手順 5、 3の画像 1 HP Pavilion 15-ab243cl Hard Drive Replacement: 手順 5、 3の画像 2 HP Pavilion 15-ab243cl Hard Drive Replacement: 手順 5、 3の画像 3
    • Remove all 16 of the 3.5 mm screws with a PH1 screwdriver and pry/slide the CD drive out of laptop.

  6. HP Pavilion 15-ab243cl Hard Drive Replacement: 手順 6、 2の画像 1 HP Pavilion 15-ab243cl Hard Drive Replacement: 手順 6、 2の画像 2
    • With the CD drive removed, unscrew the two 2mm silver screws with a PH00.

    • These can strip easily, so take your time removing.

  7. HP Pavilion 15-ab243cl Hard Drive Replacement: 手順 7、 3の画像 1 HP Pavilion 15-ab243cl Hard Drive Replacement: 手順 7、 3の画像 2 HP Pavilion 15-ab243cl Hard Drive Replacement: 手順 7、 3の画像 3
    • Using a plastic opening tool, begin to pry edge of case away from the laptop. Work around the edges until all sides, except back, are open.

  8. HP Pavilion 15-ab243cl Hard Drive Replacement: 手順 8、 3の画像 1 HP Pavilion 15-ab243cl Hard Drive Replacement: 手順 8、 3の画像 2 HP Pavilion 15-ab243cl Hard Drive Replacement: 手順 8、 3の画像 3
    • On the back side of the laptop, where the battery is, there are 12 black plastic clips. Use a plastic opening tool and pry all of these clips, unlatching them from the case.

    • Once clips are free, open the laptop. Rotating the case off, around the hinges, works best to remove the case.

  9. HP Pavilion 15-ab243cl Hard Drive Replacement, Hard Drive: 手順 9、 3の画像 1 HP Pavilion 15-ab243cl Hard Drive Replacement, Hard Drive: 手順 9、 3の画像 2 HP Pavilion 15-ab243cl Hard Drive Replacement, Hard Drive: 手順 9、 3の画像 3
    • Locate the hard drive and lift up to give better access to the connector.

  10. HP Pavilion 15-ab243cl Hard Drive Replacement: 手順 10、 3の画像 1 HP Pavilion 15-ab243cl Hard Drive Replacement: 手順 10、 3の画像 2 HP Pavilion 15-ab243cl Hard Drive Replacement: 手順 10、 3の画像 3
    • Using a plastic opening tool or spudger, pry open the white tab to release connector.

  11. HP Pavilion 15-ab243cl Hard Drive Replacement: 手順 11、 2の画像 1 HP Pavilion 15-ab243cl Hard Drive Replacement: 手順 11、 2の画像 2
    • Hard drive is good to go and can now be removed.

終わりに

To reassemble your device, follow these instructions in reverse order.

3 の人々がこのガイドを完成させました。

作成者

2人の作成者と共同で作成されました。

Alexander Bicigo

メンバー登録日: 02/14/18

942 ポイント

6のガイドは作成済み

チーム

USF Tampa, Team S6-G3, Eyestone Spring 2018 USF Tampa, Team S6-G3, Eyestone Spring 2018人のメンバー

USFT-EYESTONE-S18S6G3

3 メンバー

7のガイドは作成済み

0 件のコメント

コメントを追加

統計データ:

過去 24時間: 0

過去 7 日: 2

過去 30 日: 19

今までの合計 1,577