メインコンテンツにスキップ

HP Pavilion 15-AB153NR Motherboard Replacement

必要な工具と部品

  1. HP Pavilion 15-AB153NR Motherboard Replacement, Battery: 手順 1、 1の画像 1
    • Ensure computer is turned off and unplugged.

    • Slide the battery lock latch on the left to unlock. Slide from left to right to unlock.

  2. HP Pavilion 15-AB153NR Motherboard Replacement: 手順 2、 2の画像 1 HP Pavilion 15-AB153NR Motherboard Replacement: 手順 2、 2の画像 2
    • Slide the battery release latch on the right with continuous force from right to left.

    • Once battery pops, you may release latch.

  3. HP Pavilion 15-AB153NR Motherboard Replacement: 手順 3、 2の画像 1 HP Pavilion 15-AB153NR Motherboard Replacement: 手順 3、 2の画像 2
    • Grab the battery, rotating upwards and away from you. This will remove the battery.

  4. HP Pavilion 15-AB153NR Motherboard Replacement, CD/DVD Drive: 手順 4、 1の画像 1
    • Make sure computer is powered off and unplugged.

    • Flip computer over so that the bottom is facing the ceiling and the hinges are farthest from you.

  5. HP Pavilion 15-AB153NR Motherboard Replacement: 手順 5、 1の画像 1
    • Using the Phillips #000 screwdriver, remove the 7 mm screw on the middle right.

    • There is an icon that looks like a CD stamped into the back panel near this screw.

  6. HP Pavilion 15-AB153NR Motherboard Replacement: 手順 6、 2の画像 1 HP Pavilion 15-AB153NR Motherboard Replacement: 手順 6、 2の画像 2
    • Slide the drive out from the right side of the device.

  7. HP Pavilion 15-AB153NR Motherboard Replacement, Bottom Case Cover: 手順 7、 1の画像 1
    • Using the Phillips #1 screwdriver, remove the two 12mm screws located on the hinge covers.

  8. HP Pavilion 15-AB153NR Motherboard Replacement: 手順 8、 2の画像 1 HP Pavilion 15-AB153NR Motherboard Replacement: 手順 8、 2の画像 2
    • Lift the corner covers off of the computer using a prying tool.

  9. HP Pavilion 15-AB153NR Motherboard Replacement: 手順 9、 1の画像 1
    • Remove the six 6.5mm screws using a Phillips #1 screwdriver that are located near the top of the laptop.

  10. HP Pavilion 15-AB153NR Motherboard Replacement: 手順 10、 1の画像 1
    • Remove the remaining seven 6.5mm screws using a Phillips #1 screwdriver that are securing the back cover.

  11. HP Pavilion 15-AB153NR Motherboard Replacement: 手順 11、 1の画像 1
    • Use the Phillips #0 screwdriver to remove the two 2mm screws.

  12. HP Pavilion 15-AB153NR Motherboard Replacement: 手順 12、 3の画像 1 HP Pavilion 15-AB153NR Motherboard Replacement: 手順 12、 3の画像 2 HP Pavilion 15-AB153NR Motherboard Replacement: 手順 12、 3の画像 3
    • Use prying tools to pry the covers off of the screwholes.

    • Using the Phillips #1 screwdriver, remove the two 6.5mm screws.

  13. HP Pavilion 15-AB153NR Motherboard Replacement: 手順 13、 1の画像 1
    • Be mindful of sharp edges on computer while using prying tools.

    • Flip computer over and open so that the screen is facing you.

    • Starting at the bottom right corner, insert the prying tool and lift upwards to loosen the back panel.

    • Continue down all sides and corners of the device.

  14. HP Pavilion 15-AB153NR Motherboard Replacement: 手順 14、 2の画像 1 HP Pavilion 15-AB153NR Motherboard Replacement: 手順 14、 2の画像 2
    • Flip laptop back over so that the bottom is facing up

    • After all sides are loosened, remove the back panel from the device.

  15. HP Pavilion 15-AB153NR Motherboard Replacement, Cooling Fan: 手順 15、 2の画像 1 HP Pavilion 15-AB153NR Motherboard Replacement, Cooling Fan: 手順 15、 2の画像 2
    • Disconnect fan cable from the motherboard.

  16. HP Pavilion 15-AB153NR Motherboard Replacement: 手順 16、 1の画像 1
    • Remove both 3mm screws connected to the fan using Phillips #1 screwdriver.

  17. HP Pavilion 15-AB153NR Motherboard Replacement: 手順 17、 2の画像 1 HP Pavilion 15-AB153NR Motherboard Replacement: 手順 17、 2の画像 2
    • Remove the fan from the computer.

  18. HP Pavilion 15-AB153NR Motherboard Replacement, Speaker: 手順 18、 2の画像 1 HP Pavilion 15-AB153NR Motherboard Replacement, Speaker: 手順 18、 2の画像 2
    • Disconnect wiring harnesses by gently applying pressure to the plastic clip. Do not pull on the wires.

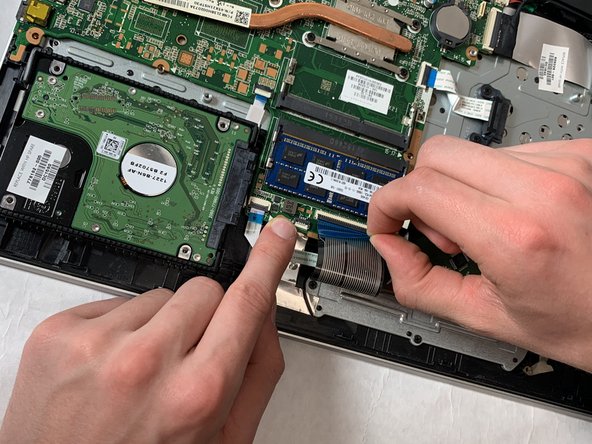
    • Disconnect the wiring harness that is routed through the speaker from the motherboard.

    • Remove the wiring harness from the groove in the speaker.

  19. HP Pavilion 15-AB153NR Motherboard Replacement: 手順 19、 2の画像 1 HP Pavilion 15-AB153NR Motherboard Replacement: 手順 19、 2の画像 2
    この手順で使用する道具:
    Tweezers
    $4.99
    購入する
    • Disconnect the speaker wiring from the motherboard.

    • If this clip is too difficult to remove by hand, tweezers or pliers can be used to gently initiate separation.

  20. HP Pavilion 15-AB153NR Motherboard Replacement: 手順 20、 2の画像 1 HP Pavilion 15-AB153NR Motherboard Replacement: 手順 20、 2の画像 2
    • Remove the speakers.

  21. HP Pavilion 15-AB153NR Motherboard Replacement, Motherboard: 手順 21、 1の画像 1
    • Use the #000 screwdriver to remove the four 6mm screws attaching the motherboard to the laptop case.

  22. HP Pavilion 15-AB153NR Motherboard Replacement: 手順 22、 2の画像 1 HP Pavilion 15-AB153NR Motherboard Replacement: 手順 22、 2の画像 2
    • Never pull on the wires themselves to disconnect a wiring harness or ribbon.

    • Unclip the wiring ribbons from the motherboard by pulling up on the blue tabs.

    • Unplug the wiring harness to the screen by gently pulling the beige connector.

  23. HP Pavilion 15-AB153NR Motherboard Replacement: 手順 23、 1の画像 1
    • Be sure to grab the motherboard by the edges. This will reduce the risk of damaging the motherboard components.

    • Remove the motherboard.

終わりに

To reassemble your device, follow these instructions in reverse order.

作成者

2人の作成者と共同で作成されました。

Christopher Hoffman

メンバー登録日: 11/11/19

97 ポイント

1ガイドが承認済み

チーム

IUPUI, Team S2-G1, Stella Fall 2019 IUPUI, Team S2-G1, Stella Fall 2019人のメンバー

IUPUI-STELLA-F19S2G1

4 メンバー

2のガイドは作成済み

0 件のコメント

コメントを追加

統計データ:

過去 24時間: 0

過去 7 日: 1

過去 30 日: 9

今までの合計 675