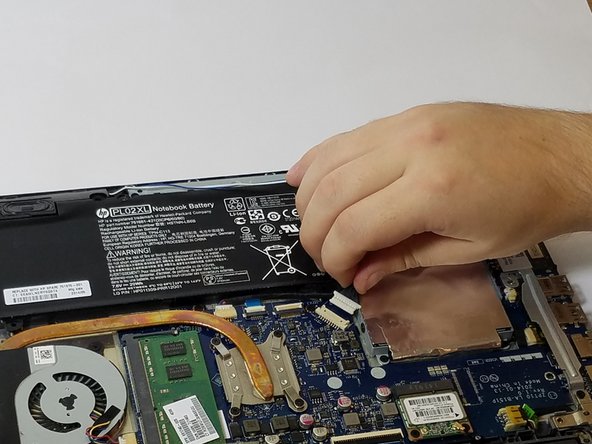
メインコンテンツにスキップ

HP Pavilion 11-n010dx Fan Replacement

必要な工具と部品

  1. HP Pavilion 11-n010dx Fan Replacement, Battery: 手順 1、 2の画像 1 HP Pavilion 11-n010dx Fan Replacement, Battery: 手順 1、 2の画像 2
    • Use the nylon spudger to remove the rubber pads near the hinge of the screen, then remove the screws under the pads.

    • Use the Phillips #0 to remove four 9mm screws.

    • Use the Phillips #0 to remove seven 6mm screws.

  2. HP Pavilion 11-n010dx Fan Replacement: 手順 2、 3の画像 1 HP Pavilion 11-n010dx Fan Replacement: 手順 2、 3の画像 2 HP Pavilion 11-n010dx Fan Replacement: 手順 2、 3の画像 3
    • Use the nylon spudger to pry the back casing near the hinges for the screen.

    • Continue to pry along the edge of the back case until the back is ready to be removed.

    • Careful when beginning to remove the case. There is a cable attached between the bottom case and the motherboard that must be properly disconnected.

  3. HP Pavilion 11-n010dx Fan Replacement: 手順 3、 2の画像 1 HP Pavilion 11-n010dx Fan Replacement: 手順 3、 2の画像 2
    • Use the blue plastic opening tool to lift up on the white tab that is holding the cable in place on the motherboard.

    • Now carefully pull the cable out of place and remove the entire back casing.

  4. HP Pavilion 11-n010dx Fan Replacement: 手順 4、 1の画像 1
    • Remove the five 6mm screws that hold the battery in place using the Phillips #0.

  5. HP Pavilion 11-n010dx Fan Replacement: 手順 5、 2の画像 1 HP Pavilion 11-n010dx Fan Replacement: 手順 5、 2の画像 2
    • Use the nylon spudger to pry away the blue/white wire that is positioned near your battery.

  6. HP Pavilion 11-n010dx Fan Replacement: 手順 6、 2の画像 1 HP Pavilion 11-n010dx Fan Replacement: 手順 6、 2の画像 2
    • Disconnect the battery cable from the motherboard by carefully pulling on the black wire at the point closest to the white tab.

  7. HP Pavilion 11-n010dx Fan Replacement: 手順 7、 1の画像 1
    • Remove the battery from your device.

  8. HP Pavilion 11-n010dx Fan Replacement, Fan: 手順 8、 1の画像 1
    • Use the Phillips #0 to remove the two 3mm screws holding the fan in place.

  9. HP Pavilion 11-n010dx Fan Replacement: 手順 9、 3の画像 1 HP Pavilion 11-n010dx Fan Replacement: 手順 9、 3の画像 2 HP Pavilion 11-n010dx Fan Replacement: 手順 9、 3の画像 3
    • Use the plastic opening tool to slowly loosen the connection cable.

    • Once the connector is loose enough, grab the cable and carefully pull it free from your device.

終わりに

To reassemble your device, follow these instructions in reverse order.

2 の人々がこのガイドを完成させました。

作成者

2人の作成者と共同で作成されました。

Joseph Lintz

メンバー登録日: 09/15/16

915 ポイント

5のガイドは作成済み

チーム

USF Tampa, Team 11-5, Blackwell Fall 2016 USF Tampa, Team 11-5, Blackwell Fall 2016人のメンバー

USFT-BLACKWELL-F16S11G5

3 メンバー

5のガイドは作成済み

0 件のコメント

コメントを追加

統計データ:

過去 24時間: 0

過去 7 日: 1

過去 30 日: 5

今までの合計 606