メインコンテンツにスキップ

HP Pavilion 11-n010dx Bottom Case Replacement

必要な工具と部品

  1. HP Pavilion 11-n010dx Bottom Case Replacement, Bottom Case: 手順 1、 2の画像 1 HP Pavilion 11-n010dx Bottom Case Replacement, Bottom Case: 手順 1、 2の画像 2
    • Use the nylon spudger to remove the rubber pads near the hinge for the screen. Then remove the screws under the pads.

    • Use Phillips #0 to remove four 9mm screws.

    • Use Phillips #0 to remove seven 6mm screws.

  2. HP Pavilion 11-n010dx Bottom Case Replacement: 手順 2、 3の画像 1 HP Pavilion 11-n010dx Bottom Case Replacement: 手順 2、 3の画像 2 HP Pavilion 11-n010dx Bottom Case Replacement: 手順 2、 3の画像 3
    • Use the nylon spudger to pry the back casing near the hinges for the screen.

    • Continue to pry along the edge of the back case until the back is ready to be removed.

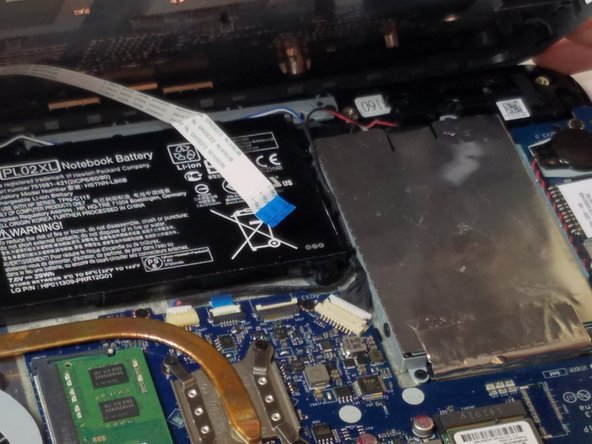
    • Careful when beginning to remove the case. There is a cable attached between the bottom case and the motherboard that must be properly disconnected.

  3. HP Pavilion 11-n010dx Bottom Case Replacement: 手順 3、 2の画像 1 HP Pavilion 11-n010dx Bottom Case Replacement: 手順 3、 2の画像 2
    • Use the plastic opening tool to lift up on the white tab that is holding the cable in place on the motherboard.

    • Now carefully pull the cable out of place and remove the entire back casing.

終わりに

To reassemble your device, follow these instructions in reverse order.

ある他の人がこのガイドを完成しました。

作成者

2人の作成者と共同で作成されました。

Joseph Lintz

メンバー登録日: 09/15/16

915 ポイント

5のガイドは作成済み

チーム

USF Tampa, Team 11-5, Blackwell Fall 2016 USF Tampa, Team 11-5, Blackwell Fall 2016人のメンバー

USFT-BLACKWELL-F16S11G5

3 メンバー

5のガイドは作成済み

0 件のコメント

コメントを追加

統計データ:

過去 24時間: 0

過去 7 日: 2

過去 30 日: 8

今までの合計 1,315