必要な工具と部品
-
-
Remove the plug from the outlet and from the back of the device
-
Remove the USB Cable from your computer and from the back of the device.
-
-
-
Using your Torx T10 screwdriver, remove the screws indicated in the picture. Screws are 13mm in length.
-
-
-
Using your Torx T10 screwdriver, remove the screws indicated in the picture. Screws are 13mm in length
-
-
-
In step 2, you removed the screw from the blue indicated area.
-
Gently pop off the black cover that the phone rests on. Underneath this cover, you will find two more screws.
-
Using your Torx T10 screwdriver, remove the screws indicated in the picture. Screws are 13mm in length
-
-
-
Using your Torx T10 screwdriver, remove the screws indicated in the picture. Screws are 13mm in length.
-
-
-
-
Once the rear plastic panel has been removed, you are ready to replace and repair the necessary parts.
-
-
-
Using the plastic opening tool, Pry off the front black plastic panel on screen area. This panel has the HP symbol on the front.
-
-
-
Using the T10 Torx screwdriver, unscrew the 7 screws on the panel indicated in the picture. These screws are 13mm in length.
-
Then, remove this panel.
-
-
-
Pull off the rubber buttons. This will come off easily.
-
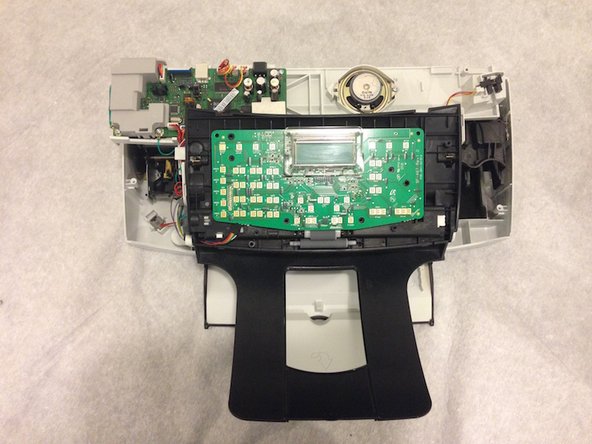
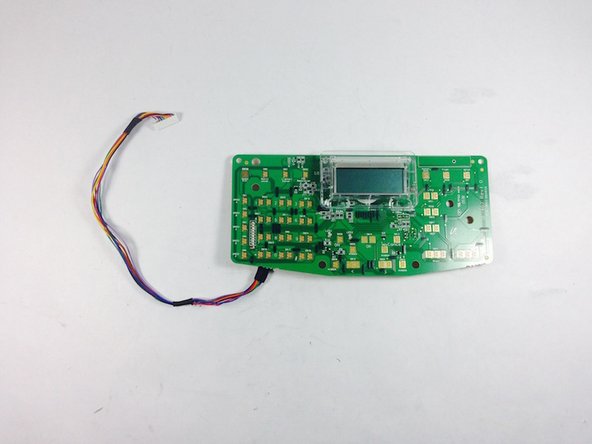
You will see the green motherboard underneath.
-
-
-
Remove black paper tray by pulling it straight out. If you are standing directly in front of it, you will be pulling it toward you.
-
-
-
Pull off the entire black front panel (where the motherboard rest on) by unfolding it forward (as if you’re fixing a paper jam) and pull it forward until it pops off.
-
-
-
Follow the wires from the left side of the keypad motherboard (on the panel you just removed) to the main motherboard and carefully unplug the wires from the main motherboard (located in the upper left corner.)
-
-
-
Wiggle wires through the hole in the bottom left corner of the printer so that the keypad motherboard panel disconnects completely from the printer.
-
-
-
Finally, pull wires upward, where the black tape on the wires is.
-
The green motherboard will become disconnected from the panel.
-
-
-
Reverse the steps to replace your new keypad motherboard.
-


To reassemble your device, follow these instructions in reverse order.
To reassemble your device, follow these instructions in reverse order.
チーム

UMass Dartmouth, Team 1-1, Duarte Fall 2014 UMass Dartmouth, Team 1-1, Duarte Fall 2014人のメンバー
UMASSD-DUARTE-F14S1G1
4 メンバー
12のガイドは作成済み