メインコンテンツにスキップ

HP OfficeJet 4650 Power Button Replacement

必要な工具と部品

  1. HP OfficeJet 4650 Power Button Replacement, Power Button: 手順 1、 3の画像 1 HP OfficeJet 4650 Power Button Replacement, Power Button: 手順 1、 3の画像 2 HP OfficeJet 4650 Power Button Replacement, Power Button: 手順 1、 3の画像 3
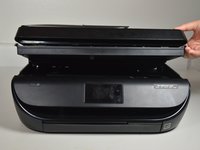
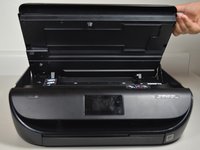
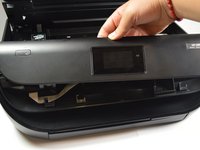
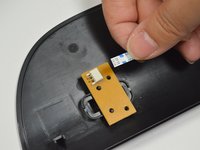
    • Open the cartridge access door by putting one hand on the grooves of each side and pulling up.

  2. HP OfficeJet 4650 Power Button Replacement: 手順 2、 2の画像 1 HP OfficeJet 4650 Power Button Replacement: 手順 2、 2の画像 2
    • Using the 2.0 mm hex screwdriver, remove the 14 mm hex screw that binds the front cover to the printer body by turning the screw counterclockwise.

  3. HP OfficeJet 4650 Power Button Replacement: 手順 3、 3の画像 1 HP OfficeJet 4650 Power Button Replacement: 手順 3、 3の画像 2 HP OfficeJet 4650 Power Button Replacement: 手順 3、 3の画像 3
    • Release the front panel from its internal hooks by applying a little force and sliding the front panel to the right.

    • Push the panel upward to remove it from the printer.

    • There is a connector attached to the back of the panel. Flip the front cover towards you gently and proceed to the next step.

  4. HP OfficeJet 4650 Power Button Replacement: 手順 4、 3の画像 1 HP OfficeJet 4650 Power Button Replacement: 手順 4、 3の画像 2 HP OfficeJet 4650 Power Button Replacement: 手順 4、 3の画像 3
    • Remove the connector that is attached to the screen's circuit board by pinching the blue part of the connector with two fingers and pulling it away from the circuit board.

  5. HP OfficeJet 4650 Power Button Replacement: 手順 5、 3の画像 1 HP OfficeJet 4650 Power Button Replacement: 手順 5、 3の画像 2 HP OfficeJet 4650 Power Button Replacement: 手順 5、 3の画像 3
    • Using the Torx T6 hex screwdriver, remove the 7.0mm screw that binds the front cover to the printer body by turning the screw counterclockwise.

  6. HP OfficeJet 4650 Power Button Replacement: 手順 6、 3の画像 1 HP OfficeJet 4650 Power Button Replacement: 手順 6、 3の画像 2 HP OfficeJet 4650 Power Button Replacement: 手順 6、 3の画像 3
    • Remove the connector that is attached to the screen's circuit board by pinching the blue part of the connector with two fingers and pulling it away from button circuit board.

  7. HP OfficeJet 4650 Power Button Replacement: 手順 7、 3の画像 1 HP OfficeJet 4650 Power Button Replacement: 手順 7、 3の画像 2 HP OfficeJet 4650 Power Button Replacement: 手順 7、 3の画像 3
    • Pop the button off from the black cover by using your finger tip to bring it up.

終わりに

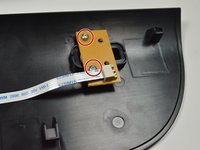
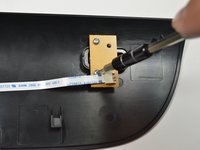
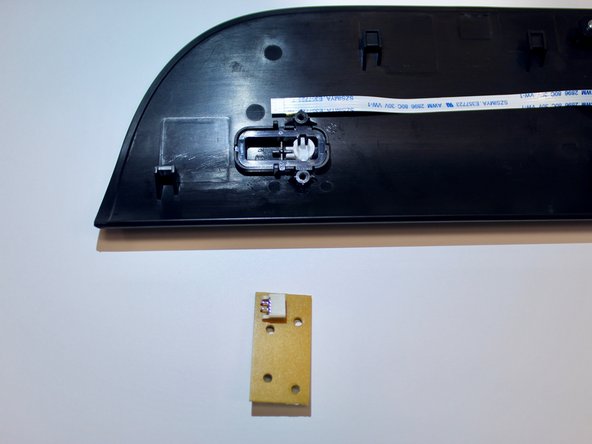
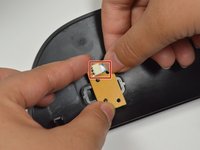
To reassemble your device, follow these instructions in reverse order.

ある他の人がこのガイドを完成しました。

作成者

4人の作成者と共同で作成されました。

Stephanie Carpintero

メンバー登録日: 01/24/18

994 ポイント

5のガイドは作成済み

チーム

Cal Poly, Team S19-G6, Livingston Winter 2018 Cal Poly, Team S19-G6, Livingston Winter 2018人のメンバー

CPSU-LIVINGSTON-W18S19G6

3 メンバー

10のガイドは作成済み

5 件のコメント

Does this fix the printer not turning on?

cindim - 返信

Where can I purchase the replacement Power Button? What is the part number?

Mort Rosenberg - 返信

Is it possible to bypass the malfunctioning power button, so the printer is on whenever it is plugged in? If so, how?

Ron Sela - 返信

Where can I purchase the replacement Power Button? What is the part number

Jack Farr

Jack Farr - 返信

Bonjour,

Ou peut on acheter l'écran tactile HP Officejet 4650 ???

Georges N'GUELA - 返信

コメントを追加

統計データ:

過去 24時間: 1

過去 7 日: 6

過去 30 日: 49

今までの合計 2,699