メインコンテンツにスキップ

この修理ガイドは変更されています。最新の未承認バージョンに切り替えます。

HP Mini 1000 Motherboard Replacement

必要条件のみ
この修理ガイドは、他のガイドの前提条件として使用されます。それ自体は不完全で、単独で使用されることはありません。

必要な工具と部品

  1. HP Mini 1000 Motherboard Replacement, Motherboard: 手順 1、 1の画像 1
    • If present, remove the large piece of black adhesive film covering the area around the fan.

  2. HP Mini 1000 Motherboard Replacement: 手順 2、 2の画像 1 HP Mini 1000 Motherboard Replacement: 手順 2、 2の画像 2
    • If present, remove the pieces of black cloth tape securing the antenna cables to the motherboard.

  3. HP Mini 1000 Motherboard Replacement: 手順 3、 2の画像 1 HP Mini 1000 Motherboard Replacement: 手順 3、 2の画像 2
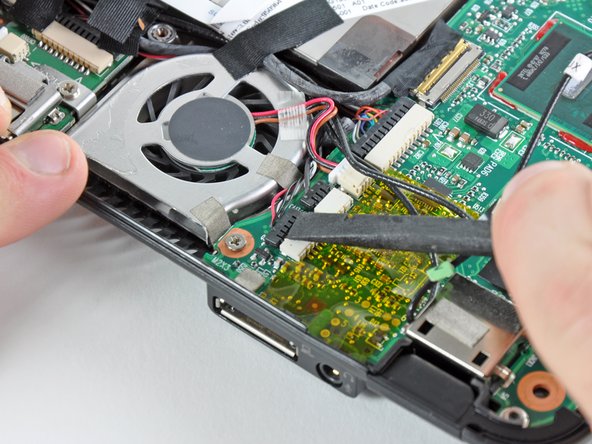
    • Use the flat end of a spudger or your fingers to disconnect the following cables:

    • Speaker cable

    • Microphone cable

    • Fan cable

    • Power cable

    • Display data cable

    • Do not lift the connectors up as you disconnect them from the motherboard. Push the connectors out of their sockets parallel to the face of the logic board toward the display assembly. Use extra care when disconnecting the display data cable, as its connector and socket are fragile.

  4. HP Mini 1000 Motherboard Replacement: 手順 4、 2の画像 1 HP Mini 1000 Motherboard Replacement: 手順 4、 2の画像 2
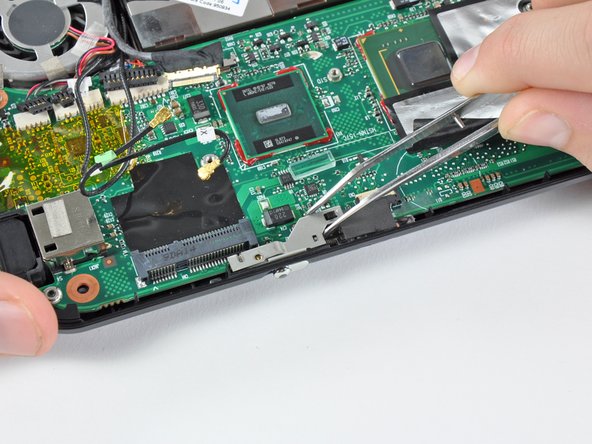
    • Remove the 2.5 mm Phillips screw securing the power switch lever to the lower case.

    • Use a pair of tweezers or your fingers to lift the power switch lever out of the Mini 1000.

  5. HP Mini 1000 Motherboard Replacement: 手順 5、 2の画像 1 HP Mini 1000 Motherboard Replacement: 手順 5、 2の画像 2
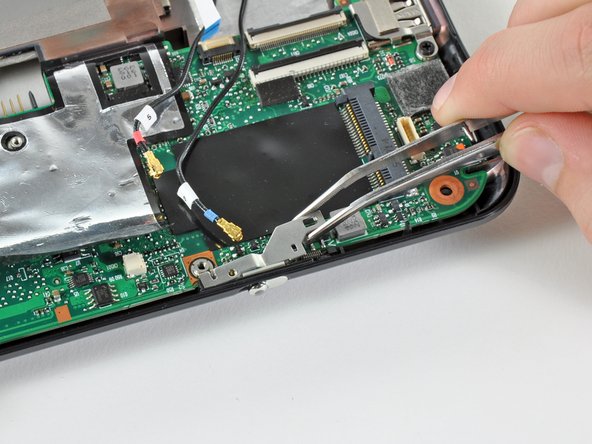
    • Remove the 2.5 mm Phillips screw securing the wireless on/off switch lever to the lower case.

    • Use tweezers or your fingers to remove the wireless on/off switch lever from the Mini 1000.

  6. HP Mini 1000 Motherboard Replacement: 手順 6、 2の画像 1 HP Mini 1000 Motherboard Replacement: 手順 6、 2の画像 2
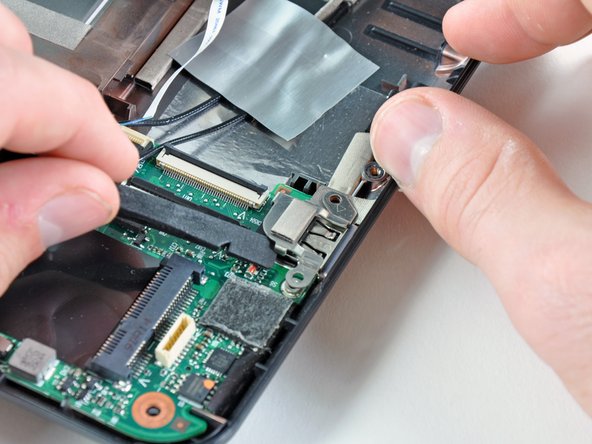
    • Remove the two 3 mm Phillips screws securing the USB bracket to the lower case.

    • Pry up the USB bracket and remove it from the motherboard.

  7. HP Mini 1000 Motherboard Replacement: 手順 7、 1の画像 1
    • Remove the single 4.5 mm Phillips screw securing the motherboard to the lower case near the fan.

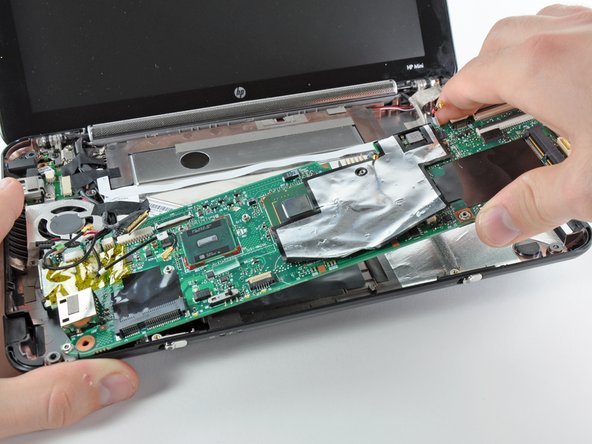
  8. HP Mini 1000 Motherboard Replacement: 手順 8、 2の画像 1 HP Mini 1000 Motherboard Replacement: 手順 8、 2の画像 2
    • Carefully lift the motherboard from its right edge and remove it from the lower case, minding any cables that may get caught.

終わりに

To reassemble your device, follow these instructions in reverse order.

作成者

4人の作成者と共同で作成されました。

Walter Galan

694,638 ポイント

1,203のガイドは作成済み

0 件のコメント

コメントを追加

統計データ:

過去 24時間: 0

過去 7 日: 0

過去 30 日: 0

今までの合計 70