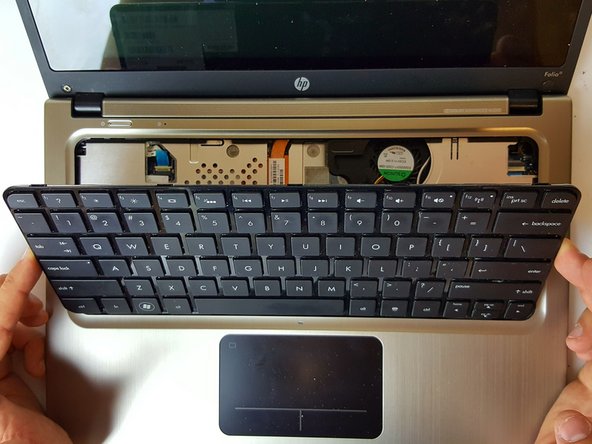
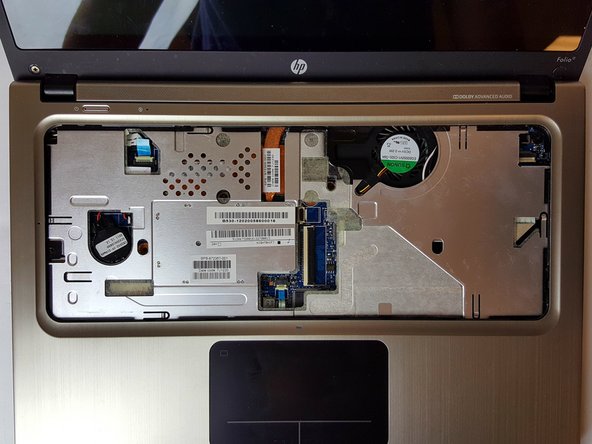
メインコンテンツにスキップ

HP Folio 13t-1000 Keyboard Replacement

必要な工具と部品

  1. HP Folio 13t-1000 Keyboard Replacement, Keyboard: 手順 1、 2の画像 1 HP Folio 13t-1000 Keyboard Replacement, Keyboard: 手順 1、 2の画像 2
    • Use an antistatic wrist wrap, or periodically touch unpainted metal to minimize the risk of damaging the laptop by electrostatic shock.

    • Use a PH1 screw head to remove the 16, 6mm screws from the bottom case housing of the laptop.

  2. HP Folio 13t-1000 Keyboard Replacement: 手順 2、 3の画像 1 HP Folio 13t-1000 Keyboard Replacement: 手順 2、 3の画像 2 HP Folio 13t-1000 Keyboard Replacement: 手順 2、 3の画像 3
    • This step requires unlocking the very fragile plastic clips along the frame; take care not to damage them.

    • Slide the spudger with a twisting motion along the entire perimeter of the laptop until the top cover is separated from the frame of the device.

  3. HP Folio 13t-1000 Keyboard Replacement: 手順 3、 1の画像 1
    • Using the flat portion of the plastic spudger, push the corner of the black surface until the first clip unlocks.

    • The top right corner of the keyboard should now be sticking out slightly.

    • Repeat the same process for the top left corner.

  4. HP Folio 13t-1000 Keyboard Replacement: 手順 4、 2の画像 1 HP Folio 13t-1000 Keyboard Replacement: 手順 4、 2の画像 2
    • Slide the keyboard up and towards the screen just enough to separate the keyboard from the top cover.

  5. HP Folio 13t-1000 Keyboard Replacement: 手順 5、 3の画像 1 HP Folio 13t-1000 Keyboard Replacement: 手順 5、 3の画像 2 HP Folio 13t-1000 Keyboard Replacement: 手順 5、 3の画像 3
    • To unlock the clamps connected to the motherboard, use your fingers or insert the pointed edge of the spudger between the first clamp and the cable.

    • Repeat the same process for the second clamp.

  6. HP Folio 13t-1000 Keyboard Replacement: 手順 6、 3の画像 1 HP Folio 13t-1000 Keyboard Replacement: 手順 6、 3の画像 2 HP Folio 13t-1000 Keyboard Replacement: 手順 6、 3の画像 3
    • Remove the keyboard from the laptop.

終わりに

To reassemble your device, follow these instructions in reverse order.

2 の人々がこのガイドを完成させました。

作成者

2人の作成者と共同で作成されました。

Cody Badchkam

メンバー登録日: 09/28/16

64 ポイント

4のガイドは作成済み

チーム

USF Tampa, Team 1-2, Cagle Fall 2016 USF Tampa, Team 1-2, Cagle Fall 2016人のメンバー

USFT-CAGLE-F16S1G2

4 メンバー

7のガイドは作成済み

2 件のコメント

Awsome Thanks! had my keyboard flooded with some cola :( .. Fixed it !

Matthijs Aveskamp - 返信

Turn your Folio 13 upside down.

Looking at the screws on the back, work out which ones go into the keyboard to retain it (it’s only 3!).

You only need to take those screws out.

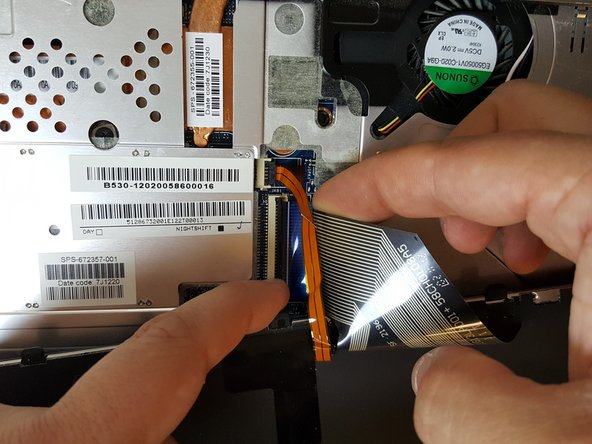
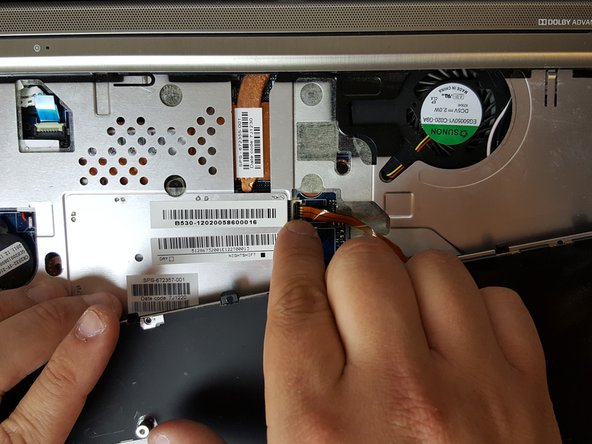
Use something thin and flat to go around the keyboard, separating it from the case front.

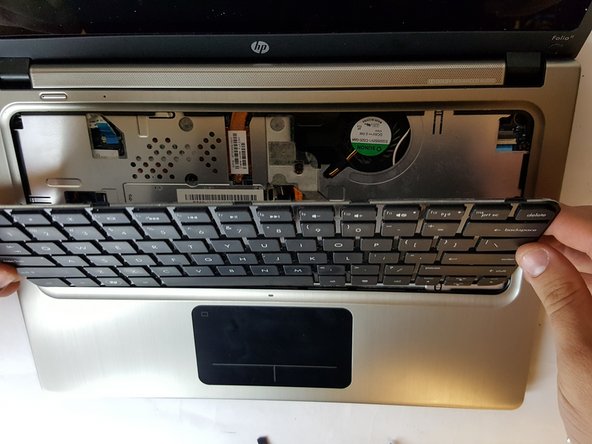
It will lift out easily.

There is no need to remove all 16 screws or take the case front off.

Neon Blade - 返信

コメントを追加

統計データ:

過去 24時間: 0

過去 7 日: 3

過去 30 日: 6

今までの合計 832