メインコンテンツにスキップ

HP Flyer Red Optical Disc Drive Replacement

必要な工具と部品

  1. HP Flyer Red Optical Disc Drive Replacement, Battery: 手順 1、 2の画像 1 HP Flyer Red Optical Disc Drive Replacement, Battery: 手順 1、 2の画像 2
    • Make sure your laptop is powered off.

    • With laptop closed flip to look at the underside of the laptop.

  2. HP Flyer Red Optical Disc Drive Replacement: 手順 2、 1の画像 1
    • On the underside of the laptop towards the hinge for the screen there are two rectangular slide switches located inside of rectangular tracks.

  3. HP Flyer Red Optical Disc Drive Replacement: 手順 3、 2の画像 1 HP Flyer Red Optical Disc Drive Replacement: 手順 3、 2の画像 2
    • The left switch is the battery unlock switch.

    • Inside the rectangular track of this switch there is an image of a closed lock that should be visible. Push this switch to the other end of the track and an image of an open lock should be visible.

  4. HP Flyer Red Optical Disc Drive Replacement: 手順 4、 1の画像 1
    • Then take and slide the other switch to the other end of its track which will pop out the battery.

    • Grab the battery and pull it out of the slot.

  5. HP Flyer Red Optical Disc Drive Replacement, Optical Disc Drive: 手順 5、 1の画像 1
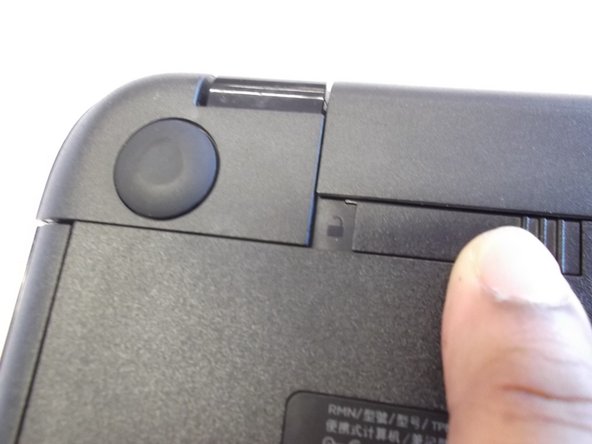
    • Remove the 4mm Phillips #1 screw located towards the middle of the laptop slightly towards the right with the picture of the CD next to it.

  6. HP Flyer Red Optical Disc Drive Replacement: 手順 6、 2の画像 1 HP Flyer Red Optical Disc Drive Replacement: 手順 6、 2の画像 2
    • Slide the disc tray out of the its slot.

終わりに

To reassemble your device, follow these instructions in reverse order.

2 の人々がこのガイドを完成させました。

作成者

2人の作成者と共同で作成されました。

Anthony Ciotti

メンバー登録日: 04/07/16

747 ポイント

5のガイドは作成済み

チーム

UMass Dartmouth, Team 4-5, Catania Spring 2016 UMass Dartmouth, Team 4-5, Catania Spring 2016人のメンバー

UMASSD-CATANIA-S16S4G5

4 メンバー

5のガイドは作成済み

0 件のコメント

コメントを追加

統計データ:

過去 24時間: 0

過去 7 日: 0

過去 30 日: 2

今までの合計 800