メインコンテンツにスキップ

HP Envy x360 15m-bp111dx Touchpad Replacement

必要な工具と部品

  1. HP Envy x360 15m-bp111dx Touchpad Replacement, Back Panel: 手順 1、 2の画像 1 HP Envy x360 15m-bp111dx Touchpad Replacement, Back Panel: 手順 1、 2の画像 2
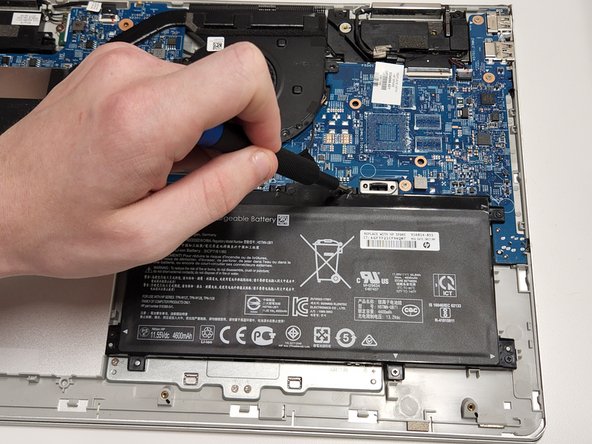
    • Remove the rubber feet to access the screws.

    • Using a Phillips #0 screwdriver, remove the four 7 mm screws.

    • Using a T5 Torx screwdriver, remove the three 5 mm screws.

  2. HP Envy x360 15m-bp111dx Touchpad Replacement: 手順 2、 3の画像 1 HP Envy x360 15m-bp111dx Touchpad Replacement: 手順 2、 3の画像 2 HP Envy x360 15m-bp111dx Touchpad Replacement: 手順 2、 3の画像 3
    • Insert opening picks or an opening tool inside the edge of the chassis to separate the back panel from the rest of the computer.

    • You may hear snapping as the clips are released while you work your way around the perimeter of the computer. This is normal.

    • Remove the back case.

  3. HP Envy x360 15m-bp111dx Touchpad Replacement, Battery: 手順 3、 2の画像 1 HP Envy x360 15m-bp111dx Touchpad Replacement, Battery: 手順 3、 2の画像 2
    • Use a Phillips screwdriver to remove the seven 4 mm screws securing the battery.

  4. HP Envy x360 15m-bp111dx Touchpad Replacement: 手順 4、 3の画像 1 HP Envy x360 15m-bp111dx Touchpad Replacement: 手順 4、 3の画像 2 HP Envy x360 15m-bp111dx Touchpad Replacement: 手順 4、 3の画像 3
    • Carefully lift the battery, and pull it towards you to remove it.

  5. HP Envy x360 15m-bp111dx Touchpad Replacement, Touchpad: 手順 5、 3の画像 1 HP Envy x360 15m-bp111dx Touchpad Replacement, Touchpad: 手順 5、 3の画像 2 HP Envy x360 15m-bp111dx Touchpad Replacement, Touchpad: 手順 5、 3の画像 3
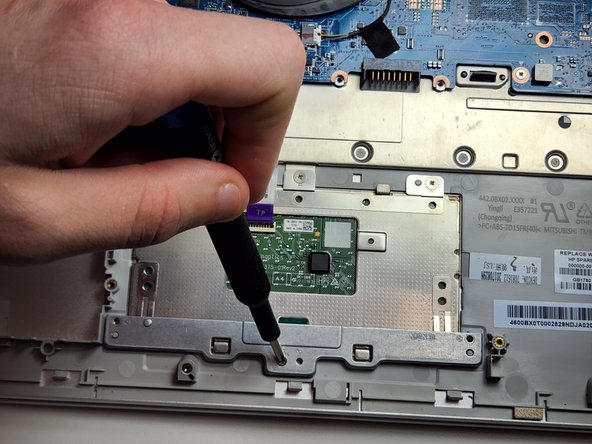
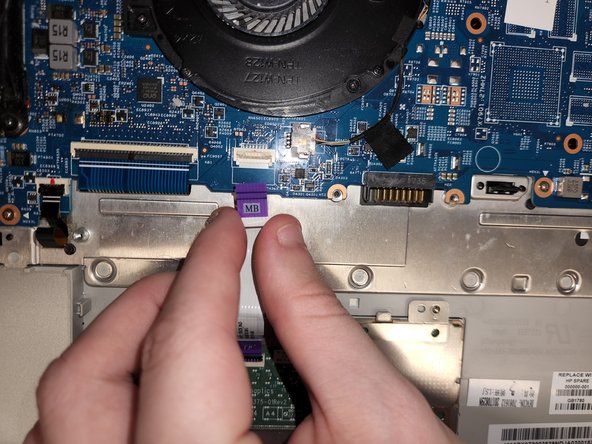
    • Use a Phillips screwdriver to remove the four 3.5 mm screws securing the bar on the touchpad.

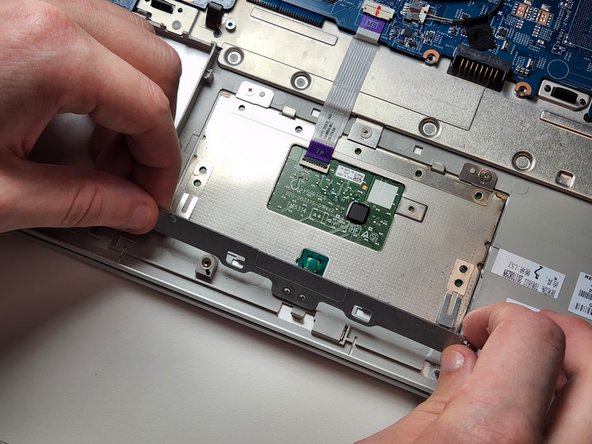
    • Remove the bar from the touchpad.

  6. HP Envy x360 15m-bp111dx Touchpad Replacement: 手順 6、 2の画像 1 HP Envy x360 15m-bp111dx Touchpad Replacement: 手順 6、 2の画像 2
    • Use a Phillips screwdriver to remove the three 2 mm screws securing the touchpad.

  7. HP Envy x360 15m-bp111dx Touchpad Replacement: 手順 7、 3の画像 1 HP Envy x360 15m-bp111dx Touchpad Replacement: 手順 7、 3の画像 2 HP Envy x360 15m-bp111dx Touchpad Replacement: 手順 7、 3の画像 3
    • Flip the lock open on the ZIF connector using the opening tool to detach the ribbon from the motherboard.

    • Gently remove the touchpad from the motherboard.

  8. HP Envy x360 15m-bp111dx Touchpad Replacement: 手順 8、 1の画像 1
    • The touchpad is now removed.

終わりに

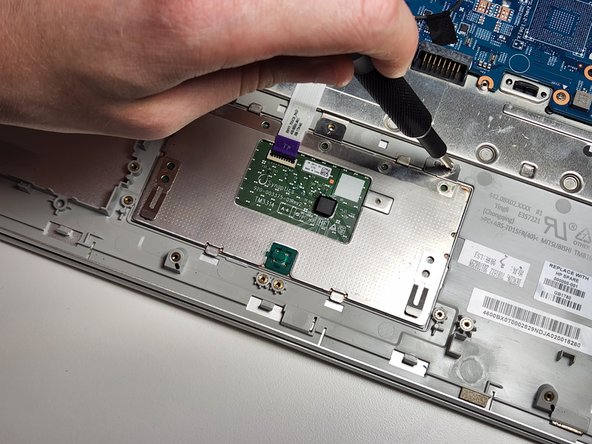
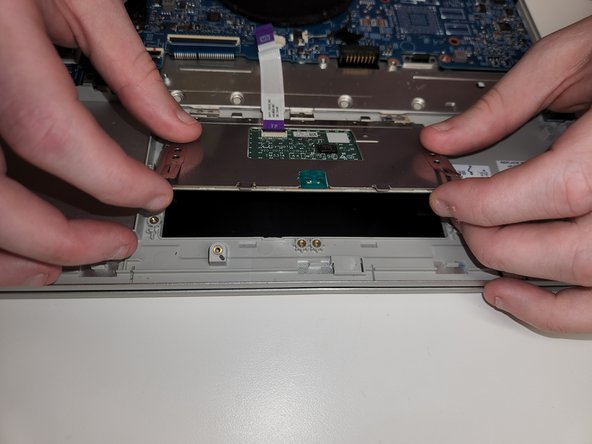
To reassemble your device, follow these instructions in reverse order.

作成者

5人の作成者と共同で作成されました。

Haley Holmes

メンバー登録日: 02/22/22

109 ポイント

1ガイドが承認済み

チーム

Clemson, Team 2-2, Hunter Spring 2022 Clemson, Team 2-2, Hunter Spring 2022人のメンバー

CLEM-HUNTER-S22S2G2

5 メンバー

6のガイドは作成済み

0 件のコメント

コメントを追加

統計データ:

過去 24時間: 1

過去 7 日: 1

過去 30 日: 4

今までの合計 226