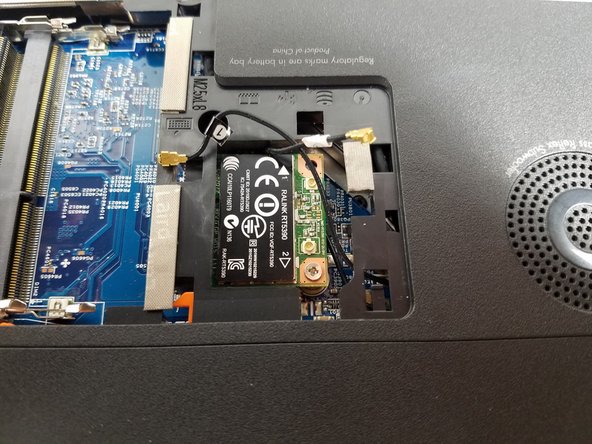
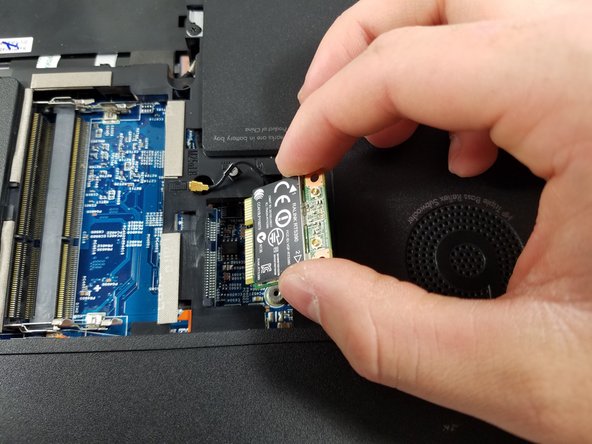
メインコンテンツにスキップ

HP Envy dv6-7363cl Wi-fi Card Replacement

必要な工具と部品

  1. HP Envy dv6-7363cl Wi-fi Card Replacement, Battery: 手順 1、 1の画像 1
    • Flip the device upside-down so that its bottom is facing up.

  2. HP Envy dv6-7363cl Wi-fi Card Replacement: 手順 2、 1の画像 1
    • Push the lever underneath the battery to the left.

  3. HP Envy dv6-7363cl Wi-fi Card Replacement: 手順 3、 2の画像 1 HP Envy dv6-7363cl Wi-fi Card Replacement: 手順 3、 2の画像 2
    • Lift the battery up out of its socket.

  4. HP Envy dv6-7363cl Wi-fi Card Replacement, Wi-Fi Card: 手順 4、 1の画像 1
    • After removing the battery, remove the circled screw.

  5. HP Envy dv6-7363cl Wi-fi Card Replacement: 手順 5、 1の画像 1
    • Remove the back cover.

  6. HP Envy dv6-7363cl Wi-fi Card Replacement: 手順 6、 1の画像 1
    • With the back cover removed, locate the Wi-Fi card which is positioned next to the Beats logo.

  7. HP Envy dv6-7363cl Wi-fi Card Replacement: 手順 7、 2の画像 1 HP Envy dv6-7363cl Wi-fi Card Replacement: 手順 7、 2の画像 2
    • Carefully remove gold-headed, black wires from Wi-Fi card with tweezers.

  8. HP Envy dv6-7363cl Wi-fi Card Replacement: 手順 8、 2の画像 1 HP Envy dv6-7363cl Wi-fi Card Replacement: 手順 8、 2の画像 2
    • After removing wires, remove circled screws from card.

    • Note: Laptop shown only has one screw holding in Wi-Fi card. Some models may have both.

  9. HP Envy dv6-7363cl Wi-fi Card Replacement: 手順 9、 2の画像 1 HP Envy dv6-7363cl Wi-fi Card Replacement: 手順 9、 2の画像 2
    • Wi-Fi card will raise out of device when screw is removed.

    • Gently pull card to the right to remove from device.

終わりに

To reassemble your device, follow these instructions in reverse order.

ある他の人がこのガイドを完成しました。

作成者

2人の作成者と共同で作成されました。

dylananthony

メンバー登録日: 10/20/16

564 ポイント

3のガイドは作成済み

チーム

UMass Dartmouth, Team S2-G5, Bernier Spring 2018 UMass Dartmouth, Team S2-G5, Bernier Spring 2018人のメンバー

UMASSD-BERNIER-S18S2G5

3 メンバー

4のガイドは作成済み

0 件のコメント

コメントを追加

統計データ:

過去 24時間: 0

過去 7 日: 2

過去 30 日: 5

今までの合計 354