メインコンテンツにスキップ

HP Envy Touchsmart m6-k125dx Motherboard Replacement

必要な工具と部品

  1. HP Envy Touchsmart m6-k125dx Motherboard Replacement, Back Panel: 手順 1、 2の画像 1 HP Envy Touchsmart m6-k125dx Motherboard Replacement, Back Panel: 手順 1、 2の画像 2
    • Turn the laptop over so that the bottom is facing up

    • Using the J0 screwdriver, unscrew all 12 M2.5x5.5 screws from the back panel.

  2. HP Envy Touchsmart m6-k125dx Motherboard Replacement: 手順 2、 1の画像 1
    • Carefully remove the back panel to reveal the inner components.

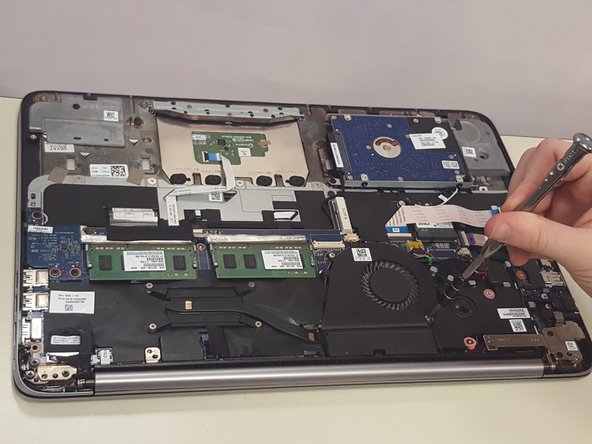
  3. HP Envy Touchsmart m6-k125dx Motherboard Replacement, Cooling Fan: 手順 3、 2の画像 1 HP Envy Touchsmart m6-k125dx Motherboard Replacement, Cooling Fan: 手順 3、 2の画像 2
    • Use the J0 screwdriver to remove the two M2.0x3.0 screws holding in the cooling fan

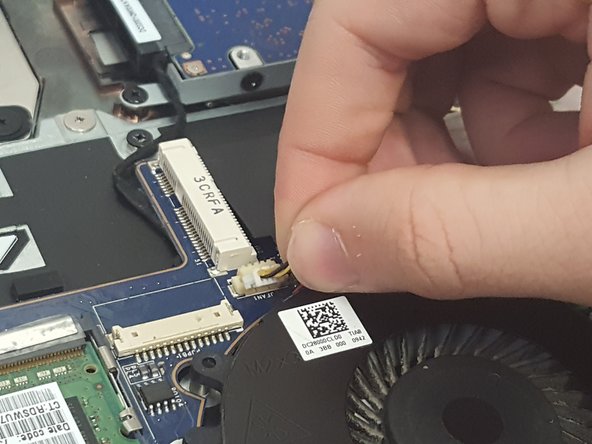
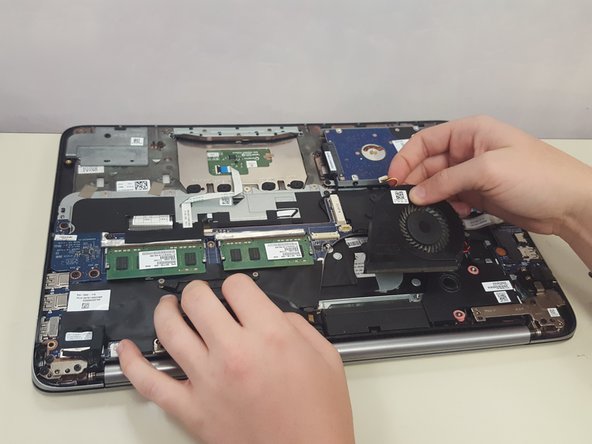
  4. HP Envy Touchsmart m6-k125dx Motherboard Replacement: 手順 4、 3の画像 1 HP Envy Touchsmart m6-k125dx Motherboard Replacement: 手順 4、 3の画像 2 HP Envy Touchsmart m6-k125dx Motherboard Replacement: 手順 4、 3の画像 3
    • Unplug the cord and carefully remove the cooling fan

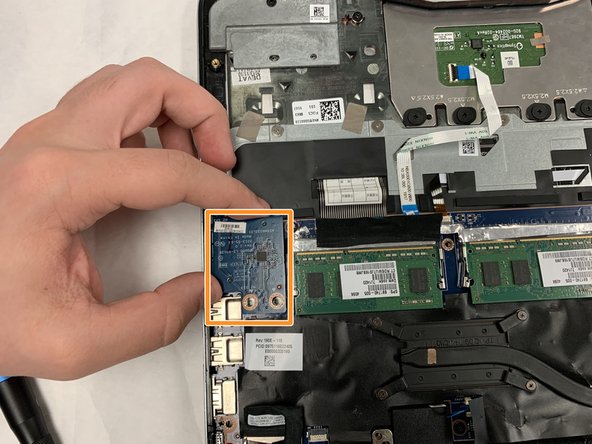
  5. HP Envy Touchsmart m6-k125dx Motherboard Replacement, Motherboard: 手順 5、 2の画像 1 HP Envy Touchsmart m6-k125dx Motherboard Replacement, Motherboard: 手順 5、 2の画像 2
    • Use the J1 screwdriver to remove the three M2.5x2.5 screws on the SD card reader.

    • Remove the SD card reader and set it aside.

  6. HP Envy Touchsmart m6-k125dx Motherboard Replacement: 手順 6、 3の画像 1 HP Envy Touchsmart m6-k125dx Motherboard Replacement: 手順 6、 3の画像 2 HP Envy Touchsmart m6-k125dx Motherboard Replacement: 手順 6、 3の画像 3
    この手順で使用する道具:
    Tweezers
    $4.99
    購入する
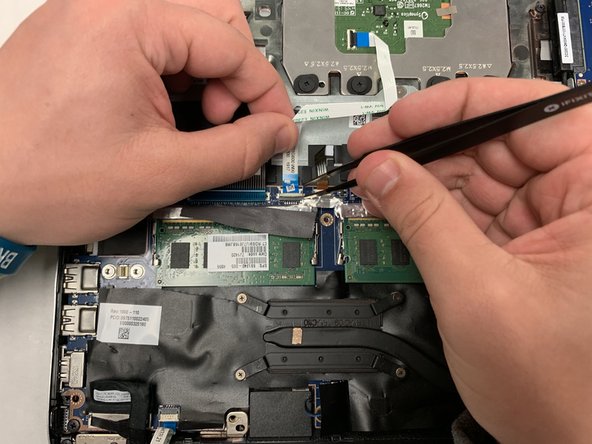
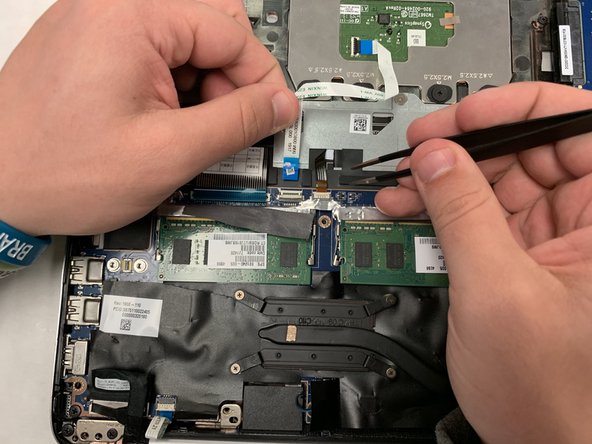
    • Disconnect the six ZIF connectors.

    • Use the tweezers to flip up the plastic retaining flap.

    • Pull the cable out horizontally.

  7. HP Envy Touchsmart m6-k125dx Motherboard Replacement: 手順 7、 2の画像 1 HP Envy Touchsmart m6-k125dx Motherboard Replacement: 手順 7、 2の画像 2
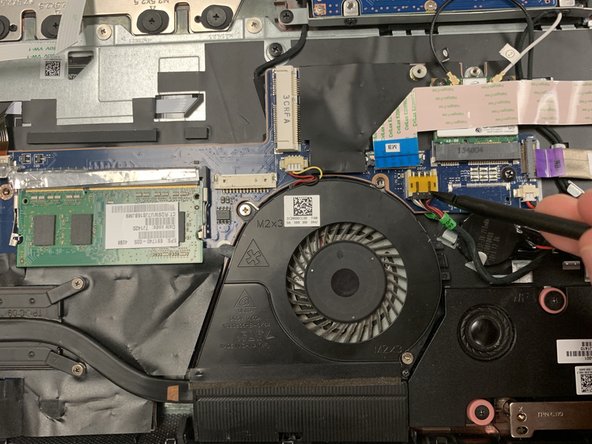
    • Disconnect the four remaining connectors.

    • Use a plastic opening tool or spudger if necessary to pry the connector apart.

  8. HP Envy Touchsmart m6-k125dx Motherboard Replacement: 手順 8、 2の画像 1 HP Envy Touchsmart m6-k125dx Motherboard Replacement: 手順 8、 2の画像 2
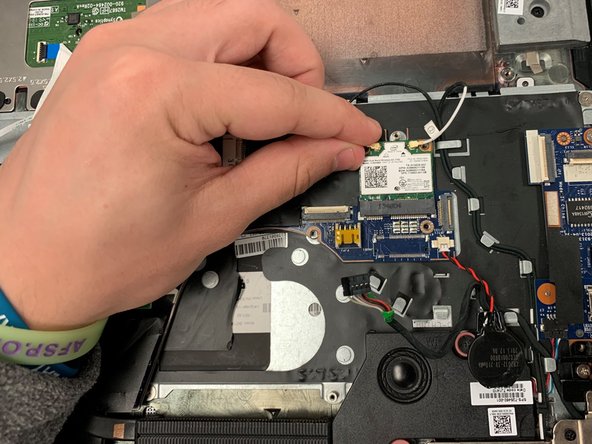
    • Use the J0 screwdriver to remove the two M2.5x2.5 screws on the wireless network card.

    • Slide the card horizontally toward the front of the laptop and out of its socket.

  9. HP Envy Touchsmart m6-k125dx Motherboard Replacement: 手順 9、 1の画像 1
    • Use the J1 screwdriver to remove the four M2.5x2.5 screws that secure the motherboard to the case.

    • Pull up on the right side of the motherboard, away from the USB ports, then slide out to the right.

終わりに

To reassemble your device, follow these instructions in reverse order.

作成者

3人の作成者と共同で作成されました。

Alan Orr

メンバー登録日: 04/06/19

139 ポイント

1ガイドが承認済み

チーム

IUPUI, Team S14-G14, Wilson Spring 2019 IUPUI, Team S14-G14, Wilson Spring 2019人のメンバー

IUPUI-WILSON-S19S14G14

4 メンバー

3のガイドは作成済み

0 件のコメント

コメントを追加

統計データ:

過去 24時間: 3

過去 7 日: 7

過去 30 日: 16

今までの合計 626