はじめに
The motherboard is a very delicate component of your printer and must be handled carefully. Additionally, following the steps in this guide will likely violate the warranty on your printer. Please proceed with caution. While following the steps in this guide, ensure your printer is grounded (plugged into a wall socket rated for 15A, 120V) to ensure that static discharge does not damage your printer after the replacement.
必要な工具と部品
-
-
Open the printer by pushing upwards on the plastic tabs located on the sides of the printer.
-
Remove the opening assist from its purchase by pushing it toward the front of the printer with a nylon spudger.
-
Remove the spring-loaded clip attached to the top of the printer by pushing it off of the hook.
-
-
-
Remove the last ten 12mm screws by placing the Torx 9 screwdriver in the screw slot and turning counterclockwise.
-
Remove the last two 12mm screws by placing the Torx 9 screwdriver in the screw slot and turning counterclockwise; the screen plate can now be separated from the printer by pushing out and to the right.
-
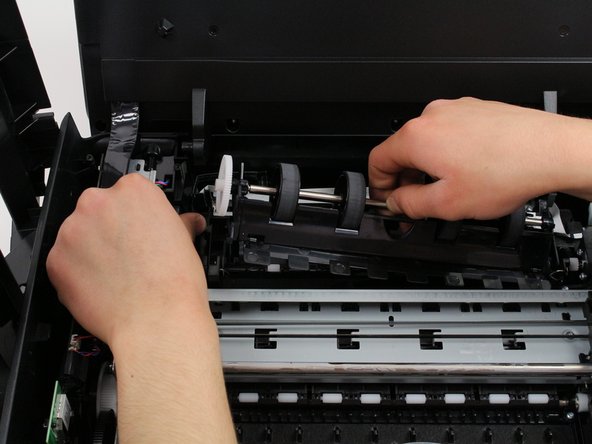
Take out the inner plastic frame (this piece is removeable after having removed the ten 12 mm screws outlined in the first bullet) by grasping the frame with both hands and carefully pulling the frame away from the printer body.
-
-
-
-
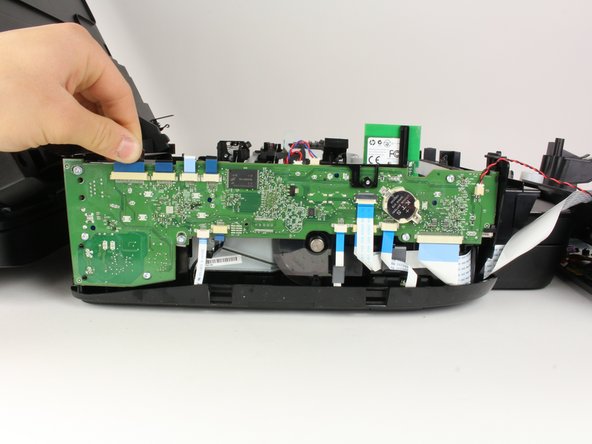
Start to remove the motherboard from the device by lifting the left hand side of the motherboard out from the printer shell with minimal force.
-
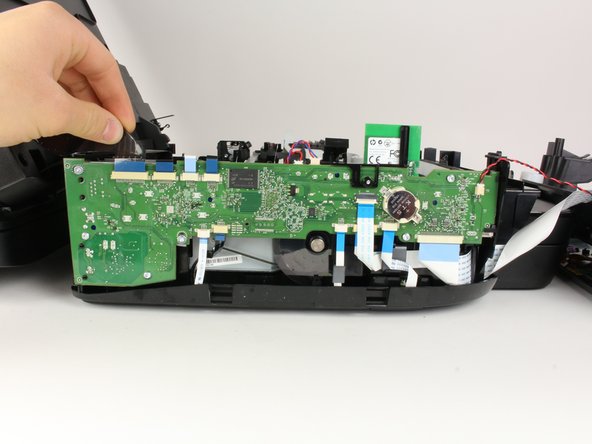
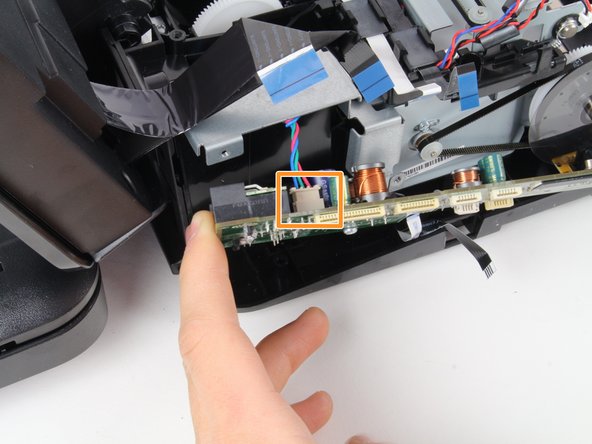
Push the clip's head away from the motherboard to release the right hand side of the motherboard from the printer shell.
-
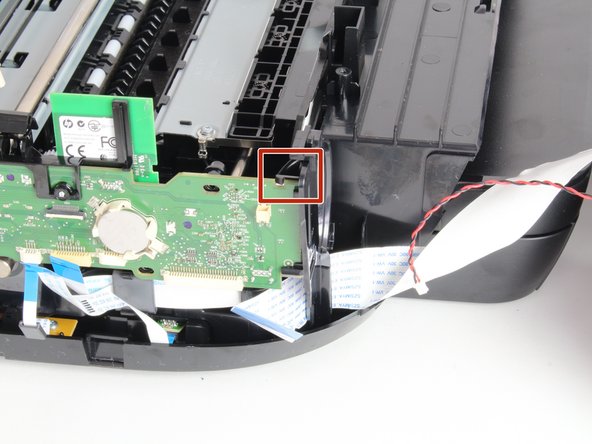
Remove the back connector by firmly grasping the tan portion of the connector adjacent to the motherboard and pulling in toward the printer to dislodge the motherboard.
-


To reassemble your device, follow these instructions in reverse order.
To reassemble your device, follow these instructions in reverse order.
ある他の人がこのガイドを完成しました。
チーム

Cal Poly, Team S1-G2, Livingston Winter 2018 Cal Poly, Team S1-G2, Livingston Winter 2018人のメンバー
CPSU-LIVINGSTON-W18S1G2
3 メンバー
10のガイドは作成済み
コメント 1 件
Replacing the HP Envy printer Motherboard is easier one compare to other printers. It helps me to resolve the HP envy printer motherboard issues. Thanks for your sharing.