メインコンテンツにスキップ

HP Envy 4-1105dx Motherboard Replacement

必要な工具と部品

  1. HP Envy 4-1105dx Motherboard Replacement, Battery: 手順 1、 1の画像 1
    • Power off the device before beginning disassembly. Disconnect all external devices.

    • Flip the device on its back.

  2. HP Envy 4-1105dx Motherboard Replacement: 手順 2、 1の画像 1
    • Unscrew and remove the one 7.5 mm Phillips-head screw using Phillips #1 screwdriver.

  3. HP Envy 4-1105dx Motherboard Replacement: 手順 3、 1の画像 1
    • Unscrew twelve 6.0 mm Phillips-head screws using Phillips #1 screwdriver.

  4. HP Envy 4-1105dx Motherboard Replacement: 手順 4、 1の画像 1
    • Use the plastic opening tool (which is short and has a thin end for prying open device parts) to pry open the back case of the device.

  5. HP Envy 4-1105dx Motherboard Replacement: 手順 5、 1の画像 1
    • Once the device is open, move the ribbon cable to the side.

  6. HP Envy 4-1105dx Motherboard Replacement: 手順 6、 1の画像 1
    • Use the flat end of a plastic spudger to disconnect the battery cable from its socket in the motherboard.

  7. HP Envy 4-1105dx Motherboard Replacement: 手順 7、 1の画像 1
    • Unscrew and remove the three 4.0 mm Phillips-head screws that hold the battery in place, using a Phillips #1 screwdriver.

  8. HP Envy 4-1105dx Motherboard Replacement: 手順 8、 1の画像 1
    • Lift the battery up and remove.

    • Removing the battery can dislodge the touchpad bracket. Place the battery carefully over the alignment pins.

  9. HP Envy 4-1105dx Motherboard Replacement, Hard Drive: 手順 9、 2の画像 1 HP Envy 4-1105dx Motherboard Replacement, Hard Drive: 手順 9、 2の画像 2
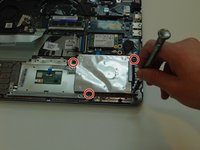
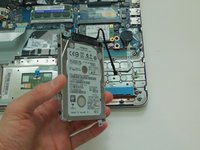
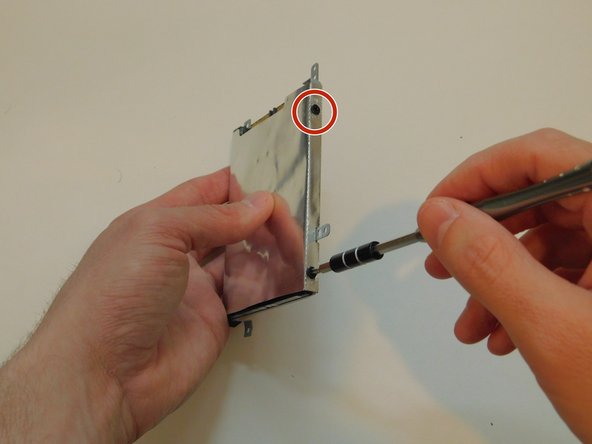
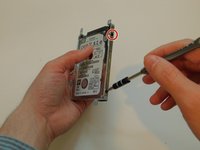
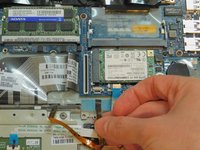
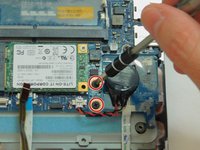
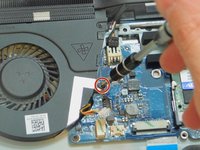
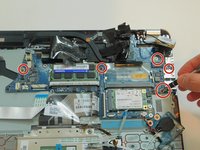
    • Remove the four 4.0 mm screws that hold down the hard drive case using a Philips #1 Screwdriver.

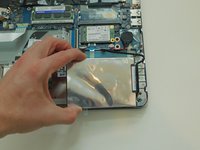
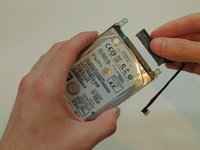
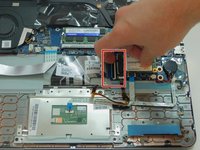
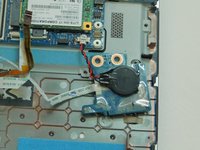
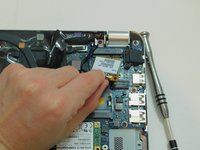
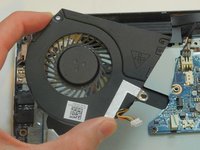
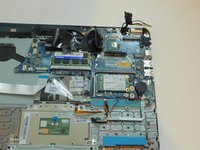
    • Move the hard drive case and hard drive so that you can easily reach the hard drive cable.

  10. HP Envy 4-1105dx Motherboard Replacement: 手順 10、 3の画像 1 HP Envy 4-1105dx Motherboard Replacement: 手順 10、 3の画像 2 HP Envy 4-1105dx Motherboard Replacement: 手順 10、 3の画像 3
    • Use the plastic spudger tool to loosen the hard drive SATA cable connection by pushing it away from the motherboard.

    • Once it is loose, pull the hard drive out of the socket.

    • Remove the hard drive from the device.

  11. HP Envy 4-1105dx Motherboard Replacement: 手順 11、 3の画像 1 HP Envy 4-1105dx Motherboard Replacement: 手順 11、 3の画像 2 HP Envy 4-1105dx Motherboard Replacement: 手順 11、 3の画像 3
    • Pull out the hard drive cable from the hard drive, and set it aside.

    • Remove the four 3.0 mm screws that attach the hard drive case to the hard drive using a Philips #1 Screwdriver. If the screwdriver is too big, try #0 sized screwdriver.

  12. HP Envy 4-1105dx Motherboard Replacement: 手順 12、 1の画像 1
    • Remove the hard drive from the hard drive case.

  13. HP Envy 4-1105dx Motherboard Replacement, Motherboard: 手順 13、 1の画像 1
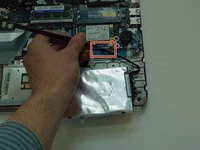
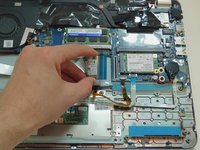
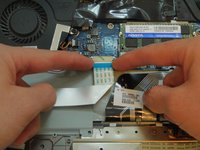
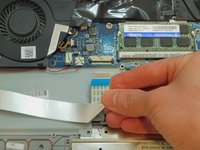
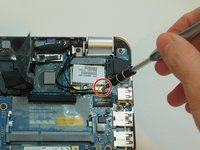
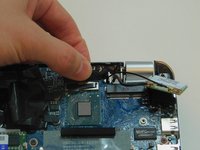
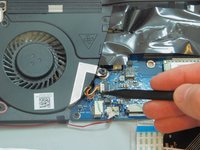
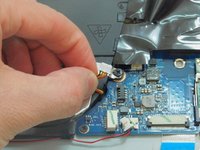
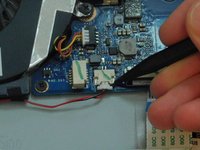
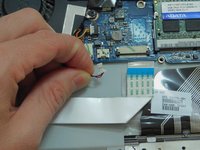
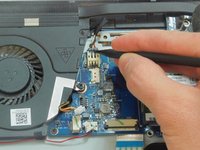
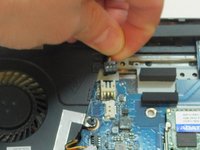
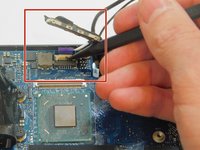
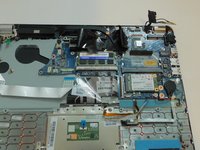
    • Prepare to disconnect the motherboard from any components you have not already removed, including the screen, touchpad, and keyboard.

    • In its original factory configuration, the motherboard is connected to 10 components.

    • Take notes or photographs to help you remember which connections went to which components.

    • Components do not have to be disconnected in the order shown.

    • Whenever possible, use plastic tools rather than metal ones, and don't touch connection points.

  14. HP Envy 4-1105dx Motherboard Replacement: 手順 14、 2の画像 1 HP Envy 4-1105dx Motherboard Replacement: 手順 14、 2の画像 2
    • Remove the ribbon cable running from under the motherboard by undoing the latch mechanism with your fingernail, and pulling out on the edge of the connector. (This is the keyboard cable).

  15. HP Envy 4-1105dx Motherboard Replacement: 手順 15、 2の画像 1 HP Envy 4-1105dx Motherboard Replacement: 手順 15、 2の画像 2
    • Flip up the black connector with your fingernail or using the plastic spudger.

    • Unplug the trackpad by pulling up on the touchpad board cable.

  16. HP Envy 4-1105dx Motherboard Replacement: 手順 16、 2の画像 1 HP Envy 4-1105dx Motherboard Replacement: 手順 16、 2の画像 2
    • Use the plastic spudger to gently pry out the small chip next to the touchpad.

    • The metal spudger has been used in the photograph, but the plastic spudger is a better choice because it is ESD safe.

  17. HP Envy 4-1105dx Motherboard Replacement: 手順 17、 2の画像 1 HP Envy 4-1105dx Motherboard Replacement: 手順 17、 2の画像 2
    • Disconnect the ribbon cable running to the ports on the right-hand side of the laptop.

  18. HP Envy 4-1105dx Motherboard Replacement: 手順 18、 3の画像 1 HP Envy 4-1105dx Motherboard Replacement: 手順 18、 3の画像 2 HP Envy 4-1105dx Motherboard Replacement: 手順 18、 3の画像 3
    • Disconnect the two small ribbon cables in front of the hard drive. The larger one is the touchpad board cable, and the smaller one is the keyboard light cable.

  19. HP Envy 4-1105dx Motherboard Replacement: 手順 19、 2の画像 1 HP Envy 4-1105dx Motherboard Replacement: 手順 19、 2の画像 2
    • Using a Phillips #0 screwdriver, remove the two 3.0 mm screws holding the speaker and motherboard to the plastic frame.

    • Move the speaker out of the way. It will stay attached to the motherboard. The cord connection cannot be disconnected.

  20. HP Envy 4-1105dx Motherboard Replacement: 手順 20、 1の画像 1
    • Pull back the black plastic covering over the northbridge.

  21. HP Envy 4-1105dx Motherboard Replacement: 手順 21、 2の画像 1 HP Envy 4-1105dx Motherboard Replacement: 手順 21、 2の画像 2
    • Using a Phillips #0 screwdriver, remove the 3.0 mm screw securing the wireless LAN adapter.

    • Detach the wireless LAN adapter from the board.

  22. HP Envy 4-1105dx Motherboard Replacement: 手順 22、 2の画像 1 HP Envy 4-1105dx Motherboard Replacement: 手順 22、 2の画像 2
    • Using your fingers, locate the display panel cable under the hinge and disconnect it.

  23. HP Envy 4-1105dx Motherboard Replacement: 手順 23、 2の画像 1 HP Envy 4-1105dx Motherboard Replacement: 手順 23、 2の画像 2
    • Disconnect the multicolored power connector for the USB/audio board by first probing it gently with a plastic spudger, then pulling it free.

  24. HP Envy 4-1105dx Motherboard Replacement: 手順 24、 2の画像 1 HP Envy 4-1105dx Motherboard Replacement: 手順 24、 2の画像 2
    • Disconnect the red and black power connector for the subwoofer by first probing it gently with a plastic spudger, then pulling it free with your fingernails.

  25. HP Envy 4-1105dx Motherboard Replacement: 手順 25、 3の画像 1 HP Envy 4-1105dx Motherboard Replacement: 手順 25、 3の画像 2 HP Envy 4-1105dx Motherboard Replacement: 手順 25、 3の画像 3
    • Peel back more of the black plastic to reveal the multicolored power connector for the cooling fan.

    • Disconnect the power connector for the cooling fan by probing it with the spudger, then pulling it free.

  26. HP Envy 4-1105dx Motherboard Replacement: 手順 26、 2の画像 1 HP Envy 4-1105dx Motherboard Replacement: 手順 26、 2の画像 2
    • Using a Phillips #0 screwdriver, remove the two 2.0 mm screws holding the right speaker in place.

    • Remove the right speaker.

  27. HP Envy 4-1105dx Motherboard Replacement: 手順 27、 2の画像 1 HP Envy 4-1105dx Motherboard Replacement: 手順 27、 2の画像 2
    • Using a Phillips #0 screwdriver, remove the 2.5 mm screw holding the cooling fan in place.

    • Lift out the cooling fan.

  28. HP Envy 4-1105dx Motherboard Replacement: 手順 28、 2の画像 1 HP Envy 4-1105dx Motherboard Replacement: 手順 28、 2の画像 2
    • Using the plastic spudger, remove the power button cable. This is the small, purple ribbon cable at the back of the motherboard.

  29. HP Envy 4-1105dx Motherboard Replacement: 手順 29、 3の画像 1 HP Envy 4-1105dx Motherboard Replacement: 手順 29、 3の画像 2 HP Envy 4-1105dx Motherboard Replacement: 手順 29、 3の画像 3
    • Using a Phillips #0 screwdriver, remove any remaining screws attaching the motherboard to the rest of the laptop.

  30. HP Envy 4-1105dx Motherboard Replacement: 手順 30、 2の画像 1 HP Envy 4-1105dx Motherboard Replacement: 手順 30、 2の画像 2
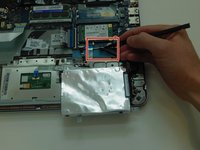
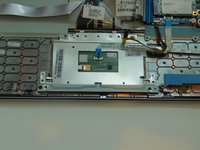
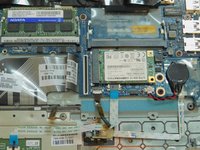
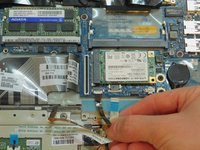
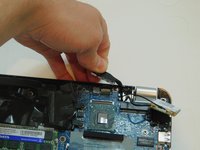
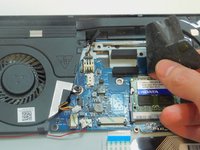
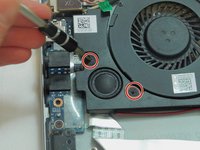
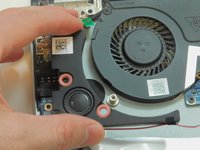
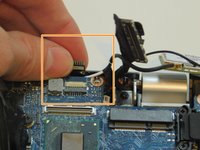
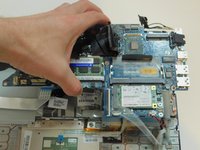
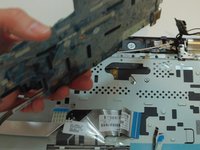
    • Gently lift out the motherboard and heat sink. If the motherboard has been fully disconnected from other components, it will lift free easily.

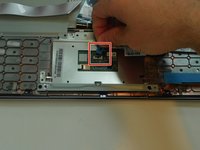
    • If the motherboard seems stuck, do not force it. Instead, return to previous steps to see if there is a connection or screw you have missed. Also check for tape, glue, or similar materials that may be attached to the motherboard.

    • Removing the motherboard before it has been fully disconnected may break not only the old motherboard, but connections or components that you will need to attach to the new motherboard. Do not rush this step.

終わりに

To reassemble your device, follow these instructions in reverse order.

作成者

3人の作成者と共同で作成されました。

Mace S

メンバー登録日: 05/18/17

155 ポイント

1ガイドが承認済み

チーム

Portland State University, Team S1-G4, Read Fall 2017 Portland State University, Team S1-G4, Read Fall 2017人のメンバー

PSUN-READ-F17S1G4

2 メンバー

3のガイドは作成済み

0 件のコメント

コメントを追加

統計データ:

過去 24時間: 0

過去 7 日: 2

過去 30 日: 3

今までの合計 809