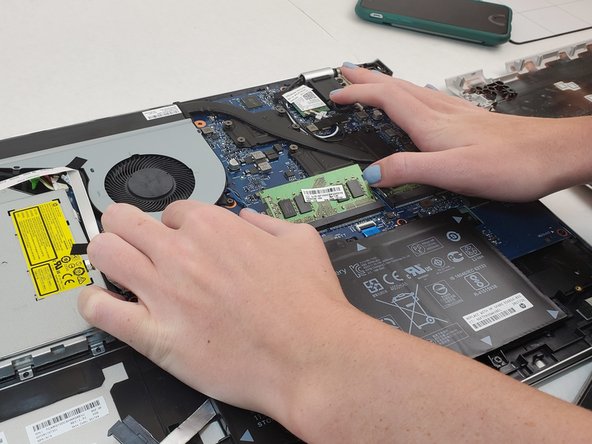
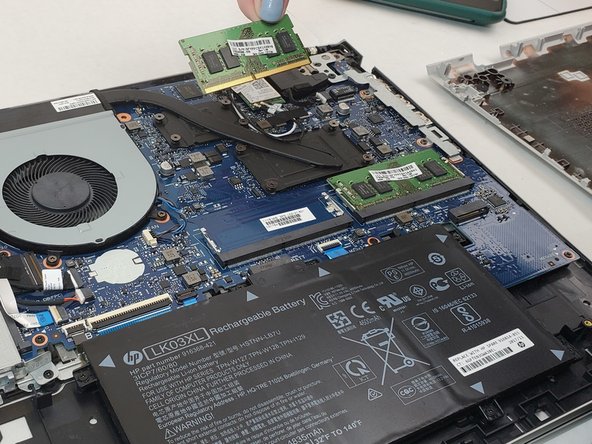
メインコンテンツにスキップ

HP Envy 17m-ae111dx RAM Replacement

必要な工具と部品

  1. HP Envy 17m-ae111dx RAM Replacement, Back Cover: 手順 1、 1の画像 1
    • Power off your laptop before beginning disassembly.

    • Place the laptop on its back.

  2. HP Envy 17m-ae111dx RAM Replacement: 手順 2、 3の画像 1 HP Envy 17m-ae111dx RAM Replacement: 手順 2、 3の画像 2 HP Envy 17m-ae111dx RAM Replacement: 手順 2、 3の画像 3
    • Remove the plastic covering to the Disk Reader.

    • Locate the small hole on the side of the disk reader. Insert the T5 Torx head screwdriver (or device of similar thickness) to release the covering for the disk reader.

    • If the button on the side is jammed, pry off the covering by using the iFixit Opening Tool.

  3. HP Envy 17m-ae111dx RAM Replacement: 手順 3、 3の画像 1 HP Envy 17m-ae111dx RAM Replacement: 手順 3、 3の画像 2 HP Envy 17m-ae111dx RAM Replacement: 手順 3、 3の画像 3
    • Unscrew all visible screws.

    • Use the T5 Torx Screwdriver and remove the four visible 6.5mm screws on the bottom of the laptop.

    • One 2.5mm screw, is located where the disk reader was once located. Use a Phillips #00 screwdriver to remove the single screw that connects the bottom cover of the laptop to the bottom frame.

  4. HP Envy 17m-ae111dx RAM Replacement: 手順 4、 2の画像 1 HP Envy 17m-ae111dx RAM Replacement: 手順 4、 2の画像 2
    • Pry the gripper completely off to expose the two screws.

    • Remove the 2.5mm screws under the gripper nearest to the hinge using the Phillips #00 screwdriver.

  5. HP Envy 17m-ae111dx RAM Replacement: 手順 5、 3の画像 1 HP Envy 17m-ae111dx RAM Replacement: 手順 5、 3の画像 2 HP Envy 17m-ae111dx RAM Replacement: 手順 5、 3の画像 3
    • Use the iFixit opening tool to pry off the back cover.

    • Ensure that you go all the way around the laptop with the tool to take it off.

  6. HP Envy 17m-ae111dx RAM Replacement, RAM: 手順 6、 2の画像 1 HP Envy 17m-ae111dx RAM Replacement, RAM: 手順 6、 2の画像 2
    • Lift the two tabs on the RAM stick outwards.

    • Do not pull back directly on the RAM stick.

  7. HP Envy 17m-ae111dx RAM Replacement: 手順 7、 2の画像 1 HP Envy 17m-ae111dx RAM Replacement: 手順 7、 2の画像 2
    • Gently lift the RAM out of the socket and remove it from the device.

    • Place the new RAM stick directly into the computer by aligning the connectors into the port and pushing down lightly. It should make an audible click.

終わりに

To reassemble your device, follow these instructions in reverse order.

ある他の人がこのガイドを完成しました。

作成者

1人の作成者と共同作成されました。

Kyle Fox

メンバー登録日: 09/16/19

293 ポイント

2のガイドは作成済み

チーム

0 件のコメント

コメントを追加

統計データ:

過去 24時間: 1

過去 7 日: 6

過去 30 日: 18

今までの合計 611