はじめに
Your keyboard is an important part of your computer, so when it's not working properly and responding the way you're used to, it's only natural that you want to replace it as soon as possible.
On a desktop computer, if the keyboard is completely unresponsive, it will definitely need to be replaced.
However, keyboard problems can physical or digital via drivers. Windows and your keyboard may have a complicated relationship, and if your keyboard has multimedia buttons to adjust the volume or open web pages, you probably have specific software installed called a keyboard driver. If the controller fails, the keyboard will not work properly - but this is not a sign that the keyboard needs to be replaced. Downloading a new keyboard driver from the manufacturer's website will solve most problems. You don't need a new keyboard for this, just new software.
必要な工具と部品
-
-
-
Flip the laptop over and locate the 2 tabs on the left or right sides. They will be slightly visible in the space between the keyboard and frame.
-
Using a plastic opening tool, push the tabs in while pulling up to disconnect the tabs from the keyboard frame.
-
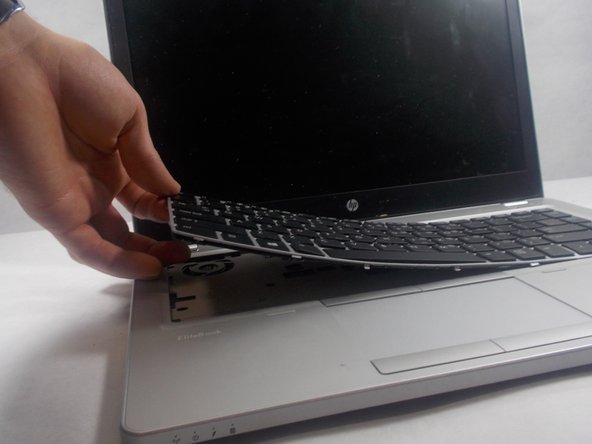
Once both tabs become unclipped, lift the keyboard up gently allowing it to slightly bend as the front and back tabs come out.
-


To reassemble your device, follow these instructions in reverse order.
To reassemble your device, follow these instructions in reverse order.
ある他の人がこのガイドを完成しました。
チーム

UMass Dartmouth, Team S1-G1, Valliere Fall 2018 UMass Dartmouth, Team S1-G1, Valliere Fall 2018人のメンバー
UMASSD-VALLIERE-F18S1G1
4 メンバー
19のガイドは作成済み