はじめに
When the optical drive goes bad, the only way to fix the problem usually is to replace it. However, before completely replacing the optical drive in the HP Elitebook 8460p, attempt to clean the optical drive with a special cleaning disk.
If the cleaning disk does not solve the problem with the optical drive, use this guide to quickly and easily change the optical drive so you can go back to listening to music and watching movies.
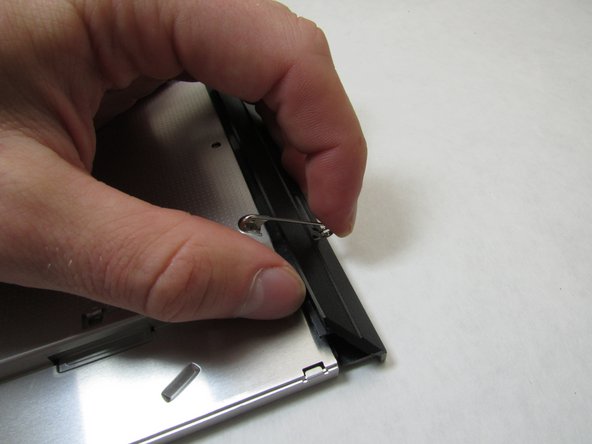
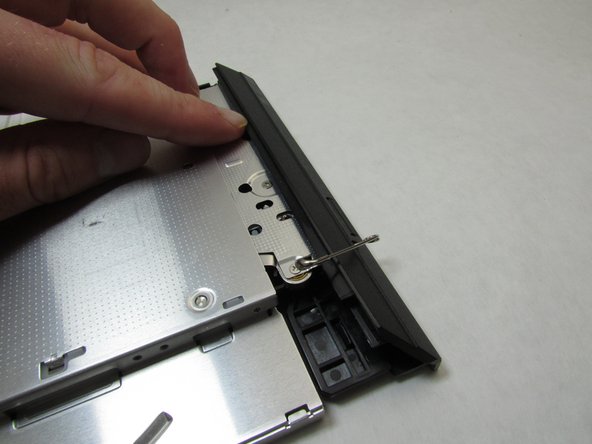
The hardest part of the guide is removing a plastic component and putting it on the new optical drive. Take your time and remove the plastic piece carefully to avoid breaking it. Additionally, before opening up the bottom panel to the laptop, make sure you are properly grounded with an ESD grounding strap to prevent electrostatic discharges from damaging other electrical components of the laptop.
To complete this guide, you will need a Phillips #0 screw driver, a T2 Torx screw driver, an ESD strap, and a thin pry tool.
必要な工具と部品
-
-
On the back of the computer, slide the left switch towards the outside of the laptop until you hear a click.
-
-
-
On the back of the laptop, slide the right switch toward the outside of the laptop until you hear a click.
-
-
-
-
Using a Phillips #0 bit, unscrew the one Phillips head screw.
-
Using a T2 Torx screwdriver, remove the two 8.0mm Torx screws.
-


To reassemble your device, follow these instructions in reverse order.
To reassemble your device, follow these instructions in reverse order.
2 の人々がこのガイドを完成させました。

チーム

Embry-Riddle Aeronautical University, Team S12-G1, Lamothe Fall 2019 Embry-Riddle Aeronautical University, Team S12-G1, Lamothe Fall 2019人のメンバー
ERAU-LAMOTHE-F19S12G1
4 メンバー
10のガイドは作成済み