はじめに
This guide will provide guidance on how to replace the display on your HP EliteBook x360 830 G7. Screens are vital for the user operation of your laptop, as it is an essential output in order for a user to see what their computer is doing and/or what they are doing. Water, cracks, and drops are all ways that your screen can become damaged.
Before you begin, remove any cases or screen protectors, disconnect your computer from it's charger (if connected), and then power off your device.
必要な工具と部品
-
-
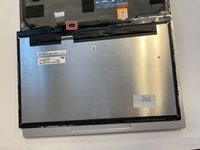
Use an opening tool to remove the display from the laptop case. Place it in the area that you see the most give.
-
-
-
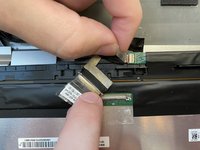
With the screen removed, locate the pair of wires hidden underneath the two pieces of tape.
-
-
-
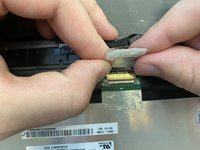
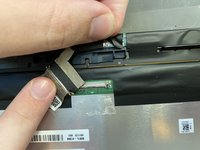
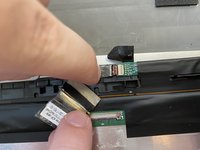
Use a plastic opening tool or nylon spudger to lift the metal digitizer-connector bracket.
-
-
-
-
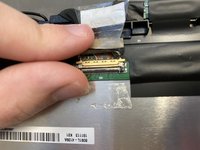
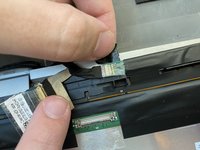
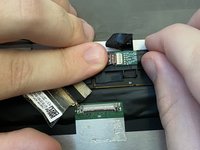
Now that the bracket is removed, pull the golden connector away from the silver base.
-
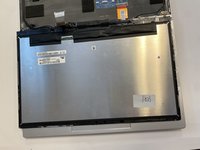
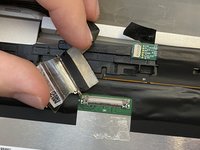
Now, the back of the display should look like this.
-
-
-
The next piece of tape that needs to be peeled, but not removed, is highlighted by the red rectangle.
-
-
-
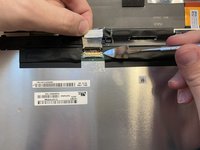
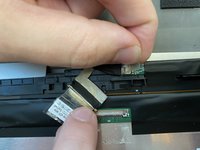
Peel, but do not remove entirely, the clear piece of tape that was underneath the black tape.
-
-
-
Pull the small, bronze "Brighton" ribbon cable connector from the tan connection base.
-
-
-
If you can move your display's housing away from the computer, then you have successfully detached your display and can replace it.
-


To reassemble your device, follow these instructions in reverse order.
To reassemble your device, follow these instructions in reverse order.
2 の人々がこのガイドを完成させました。
チーム

University of Alabama, Team 2-1, Bedsole Spring 2022 University of Alabama, Team 2-1, Bedsole Spring 2022人のメンバー
UA-BEDSOLE-S22S2G1
4 メンバー
5のガイドは作成済み