はじめに
The Wifi card can be one of the most important components of your computer. This is what connects the computer to the wireless internet by means of communicating through the router. If in range, they are able to connect to wireless internet if it's not password protected. If it doesn't work, the computer is rendered obsolete. If your computer can't connect to the internet or has trouble with the upload/download speed and you are wishing to replace or upgrade, you have come to the right place!
必要な工具と部品
-
-
Use a Phillips #1 screwdriver to undo the five screws. The top three screws are 10 mm and the two side screws are 7 mm.
-
Unscrew the bottom three screws using the same screwdriver.
-
-
-
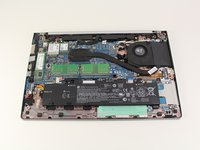
Turn computer so that the hinged side is facing up.
-
Use the plastic opening tool to pry open the back plate.
-
Drag the plastic opening tool along the edge from left to right and use a second opening tool to pry open the top right corner.
-
Repeat the 3rd step for the other side.
-
Repeat on Left and Right sides of the system. There are two points in the middle (on the left and right sides of the center screw) that will release with slight lifting pressure.
-
-
-
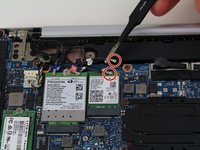
この手順で使用する道具:Tweezers$4.99
-
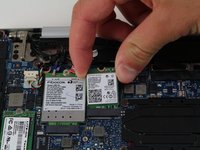
Using either the spudger, tweezers or your fingers, remove the wire connectors from the WiFi card by pulling up.
-


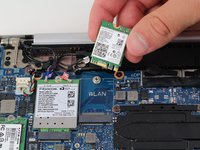
To reassemble your device, follow these instructions in reverse order. Make sure to handle the component with extreme care, as it is delicate and has no protection.
To reassemble your device, follow these instructions in reverse order. Make sure to handle the component with extreme care, as it is delicate and has no protection.
ある他の人がこのガイドを完成しました。
チーム

Cal Poly, Team S25-G13, Maness Spring 2018 Cal Poly, Team S25-G13, Maness Spring 2018人のメンバー
CPSU-MANESS-S18S25G13
4 メンバー
18のガイドは作成済み