メインコンテンツにスキップ

HP Elite X2 1013 G3 Fingerprint Scanner Replacement

必要な工具と部品

  1. HP Elite X2 1013 G3 Fingerprint Scanner Replacement, Screen: 手順 1、 1の画像 1
    • Flip the device over so the base is facing the ceiling.

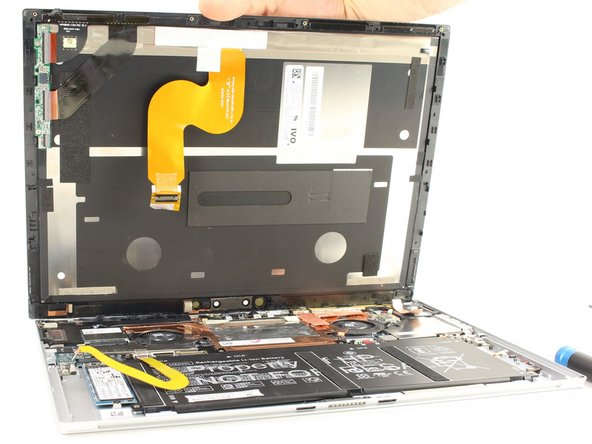
    • Lift up the tablet stand.

    • Remove the four 2 mm screws from the tablet using a T5 Torx screwdriver.

  2. HP Elite X2 1013 G3 Fingerprint Scanner Replacement: 手順 2、 2の画像 1 HP Elite X2 1013 G3 Fingerprint Scanner Replacement: 手順 2、 2の画像 2
    • Flip the tablet over with the screen facing upwards.

    • Place the suction handle in the center of the screen and slowly lift off the screen until it is at a 30 degree angle, starting by gently prying up the bottom.

    • Do not pull the screen beyond a 30 degree angle. Additional internal components must be disconnected first.

  3. HP Elite X2 1013 G3 Fingerprint Scanner Replacement: 手順 3、 2の画像 1 HP Elite X2 1013 G3 Fingerprint Scanner Replacement: 手順 3、 2の画像 2
    • With the screen lifted at a 30 degree angle, gently disconnect the yellow ribbon cable at the end connected to the screen.

    • Gently disconnect the orange ribbon cable at the end connected to the bottom plate.

  4. HP Elite X2 1013 G3 Fingerprint Scanner Replacement: 手順 4、 2の画像 1 HP Elite X2 1013 G3 Fingerprint Scanner Replacement: 手順 4、 2の画像 2
    • Remove the screen from the tablet.

  5. HP Elite X2 1013 G3 Fingerprint Scanner Replacement, Battery: 手順 5、 1の画像 1
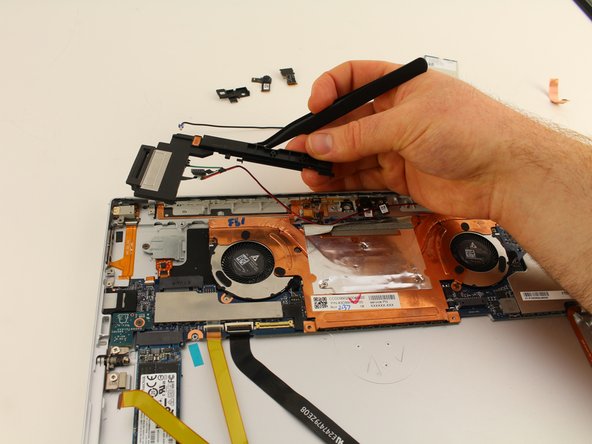
    • Use the Phillips #00 screwdriver to remove the six 2 mm screws.

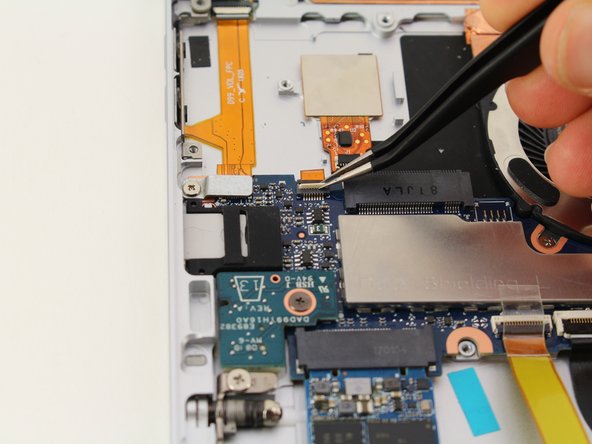
    • Gently disconnect the two connectors.

  6. HP Elite X2 1013 G3 Fingerprint Scanner Replacement: 手順 6、 1の画像 1
    • Lift the battery out of the housing.

  7. HP Elite X2 1013 G3 Fingerprint Scanner Replacement, Fingerprint Scanner: 手順 7、 1の画像 1
    • Disconnect the connector from the motherboard with your fingers.

    • The screwdriver is only used as a pointing device. Never attempt to use a screwdriver to pry components apart.

  8. HP Elite X2 1013 G3 Fingerprint Scanner Replacement: 手順 8、 1の画像 1
    • Remove the two speaker/antenna module mounting 2mm screws using a Phillips #00 Screwdriver.

  9. HP Elite X2 1013 G3 Fingerprint Scanner Replacement: 手順 9、 2の画像 1 HP Elite X2 1013 G3 Fingerprint Scanner Replacement: 手順 9、 2の画像 2
    • Use a spudger to gently pry the left black plastic speaker/antenna module off of the frame as pictured. Start by lifting up the right side of the module, then slowly work your way down the module towards the right.

    • The slight cracking sound you will hear is the sounds of plastic clasps.

    • We removed other peripherals from the frame so we could move the speaker/antenna module completely out of the way for photographing. You should not have to do this to replace just the fingerprint scanner.

  10. HP Elite X2 1013 G3 Fingerprint Scanner Replacement: 手順 10、 2の画像 1 HP Elite X2 1013 G3 Fingerprint Scanner Replacement: 手順 10、 2の画像 2
    • Remove the 2mm bracket mounting screw from the frame using a Phillips #00 Screwdriver.

    • Lift up the bracket and set aside.

  11. HP Elite X2 1013 G3 Fingerprint Scanner Replacement: 手順 11、 3の画像 1 HP Elite X2 1013 G3 Fingerprint Scanner Replacement: 手順 11、 3の画像 2 HP Elite X2 1013 G3 Fingerprint Scanner Replacement: 手順 11、 3の画像 3
    • Open the ribbon cable clamp and pull the cable out.

    • You may require tweezers to slide the ribbon cable out of the clamp.

    • Lift out the fingerprint scanner.

終わりに

To reassemble your device, follow these instructions in reverse order.

作成者

4人の作成者と共同で作成されました。

Hunter Baird-Wise

メンバー登録日: 04/18/19

447 ポイント

2のガイドは作成済み

チーム

Cal Poly, Team S9-G12, Maness Spring 2019 Cal Poly, Team S9-G12, Maness Spring 2019人のメンバー

CPSU-MANESS-S19S9G12

4 メンバー

5のガイドは作成済み

0 件のコメント

コメントを追加

統計データ:

過去 24時間: 1

過去 7 日: 3

過去 30 日: 14

今までの合計 806