メインコンテンツにスキップ

HP Deskjet 1055 Scanner Glass Pane Replacement

必要な工具と部品

  1. HP Deskjet 1055 Scanner Glass Pane Replacement, Scanner Glass Pane: 手順 1、 1の画像 1
    • Take all paper out of the paper tray. Unplug the printer.

    • Remove the plastic printer-control panel on the top left.

    • Then, forcefully lift up the bottom of the panel while applying downward pressure with your thumb-as shown.

  2. HP Deskjet 1055 Scanner Glass Pane Replacement: 手順 2、 2の画像 1 HP Deskjet 1055 Scanner Glass Pane Replacement: 手順 2、 2の画像 2
    • With your other hand, slide the top of the panel towards the back of the printer.

    • Do not rip the white cable that connects the panel with the main body of the printer.

    • Disconnect the ribbon by pinching the blue tab and pulling away from the green circuit board.

    • Lift the panel free and set to the side.

  3. HP Deskjet 1055 Scanner Glass Pane Replacement: 手順 3、 1の画像 1
    • Place the plastic opening tool between the plastic cover and the mount on the printer.

    • Pry the plastic cover towards the center of the printer.

    • Pull up on the cover to remove it from the printer-as shown.

    • Repeat the process on the other side.

  4. HP Deskjet 1055 Scanner Glass Pane Replacement: 手順 4、 1の画像 1
    • To remove the glass panel, take out the four 14 mm (1/2 inch) screws with a T10 Torx screwdriver.

    • Don't lift the glass panel completely off because there are cables plugged into the underside.

  5. HP Deskjet 1055 Scanner Glass Pane Replacement: 手順 5、 3の画像 1 HP Deskjet 1055 Scanner Glass Pane Replacement: 手順 5、 3の画像 2 HP Deskjet 1055 Scanner Glass Pane Replacement: 手順 5、 3の画像 3
    • Disconnect the white cables from the green motherboard by pinching the cable where it connects to the green motherboard. Pull up, lightly.

    • Set the lower part of the printer aside.

  6. HP Deskjet 1055 Scanner Glass Pane Replacement: 手順 6、 2の画像 1 HP Deskjet 1055 Scanner Glass Pane Replacement: 手順 6、 2の画像 2
    • Place the glass panel, face down, on a smooth surface.

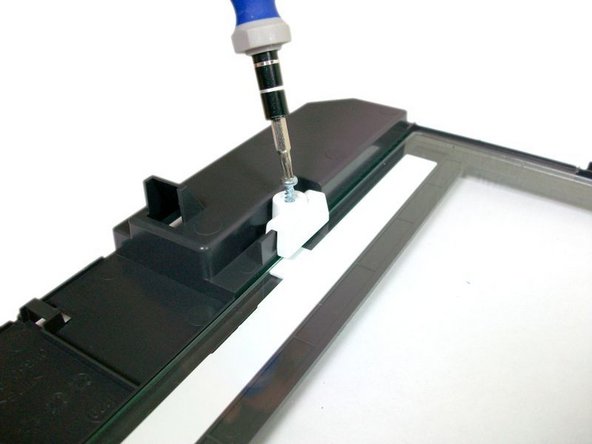
    • Remove the 14 mm (1/2 in.) screw from the white plastic tab on the side of the panel with a T10 Torx screwdriver.

  7. HP Deskjet 1055 Scanner Glass Pane Replacement: 手順 7、 3の画像 1 HP Deskjet 1055 Scanner Glass Pane Replacement: 手順 7、 3の画像 2 HP Deskjet 1055 Scanner Glass Pane Replacement: 手順 7、 3の画像 3
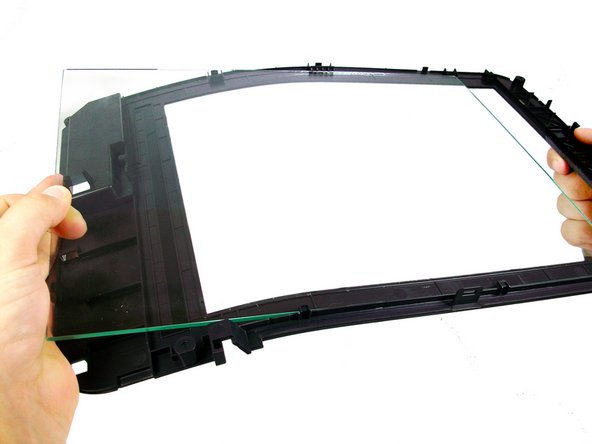
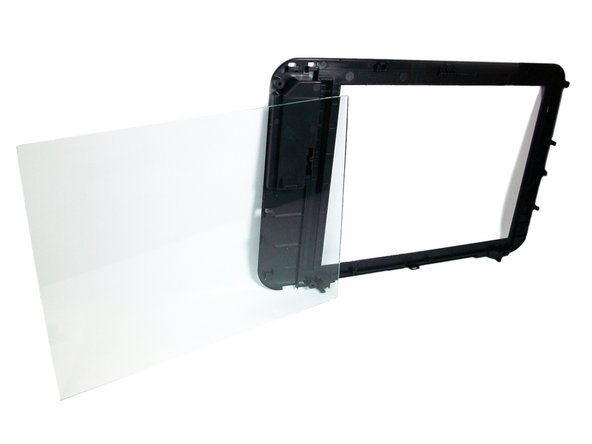
    • Remove the glass pane by carefully bending the plastic frame down from the side and sliding the glass pane out from the side.

終わりに

To reassemble your device, follow these instructions in reverse order.

ある他の人がこのガイドを完成しました。

作成者

8人の作成者と共同で作成されました。

Samuel Isbell

メンバー登録日: 10/09/12

10 ポイント

1ガイドが承認済み

チーム

Cal Poly, Team 9-18, Amido Fall 2012 Cal Poly, Team 9-18, Amido Fall 2012人のメンバー

CPSU-AMIDO-F12S9G18

4 メンバー

10のガイドは作成済み

0 件のコメント

コメントを追加

統計データ:

過去 24時間: 0

過去 7 日: 6

過去 30 日: 26

今までの合計 3,829