メインコンテンツにスキップ

HP DS0011 DX Battery and M2 Replacement

必要な工具と部品

  1. HP DS0011 DX Battery and M2 Replacement, Shut Down Laptop: 手順 1、 1の画像 1
    • Firstly, shut down the laptop so that the hard drive is not damaged while removing and replacing the m.2. After doing this, set laptop down on its back.

  2. HP DS0011 DX Battery and M2 Replacement, Remove Back Cover Screws: 手順 2、 2の画像 1 HP DS0011 DX Battery and M2 Replacement, Remove Back Cover Screws: 手順 2、 2の画像 2
    • Remove the screws on the back cover using a Phillips head screwdriver.

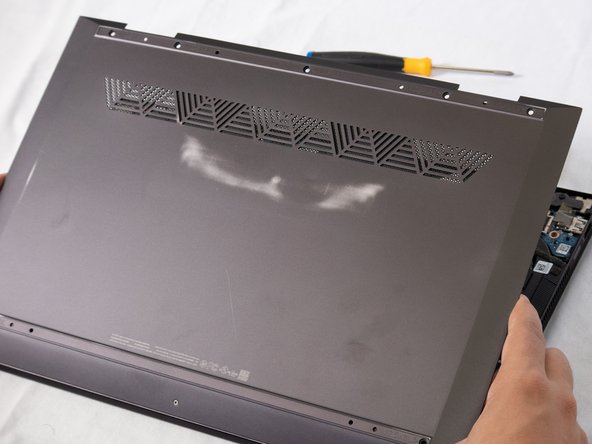
  3. HP DS0011 DX Battery and M2 Replacement, Remove Back Cover: 手順 3、 2の画像 1 HP DS0011 DX Battery and M2 Replacement, Remove Back Cover: 手順 3、 2の画像 2
    • Approach the back cover from the corners and pry it off with a flathead so that the m.2 is exposed.

  4. HP DS0011 DX Battery and M2 Replacement, Remove screws from m.2.: 手順 4、 1の画像 1
    • Remove the screws from the m.2 so that it can be removed. Adjust Phillips head accordingly.

  5. HP DS0011 DX Battery and M2 Replacement, Unplug m.2.: 手順 5、 1の画像 1
    • Unplug the m.2 from the laptop and remove it. Remove gently to ensure other parts of the laptop are not damaged.

  6. HP DS0011 DX Battery and M2 Replacement, Replace With New m.2.: 手順 6、 1の画像 1
    • Replace the old m.2 with the new one. Plug in the new m.2 to the m.2 port and screw in tightly.

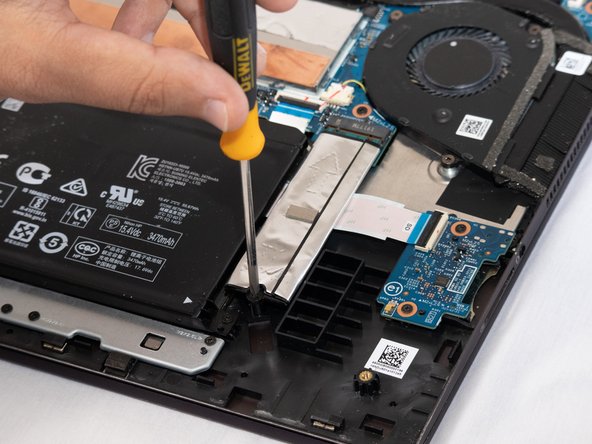
  7. HP DS0011 DX Battery and M2 Replacement, Unscrew Battery: 手順 7、 1の画像 1
    • Adjust Phillips head screw-driver and unscrew the screws for the battery.

  8. HP DS0011 DX Battery and M2 Replacement, Remove Battery: 手順 8、 1の画像 1
    • Take out the battery by lifting up and pulling from the port.

  9. HP DS0011 DX Battery and M2 Replacement, Replace With New Battery: 手順 9、 2の画像 1 HP DS0011 DX Battery and M2 Replacement, Replace With New Battery: 手順 9、 2の画像 2
    • Replace the old battery with the new one. Plug battery into port and screw the screws.

  10. HP DS0011 DX Battery and M2 Replacement, Put Back Cover Back On: 手順 10、 2の画像 1 HP DS0011 DX Battery and M2 Replacement, Put Back Cover Back On: 手順 10、 2の画像 2
    • After completely screwing in the battery and m2, put the back cover on by putting it on the magnetic contact and pushing it down into the clips.

  11. HP DS0011 DX Battery and M2 Replacement, Screw Back Cover back: 手順 11、 1の画像 1
    • Screw the back cover back on to the laptop.

終わりに

Once completed it may take a little bit for the computer to reboot. If the computer does not restart, contact a speacialist.

作成者

2人の作成者と共同で作成されました。

Zak Boyadjian

メンバー登録日: 11/23/21

193 ポイント

1ガイドが承認済み

0 件のコメント

コメントを追加

統計データ:

過去 24時間: 0

過去 7 日: 0

過去 30 日: 9

今までの合計 207