メインコンテンツにスキップ

HP Chromebook 11a-nb0013dx Motherboard Replacement

必要な工具と部品

  1. HP Chromebook 11a-nb0013dx Motherboard Replacement, Motherboard: 手順 1、 2の画像 1 HP Chromebook 11a-nb0013dx Motherboard Replacement, Motherboard: 手順 1、 2の画像 2
    • Position the Chromebook with the bottom facing up.

    • Locate the 8 screws on the back of the Chromebook.

    • Next, remove the 8 (8mm) screws using the phillips screw driver with the #0 bit.

  2. HP Chromebook 11a-nb0013dx Motherboard Replacement: 手順 2、 2の画像 1 HP Chromebook 11a-nb0013dx Motherboard Replacement: 手順 2、 2の画像 2
    • Locate the 4 rubber feet on the bottom of the laptop.

    • Pry them off with the metal spudger or an iFixit opening pick.

  3. HP Chromebook 11a-nb0013dx Motherboard Replacement: 手順 3、 1の画像 1
    • Flip over and open the Chromebook.

    • Locate the seem surrounding the keyboard and track pad.

    • Use an iFixit opening pick to pry the keyboard from the laptop

  4. HP Chromebook 11a-nb0013dx Motherboard Replacement: 手順 4、 3の画像 1 HP Chromebook 11a-nb0013dx Motherboard Replacement: 手順 4、 3の画像 2 HP Chromebook 11a-nb0013dx Motherboard Replacement: 手順 4、 3の画像 3
    • Gentally lift up the keyboard and locate the two ribbons attatched to the motherboard.

    • Use the IFixit Opening Tool to lift the two tabs located on the zero insertion force (ZIF) connectors.

    • To do this, use the tip of the IFixit Opening Tool to flip up the small locking flap and gently pull the ribbon out.

    • Then, fully remove the keyboard and set aside.

  5. HP Chromebook 11a-nb0013dx Motherboard Replacement: 手順 5、 2の画像 1 HP Chromebook 11a-nb0013dx Motherboard Replacement: 手順 5、 2の画像 2
    この手順で使用する道具:
    Tweezers
    $4.99
    購入する
    • Locate the bundled cable connector connecting the battery to the motherboard.

    • Use the precision tweezers to peel back the black tape covering the bundled cable connector.

    • Next, use the precision tweezers to grab the edge of the connector and slowly pull the cable towards you.

  6. HP Chromebook 11a-nb0013dx Motherboard Replacement: 手順 6、 3の画像 1 HP Chromebook 11a-nb0013dx Motherboard Replacement: 手順 6、 3の画像 2 HP Chromebook 11a-nb0013dx Motherboard Replacement: 手順 6、 3の画像 3
    • Locate the bundled cable connector connecting the speakers to the motherboard.

    • Using the precision tweezers, peel back the plastic that is covering the bundled cable connector.

    • Then, use the precision tweezers to grab the edges of the bundled cable connector and remove by pulling towards the battery.

  7. HP Chromebook 11a-nb0013dx Motherboard Replacement: 手順 7、 2の画像 1 HP Chromebook 11a-nb0013dx Motherboard Replacement: 手順 7、 2の画像 2
    • Locate the LDC cable connecting the screen to the motherboard.

    • Using the precision tweezers, peel back the plastic covering the LDC cable connector.

    • Then, use the precision tweezers to gently pull back the LDC cable towards the screen.

  8. HP Chromebook 11a-nb0013dx Motherboard Replacement: 手順 8、 3の画像 1 HP Chromebook 11a-nb0013dx Motherboard Replacement: 手順 8、 3の画像 2 HP Chromebook 11a-nb0013dx Motherboard Replacement: 手順 8、 3の画像 3
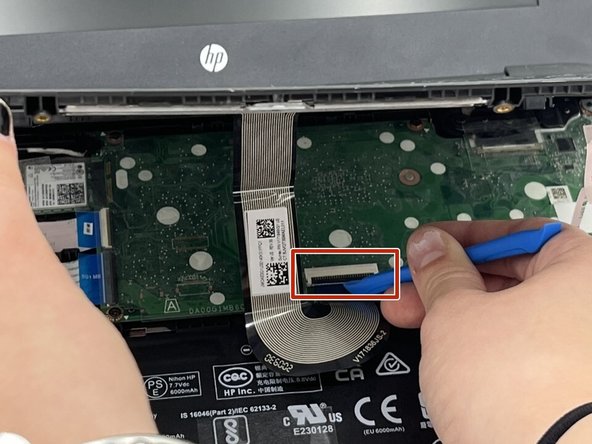
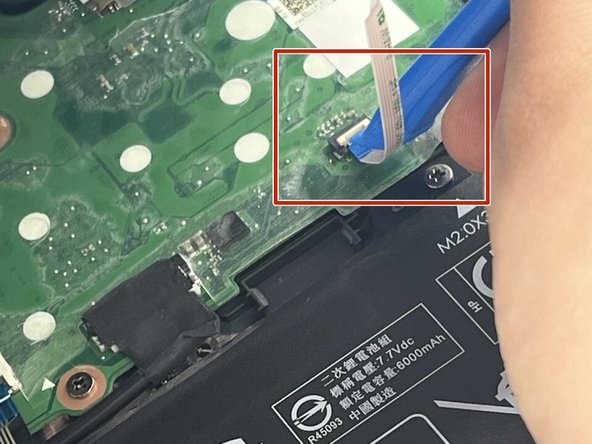
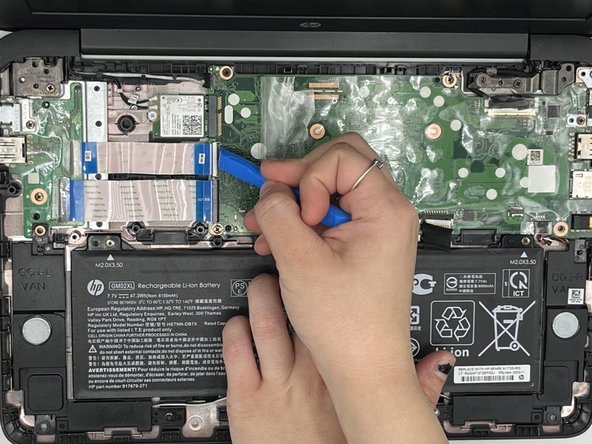
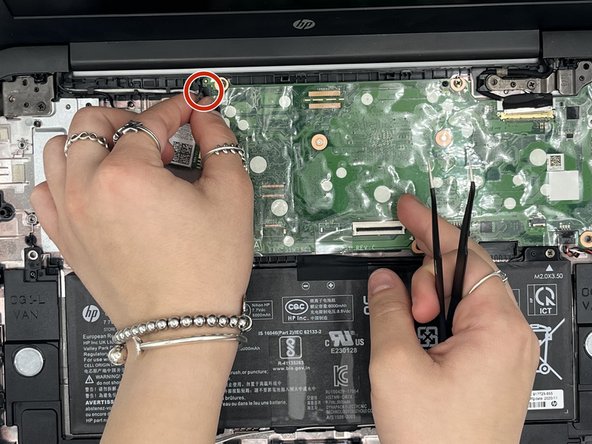
    • Locate the ribbons and their ZIF connectors connecting the motherboard and the daughterboard.

    • Use the precision tweezers to peel back the plastic and uncover the ZIF connectors located at the end of each ribbon.

    • Use the IFixit Opening Tool to flip up the locking flap holding the ribons in place.

    • Then, gently pull out each ribon.

    • On the top left corner of the motherboard, gently unplug the bundled cable from the motherboard.

  9. HP Chromebook 11a-nb0013dx Motherboard Replacement: 手順 9、 3の画像 1 HP Chromebook 11a-nb0013dx Motherboard Replacement: 手順 9、 3の画像 2 HP Chromebook 11a-nb0013dx Motherboard Replacement: 手順 9、 3の画像 3
    • Locate the 6 screws holding the motherboard in place.

    • Using the philips screw driver with the #0 bit, unscrew the 6 (4mm) screws and set them aside.

    • After all the screws are removed, remove the USB-C bracket in the top right hand corner and set aside.

  10. HP Chromebook 11a-nb0013dx Motherboard Replacement: 手順 10、 2の画像 1 HP Chromebook 11a-nb0013dx Motherboard Replacement: 手順 10、 2の画像 2
    • Once the motherboard is not connected to any other components of the Chromebook, gentely remove.

    • When removing the motherboard, lift up and to the left.

終わりに

To reassemble your device, follow these instructions in reverse order.

作成者

3人の作成者と共同で作成されました。

Ava Corona

メンバー登録日: 02/09/23

281 ポイント

1ガイドが承認済み

チーム

University of North Texas, Team 3-4, Saru Jimmy Spring 2023 University of North Texas, Team 3-4, Saru Jimmy Spring 2023人のメンバー

UNT-SARU JIMMY-S23S3G4

3 メンバー

5のガイドは作成済み

0 件のコメント

コメントを追加

統計データ:

過去 24時間: 2

過去 7 日: 4

過去 30 日: 12

今までの合計 150