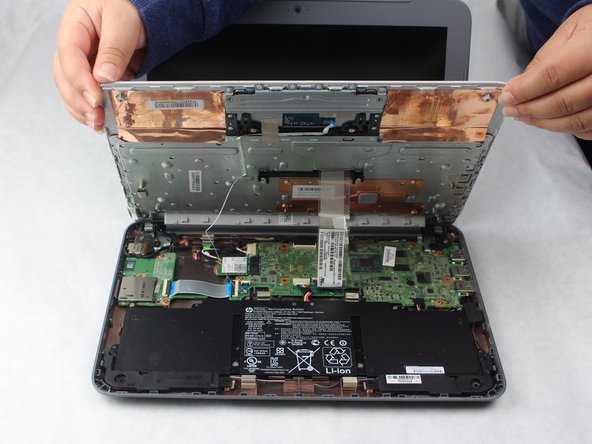
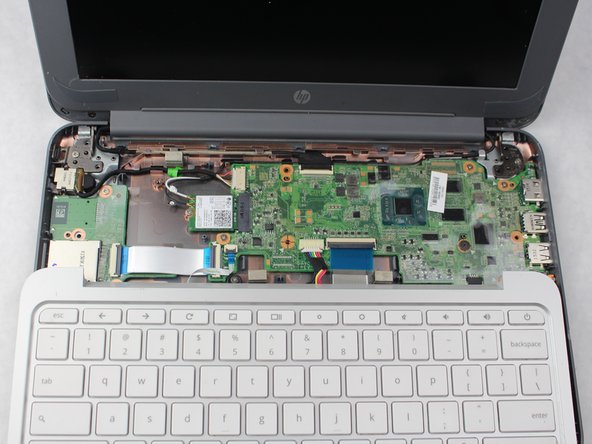
メインコンテンツにスキップ

HP Chromebook 11-2210nr Keyboard Replacement

必要な工具と部品

  1. HP Chromebook 11-2210nr Keyboard Replacement, Keyboard: 手順 1、 2の画像 1 HP Chromebook 11-2210nr Keyboard Replacement, Keyboard: 手順 1、 2の画像 2
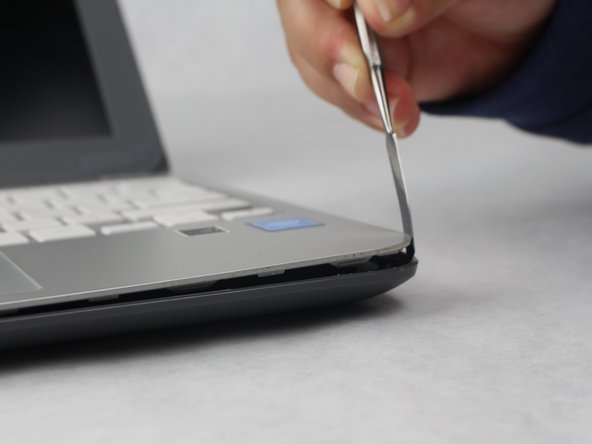
    • Position your closed laptop face down to remove the 9 visible 6mm screws using the Phillips #1 screwdriver.
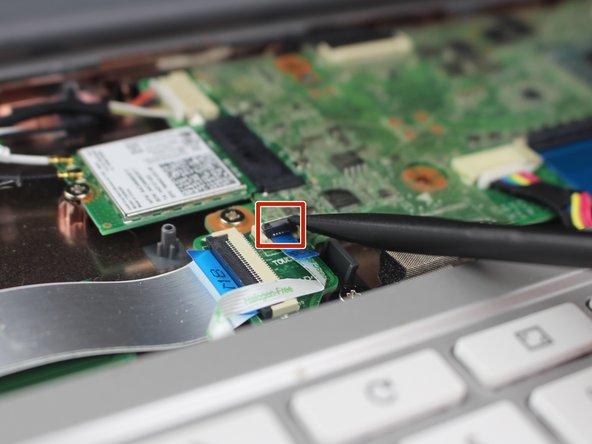
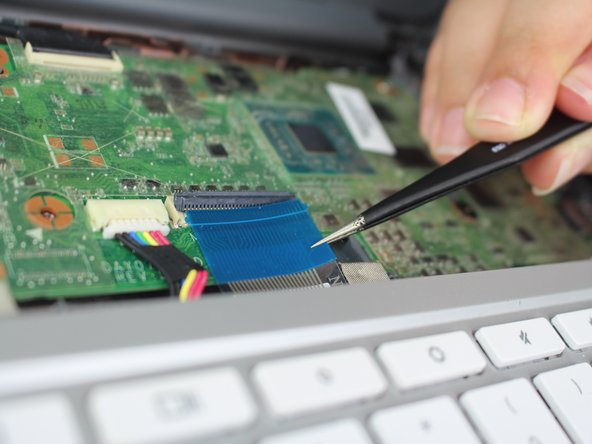
  2. HP Chromebook 11-2210nr Keyboard Replacement: 手順 2、 3の画像 1 HP Chromebook 11-2210nr Keyboard Replacement: 手順 2、 3の画像 2 HP Chromebook 11-2210nr Keyboard Replacement: 手順 2、 3の画像 3
    • Using the metal spudger, remove the two rubber pads that are closer to the hinge of the laptop.

    • Remove the two additional 6mm screws located beneath the rubber pads using the Phillips #1 screwdriver.

    • The two bottom rubber pads do not contain screws, but you may check if you wish to be sure.

  3. HP Chromebook 11-2210nr Keyboard Replacement: 手順 3、 3の画像 1 HP Chromebook 11-2210nr Keyboard Replacement: 手順 3、 3の画像 2 HP Chromebook 11-2210nr Keyboard Replacement: 手順 3、 3の画像 3
    • Turn the Laptop over and with the metal spudger start to run it along the plastic seam to pry it off.

    • You will hear popping sounds when you are sliding the spudger along the device.

    • For an easier removal, start from the sides and work your way in to the corners.

  4. HP Chromebook 11-2210nr Keyboard Replacement: 手順 4、 3の画像 1 HP Chromebook 11-2210nr Keyboard Replacement: 手順 4、 3の画像 2 HP Chromebook 11-2210nr Keyboard Replacement: 手順 4、 3の画像 3
    • Carefully lift off the keyboard and gently place it towards you until the two ribbon wires become visible and place the keyboard down.

    • Locate where the two ribbon wires are being held in place by two chips.

    • This does not disconnect the keyboard from the laptop just yet.

  5. HP Chromebook 11-2210nr Keyboard Replacement: 手順 5、 3の画像 1 HP Chromebook 11-2210nr Keyboard Replacement: 手順 5、 3の画像 2 HP Chromebook 11-2210nr Keyboard Replacement: 手順 5、 3の画像 3
    • Using the nylon spudger, lift the plastic clasps holding the two ribbon wires up to properly disconnect the wires.

    • It is recommended to use the nylon spudger for this step. Any metal can damage your motherboard.

    • This step completely disconnects the keyboard to allow safe removal and replacement.

終わりに

To reassemble your device, follow these instructions in reverse order.

作成者

2人の作成者と共同で作成されました。

Bridget Rosales

メンバー登録日: 10/02/18

121 ポイント

1ガイドが承認済み

チーム

Sam Houston State, Team S11-G3, Blackburne Fall 2018 Sam Houston State, Team S11-G3, Blackburne Fall 2018人のメンバー

SHSU-BLACKBURNE-F18S11G3

4 メンバー

5のガイドは作成済み

0 件のコメント

コメントを追加

統計データ:

過去 24時間: 0

過去 7 日: 2

過去 30 日: 4

今までの合計 211