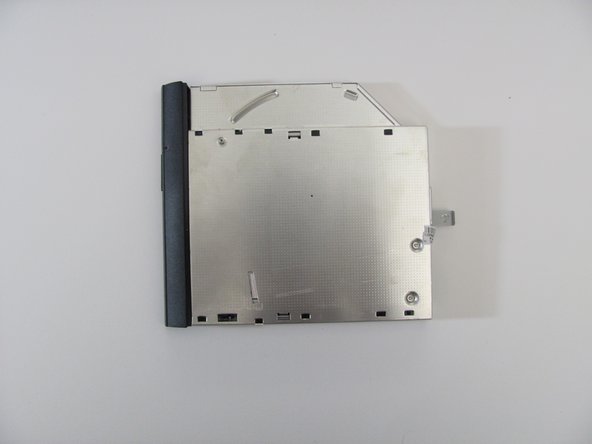
メインコンテンツにスキップ

HP 2000 - 2D22DX Optical Drive Replacement

必要な工具と部品

  1. HP 2000 - 2D22DX Optical Drive Replacement, Battery: 手順 1、 2の画像 1 HP 2000 - 2D22DX Optical Drive Replacement, Battery: 手順 1、 2の画像 2
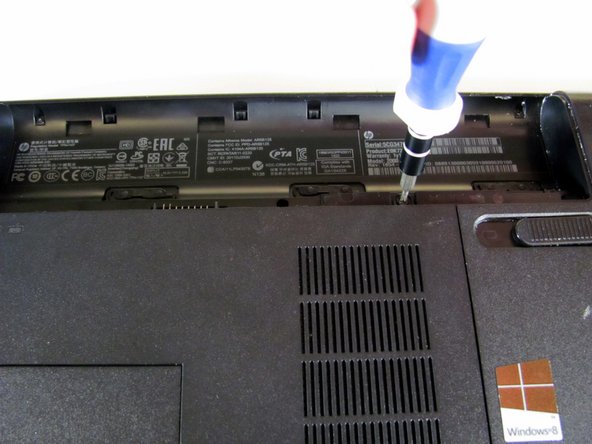
    • Flip the device over and locate the battery compartment.

    • Slide the battery release latch to the left until the battery is detached from its slot.

    • A distinguishable pop will be heard when the battery is fully released.

  2. HP 2000 - 2D22DX Optical Drive Replacement: 手順 2、 2の画像 1 HP 2000 - 2D22DX Optical Drive Replacement: 手順 2、 2の画像 2
    • Slowly pull the battery out of its slot, being careful not to damage any of the connectors in the process.

  3. HP 2000 - 2D22DX Optical Drive Replacement, Hard Drive: 手順 3、 2の画像 1 HP 2000 - 2D22DX Optical Drive Replacement, Hard Drive: 手順 3、 2の画像 2
    • Loosen the Phillips #00 screw securing the RAM compartment cover.

    • The screw is permanently attached to the RAM compartment cover. Do not try to remove it completely.

  4. HP 2000 - 2D22DX Optical Drive Replacement: 手順 4、 2の画像 1 HP 2000 - 2D22DX Optical Drive Replacement: 手順 4、 2の画像 2
    • Once the screw is sufficiently loosened, slowly unclip the RAM compartment cover from its slots in the plastic chassis.

    • When unclipped completely, pull the compartment door out and away from the chassis.

  5. HP 2000 - 2D22DX Optical Drive Replacement: 手順 5、 3の画像 1 HP 2000 - 2D22DX Optical Drive Replacement: 手順 5、 3の画像 2 HP 2000 - 2D22DX Optical Drive Replacement: 手順 5、 3の画像 3
    • Loosen the two Phillips #00 screws that are securing the hard drive compartment.

    • The screws are permanently attached to the hard drive compartment cover. Do not try to remove them completely.

    • Once the screws are sufficiently loosened, disconnect the clips holding the cover in place and slowly pull the cover away from the plastic chassis.

  6. HP 2000 - 2D22DX Optical Drive Replacement: 手順 6、 3の画像 1 HP 2000 - 2D22DX Optical Drive Replacement: 手順 6、 3の画像 2 HP 2000 - 2D22DX Optical Drive Replacement: 手順 6、 3の画像 3
    • Using a spudger, disconnect the hard drive connecting cable. Use a slow, prying motion as if pulling a nail out of wood.

    • Be very gentle with the connecting cable and its respective port on the logic board. Both are very fragile and can be easily damaged.

  7. HP 2000 - 2D22DX Optical Drive Replacement: 手順 7、 3の画像 1 HP 2000 - 2D22DX Optical Drive Replacement: 手順 7、 3の画像 2 HP 2000 - 2D22DX Optical Drive Replacement: 手順 7、 3の画像 3
    • Using your fingers, grab the blue tab on the right side of the hard drive and slowly pull upwards.

    • Lift the hard drive out and away from its socket in the plastic chassis.

  8. HP 2000 - 2D22DX Optical Drive Replacement, Optical Drive: 手順 8、 2の画像 1 HP 2000 - 2D22DX Optical Drive Replacement, Optical Drive: 手順 8、 2の画像 2
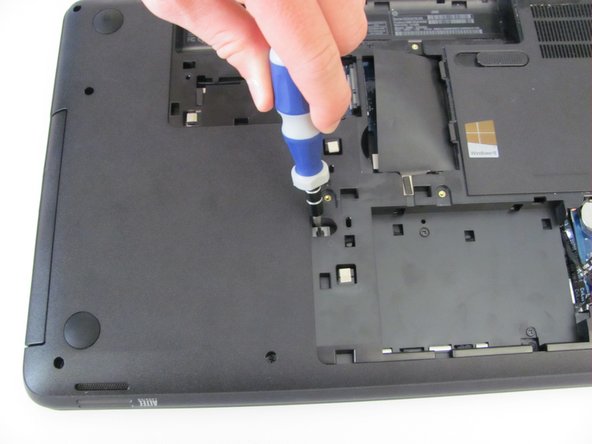
    • Locate the Phillips-head screw on the left side of the hard drive recess, indicated by a red circle.

    • Use a #00 Phillips head screwdriver to remove the small screw. Consider using a magnetized screwdriver.

  9. HP 2000 - 2D22DX Optical Drive Replacement: 手順 9、 3の画像 1 HP 2000 - 2D22DX Optical Drive Replacement: 手順 9、 3の画像 2 HP 2000 - 2D22DX Optical Drive Replacement: 手順 9、 3の画像 3
    • Once the securing screw is removed, the optical drive can be pulled from its slot easily.

    • Use your fingers to pull the optical drive away slowly from its position in the plastic chassis.

    • The optical drive should slide out very easily. If you fell resistance, do not pull too hard. Something may be caught, and you might damage the optical drive's connections.

終わりに

To reassemble your device, follow these instructions in reverse order.

3 の人々がこのガイドを完成させました。

作成者

3人の作成者と共同で作成されました。

Conor Most

メンバー登録日: 04/14/14

2,687 ポイント

6のガイドは作成済み

チーム

Cal Poly, Team 3-40, Maness Spring 2014 Cal Poly, Team 3-40, Maness Spring 2014人のメンバー

CPSU-MANESS-S14S3G40

4 メンバー

6のガイドは作成済み

0 件のコメント

コメントを追加

統計データ:

過去 24時間: 0

過去 7 日: 0

過去 30 日: 3

今までの合計 1,562