メインコンテンツにスキップ

HP 15-dy2702dx Lower Case Replacement

必要な工具と部品

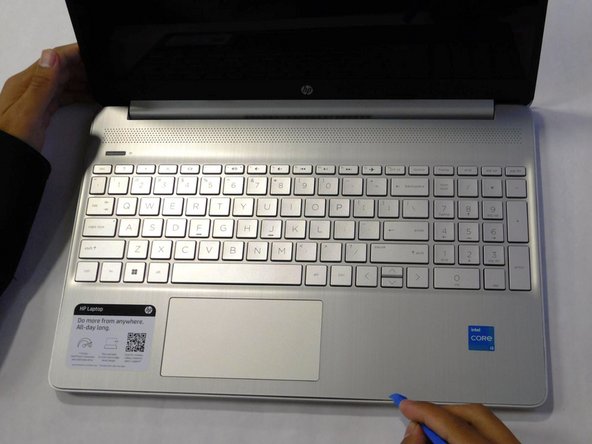
  1. HP 15-dy2702dx Lower Case Replacement, Lower Case: 手順 1、 1の画像 1
    • Remove both of the rubber strips to uncover the hidden screws.

    • You can use a prying tool to help lift an end.

  2. HP 15-dy2702dx Lower Case Replacement: 手順 2、 1の画像 1
    • Unscrew all 8 Phillips #0 screws on the bottom panel:

    • Two M2.5x6

    • Six M2x6

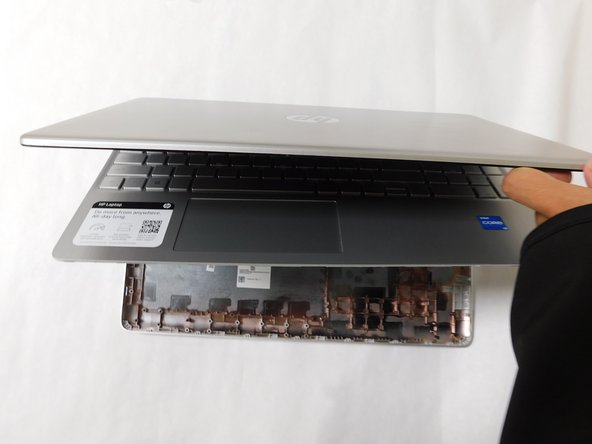
  3. HP 15-dy2702dx Lower Case Replacement: 手順 3、 2の画像 1 HP 15-dy2702dx Lower Case Replacement: 手順 3、 2の画像 2
    • Flip the laptop over and open the lid.

    • Separate the bottom panel from the main body by using the iFixit opening tool.

    • Ensure that the bottom panel is completely separated along the edges.

  4. HP 15-dy2702dx Lower Case Replacement: 手順 4、 2の画像 1 HP 15-dy2702dx Lower Case Replacement: 手順 4、 2の画像 2
    • If you can lift the laptop like shown in the first picture, the bottom panel is nearly separated.

    • Close the laptop to allow the back edges to fully separate

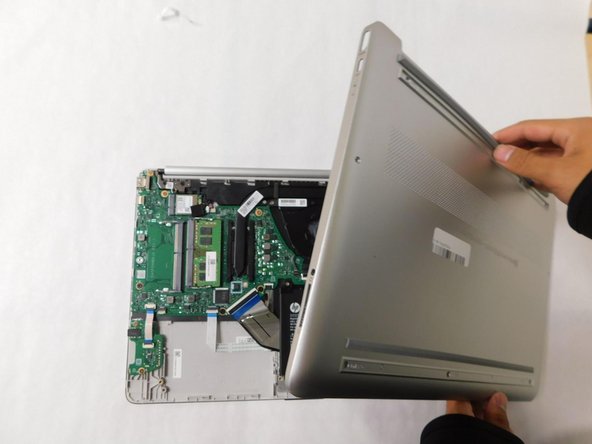
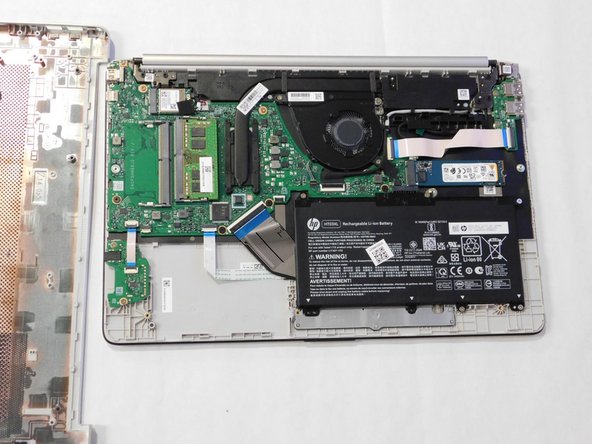
  5. HP 15-dy2702dx Lower Case Replacement: 手順 5、 3の画像 1 HP 15-dy2702dx Lower Case Replacement: 手順 5、 3の画像 2 HP 15-dy2702dx Lower Case Replacement: 手順 5、 3の画像 3
    • Flip the laptop over and carefully remove the lower case.

終わりに

To reassemble your device, follow these instructions in reverse order.

ある他の人がこのガイドを完成しました。

作成者

1人の作成者と共同作成されました。

Zander Herbold

メンバー登録日: 09/05/23

643 ポイント

4のガイドは作成済み

チーム

Gateway, Team 1-4, Pee Fall 2023 Gateway, Team 1-4, Pee Fall 2023人のメンバー

GCC-PEE-F23S1G4

4 メンバー

8のガイドは作成済み

0 件のコメント

コメントを追加

統計データ:

過去 24時間: 1

過去 7 日: 7

過去 30 日: 21

今までの合計 156