メインコンテンツにスキップ

HP 15-db0015dx Fan and Heat Sink Replacement

必要な工具と部品

  1. HP 15-db0015dx Fan and Heat Sink Replacement, Battery: 手順 1、 2の画像 1 HP 15-db0015dx Fan and Heat Sink Replacement, Battery: 手順 1、 2の画像 2
    • Power off the device before starting.

    • Remove the rubber strips that hide the screws using the spudger.

    • Flip the device and unscrew the eleven screws with a Phillips #0 screwdriver.

  2. HP 15-db0015dx Fan and Heat Sink Replacement: 手順 2、 3の画像 1 HP 15-db0015dx Fan and Heat Sink Replacement: 手順 2、 3の画像 2 HP 15-db0015dx Fan and Heat Sink Replacement: 手順 2、 3の画像 3
    • Use the spudger tool to pry open the back cover.

    • Lift the back panel to access the inside.

    • Slide the CD drive to the left, and remove.

  3. HP 15-db0015dx Fan and Heat Sink Replacement: 手順 3、 3の画像 1 HP 15-db0015dx Fan and Heat Sink Replacement: 手順 3、 3の画像 2 HP 15-db0015dx Fan and Heat Sink Replacement: 手順 3、 3の画像 3
    • Unscrew the three battery screws with a Phillips #0 screwdriver.

    • Lift the battery up, disconnecting the connector first.

    • Push forward and remove the battery.

  4. HP 15-db0015dx Fan and Heat Sink Replacement, Fan and Heat Sink: 手順 4、 1の画像 1
    • Remove the screw on the fan with a Phillips #0 screwdriver.

  5. HP 15-db0015dx Fan and Heat Sink Replacement: 手順 5、 3の画像 1 HP 15-db0015dx Fan and Heat Sink Replacement: 手順 5、 3の画像 2 HP 15-db0015dx Fan and Heat Sink Replacement: 手順 5、 3の画像 3
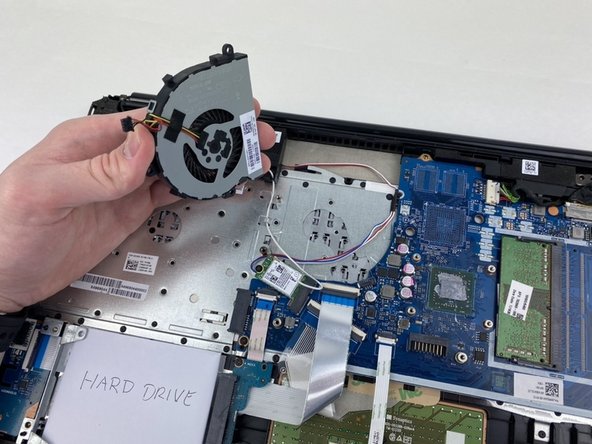
    • Lift the fan upward slightly.

    • Be careful not to pull hard as the wires could become damaged.

    • Disconnect the fan cable by pinching on the sides of the connectors and sliding it out.

    • Lift the rest of the way to remove the fan.

  6. HP 15-db0015dx Fan and Heat Sink Replacement: 手順 6、 2の画像 1 HP 15-db0015dx Fan and Heat Sink Replacement: 手順 6、 2の画像 2
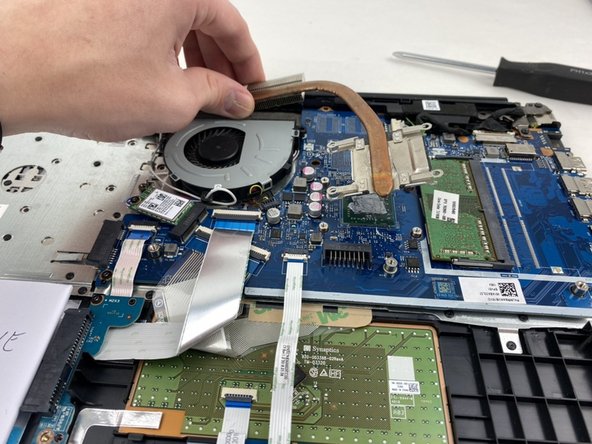
    • Remove the four screws with a Phillips #00 screwdriver.

    • Lift and remove the heat sink.

    • Remember to clean and reapply the thermal paste during reinstallation to retain proper heat transfer from the CPU. Check out this Thermal Paste Application guide if you are unfamiliar with the process.

終わりに

To reassemble your device, follow these instructions in reverse order.

ある他の人がこのガイドを完成しました。

作成者

4人の作成者と共同で作成されました。

Brandon Hirtz

メンバー登録日: 01/29/20

97 ポイント

1ガイドが承認済み

3 件のコメント

Hey great guide! Just a quick question: is the material directly under the copper pipe (on the CPU side) also thermal paste which needs to be swapped out? Or is ist a static part of the fan/pipe/CPU cover? Thanks in advance!

Aaron P - 返信

It's best to remove the material on both the CPU side and the attached fan side.

Terri Alexander - 返信

did the fan replacement, want to do thermal paste replacement now. 3 of the 4 screws holding the heat sink bracket are stripped on mine... I need to know what size they are for replacement... any help there?

Lisa Nia - 返信

コメントを追加

統計データ:

過去 24時間: 0

過去 7 日: 2

過去 30 日: 20

今までの合計 1,191