メインコンテンツにスキップ

HP 15-db0004dx Fan Replacement

必要な工具と部品

  1. HP 15-db0004dx Fan Replacement, Bottom Case: 手順 1、 2の画像 1 HP 15-db0004dx Fan Replacement, Bottom Case: 手順 1、 2の画像 2
    • Turn the laptop off and unplug it before starting.

    • Flip your laptop over, face down.

  2. HP 15-db0004dx Fan Replacement: 手順 2、 1の画像 1
    • Peel off the two long rubber grips running lengthwise on the laptop.

  3. HP 15-db0004dx Fan Replacement: 手順 3、 2の画像 1 HP 15-db0004dx Fan Replacement: 手順 3、 2の画像 2
    • Using a Phillips #000 screwdriver, remove the eleven 10 mm screws located on the underside of the laptop, that are holding the back panel in place.

  4. HP 15-db0004dx Fan Replacement: 手順 4、 1の画像 1
    • Carefully slide the optical drive out of the laptop.

  5. HP 15-db0004dx Fan Replacement: 手順 5、 1の画像 1
    • Use a plastic opening tool to separate the back panel from the laptop.

    • For an easier removal, start at the corner and run the tool along the edge of the cover.

    • If you do not have a plastic opening tool, open it carefully using your hands, as shown.

    • Be careful to not bend the back panel, or to not apply too much pressure and force, doing so could cause the panel to break.

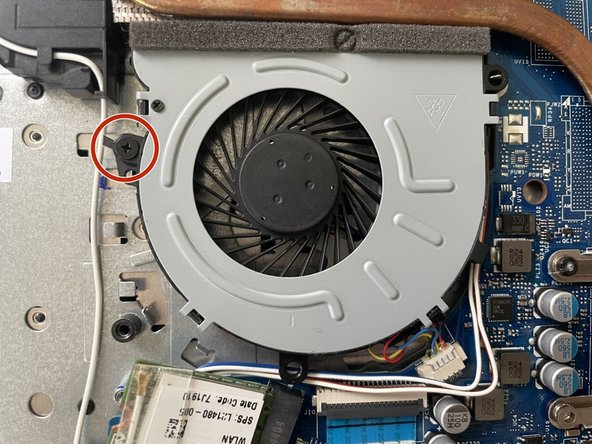
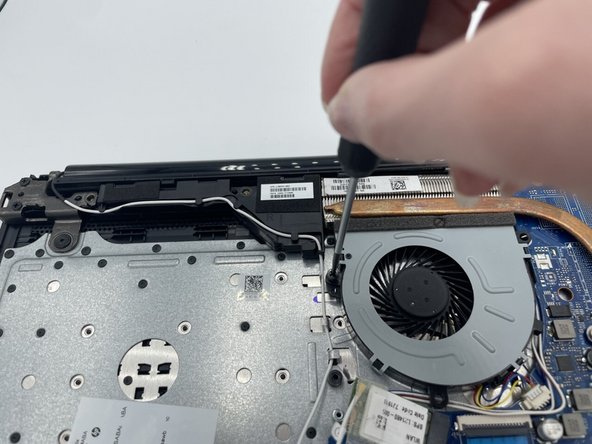
  6. HP 15-db0004dx Fan Replacement, Fan: 手順 6、 3の画像 1 HP 15-db0004dx Fan Replacement, Fan: 手順 6、 3の画像 2 HP 15-db0004dx Fan Replacement, Fan: 手順 6、 3の画像 3
    • Using a Phillips #000 screwdriver remove the 5mm screw holding the fan in place.

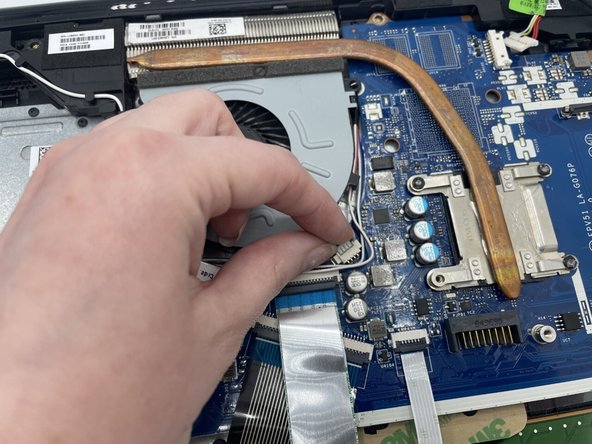
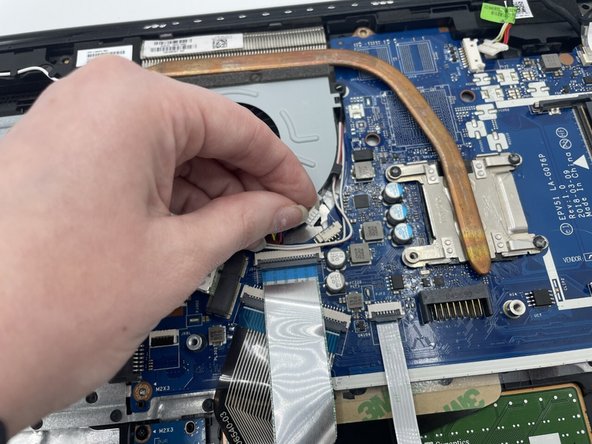
  7. HP 15-db0004dx Fan Replacement: 手順 7、 3の画像 1 HP 15-db0004dx Fan Replacement: 手順 7、 3の画像 2 HP 15-db0004dx Fan Replacement: 手順 7、 3の画像 3
    • After the screw is removed, carefully unplug the set of wires with one of each colored, red, black, yellow, and blue, from the white connector it is secured at.

    • To unplug it gently pull the white connector from the adapter, possibly in a back and forth motion to free it.

    • DO NOT pull on the wires, doing so could cause damage to the wires, or for them to become disconnected to the white adapter they are attached to.

  8. HP 15-db0004dx Fan Replacement: 手順 8、 3の画像 1 HP 15-db0004dx Fan Replacement: 手順 8、 3の画像 2 HP 15-db0004dx Fan Replacement: 手順 8、 3の画像 3
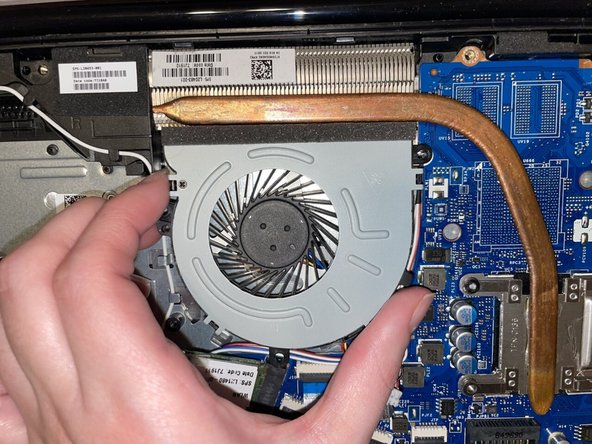
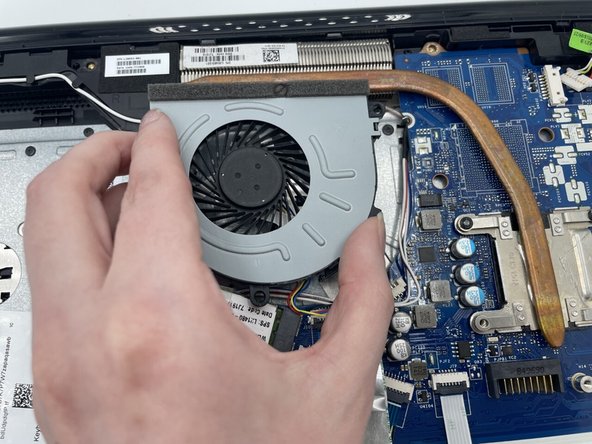
    • Carefully remove the fan from the laptop.

    • Be careful with removal as to not bend or break anything. There is a metal peg shown in the image, that the fan is secured on that could potentially bend

終わりに

To reassemble your device, follow these instructions in reverse order.

作成者

1人の作成者と共同作成されました。

Britanni Arizola

メンバー登録日: 09/22/22

562 ポイント

3のガイドは作成済み

チーム

University of North Texas, Team 4-5, Saru Jimmy Fall 2022 University of North Texas, Team 4-5, Saru Jimmy Fall 2022人のメンバー

UNT-SARU JIMMY-F22S4G5

3 メンバー

5のガイドは作成済み

0 件のコメント

コメントを追加

統計データ:

過去 24時間: 0

過去 7 日: 0

過去 30 日: 2

今までの合計 96