メインコンテンツにスキップ

HP 15-ay011nr Fan Replacement

必要な工具と部品

  1. HP 15-ay011nr Fan Replacement, Battery: 手順 1、 1の画像 1
    • Slide the two battery lock latches on the back of the device to the “unlock” position.

  2. HP 15-ay011nr Fan Replacement: 手順 2、 1の画像 1
    • Lift the battery upward to remove it from the device.

  3. HP 15-ay011nr Fan Replacement, Back Panel: 手順 3、 1の画像 1
    • Using the PH1 phillips-head screwdriver, remove all the 5/16 in. screws from the back of the device.

    • There should be 10 in total, be sure to keep them together!

  4. HP 15-ay011nr Fan Replacement: 手順 4、 1の画像 1
    • Locate the optical disc drive and remove it from the device by sliding it straight of the device.

  5. HP 15-ay011nr Fan Replacement: 手順 5、 2の画像 1 HP 15-ay011nr Fan Replacement: 手順 5、 2の画像 2
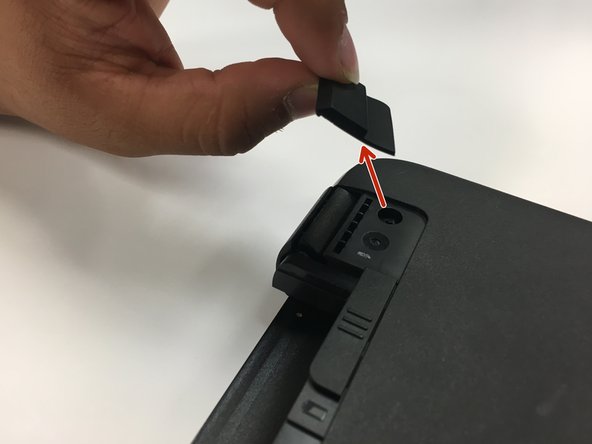
    • Covering the hinges of the device are rubber bumpers secured to the device using adhesive. Remove them carefully.

    • Place the adhesive side up as you will need to place them back after your replacement is complete.

  6. HP 15-ay011nr Fan Replacement: 手順 6、 2の画像 1 HP 15-ay011nr Fan Replacement: 手順 6、 2の画像 2
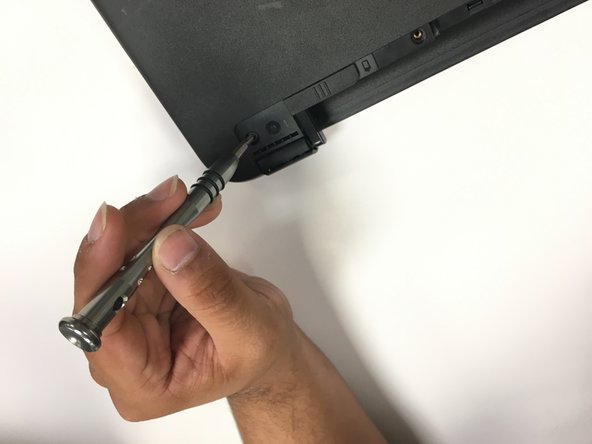
    • In the same spot you’ve just removed the bumpers from, you will find two 5/16 in. screws. Using the same Phillips-head screwdriver used in step 2, remove the screws

    • Be sure to keep the screws together!

  7. HP 15-ay011nr Fan Replacement: 手順 7、 1の画像 1
    • Carefully remove the back panel from the device.

    • If you are unable to do this with your hands, you can use a thin prying tool of your choice to make it easier!

  8. HP 15-ay011nr Fan Replacement, Fan: 手順 8、 2の画像 1 HP 15-ay011nr Fan Replacement, Fan: 手順 8、 2の画像 2
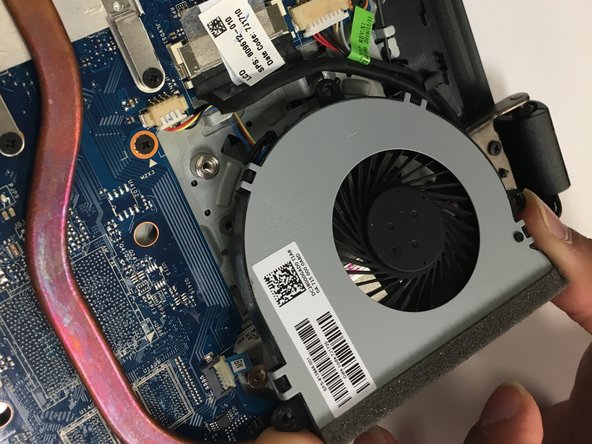
    • There are two 5/16 in. screws adjacent from each other that secure the fan to the device. Use the PH1 phillips-head screwdriver to remove them.

    • Be sure to keep them together!

  9. HP 15-ay011nr Fan Replacement: 手順 9、 2の画像 1 HP 15-ay011nr Fan Replacement: 手順 9、 2の画像 2
    • Lift the clear plastic strip holding down the fan and lift the fan out of place.

  10. HP 15-ay011nr Fan Replacement: 手順 10、 2の画像 1 HP 15-ay011nr Fan Replacement: 手順 10、 2の画像 2
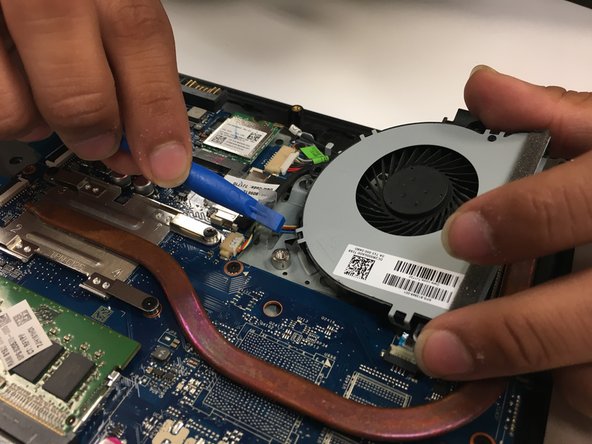
    • Use your fingers or tweezers to pinch both sides of the connector and remove the fan from the device.

終わりに

To reassemble your device, follow these instructions in reverse order.

ある他の人がこのガイドを完成しました。

作成者

3人の作成者と共同で作成されました。

Daymon Brisco

メンバー登録日: 09/25/17

288 ポイント

2のガイドは作成済み

チーム

University of North Texas, Team S3-G3, Thompson Fall 2017 University of North Texas, Team S3-G3, Thompson Fall 2017人のメンバー

UNT-THOMPSON-F17S3G3

4 メンバー

6のガイドは作成済み

0 件のコメント

コメントを追加

統計データ:

過去 24時間: 1

過去 7 日: 5

過去 30 日: 15

今までの合計 1,417