メインコンテンツにスキップ

HP 15-ac142dx Screen Replacement

必要な工具と部品

  1. HP 15-ac142dx Screen Replacement, Screen: 手順 1、 1の画像 1
    • The first step you should take is to turn the laptop off.

    • Next you want to get the prying tool and wedge it into the seam of the screen and outer casing.

  2. HP 15-ac142dx Screen Replacement: 手順 2、 2の画像 1 HP 15-ac142dx Screen Replacement: 手順 2、 2の画像 2
    • Once it is wedged in on one of the upper corners you want to gently lift and slide the tool down the sides and top of the seam until the frame pops off.

    • Continue moving the tool down, while wedged, to release the grasp. You will be left with just the screen in the casing.

    • While prying off make sure you have a good grasp on the computer. You will know it is coming off due to the audible clicks

  3. HP 15-ac142dx Screen Replacement: 手順 3、 2の画像 1 HP 15-ac142dx Screen Replacement: 手順 3、 2の画像 2
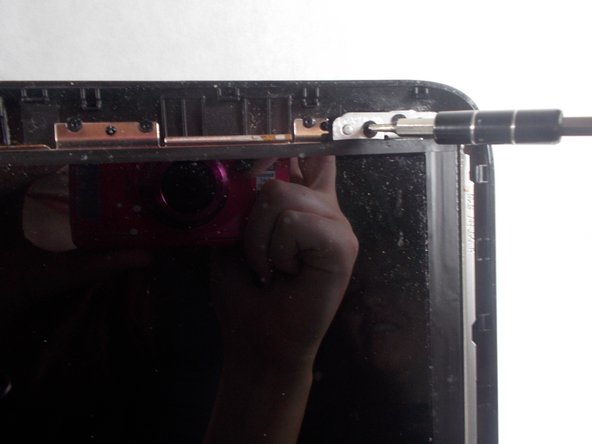
    • Next, you will want to unscrew the Phillips PM2.0×5.2 screws at the top of the screen with the #0 bit, this will allow the screen to pop off easily.

    • Once all the screws are removed, gently remove the screen from the outer casing.

終わりに

To reassemble your device, follow these instructions in reverse order.

ある他の人がこのガイドを完成しました。

作成者

1人の作成者と共同作成されました。

Nicole Mathieu

メンバー登録日: 03/19/18

620 ポイント

5のガイドは作成済み

チーム

UMass Dartmouth, Team S2-G4, Bernier Spring 2018 UMass Dartmouth, Team S2-G4, Bernier Spring 2018人のメンバー

UMASSD-BERNIER-S18S2G4

3 メンバー

5のガイドは作成済み

0 件のコメント

コメントを追加

統計データ:

過去 24時間: 0

過去 7 日: 1

過去 30 日: 13

今までの合計 566